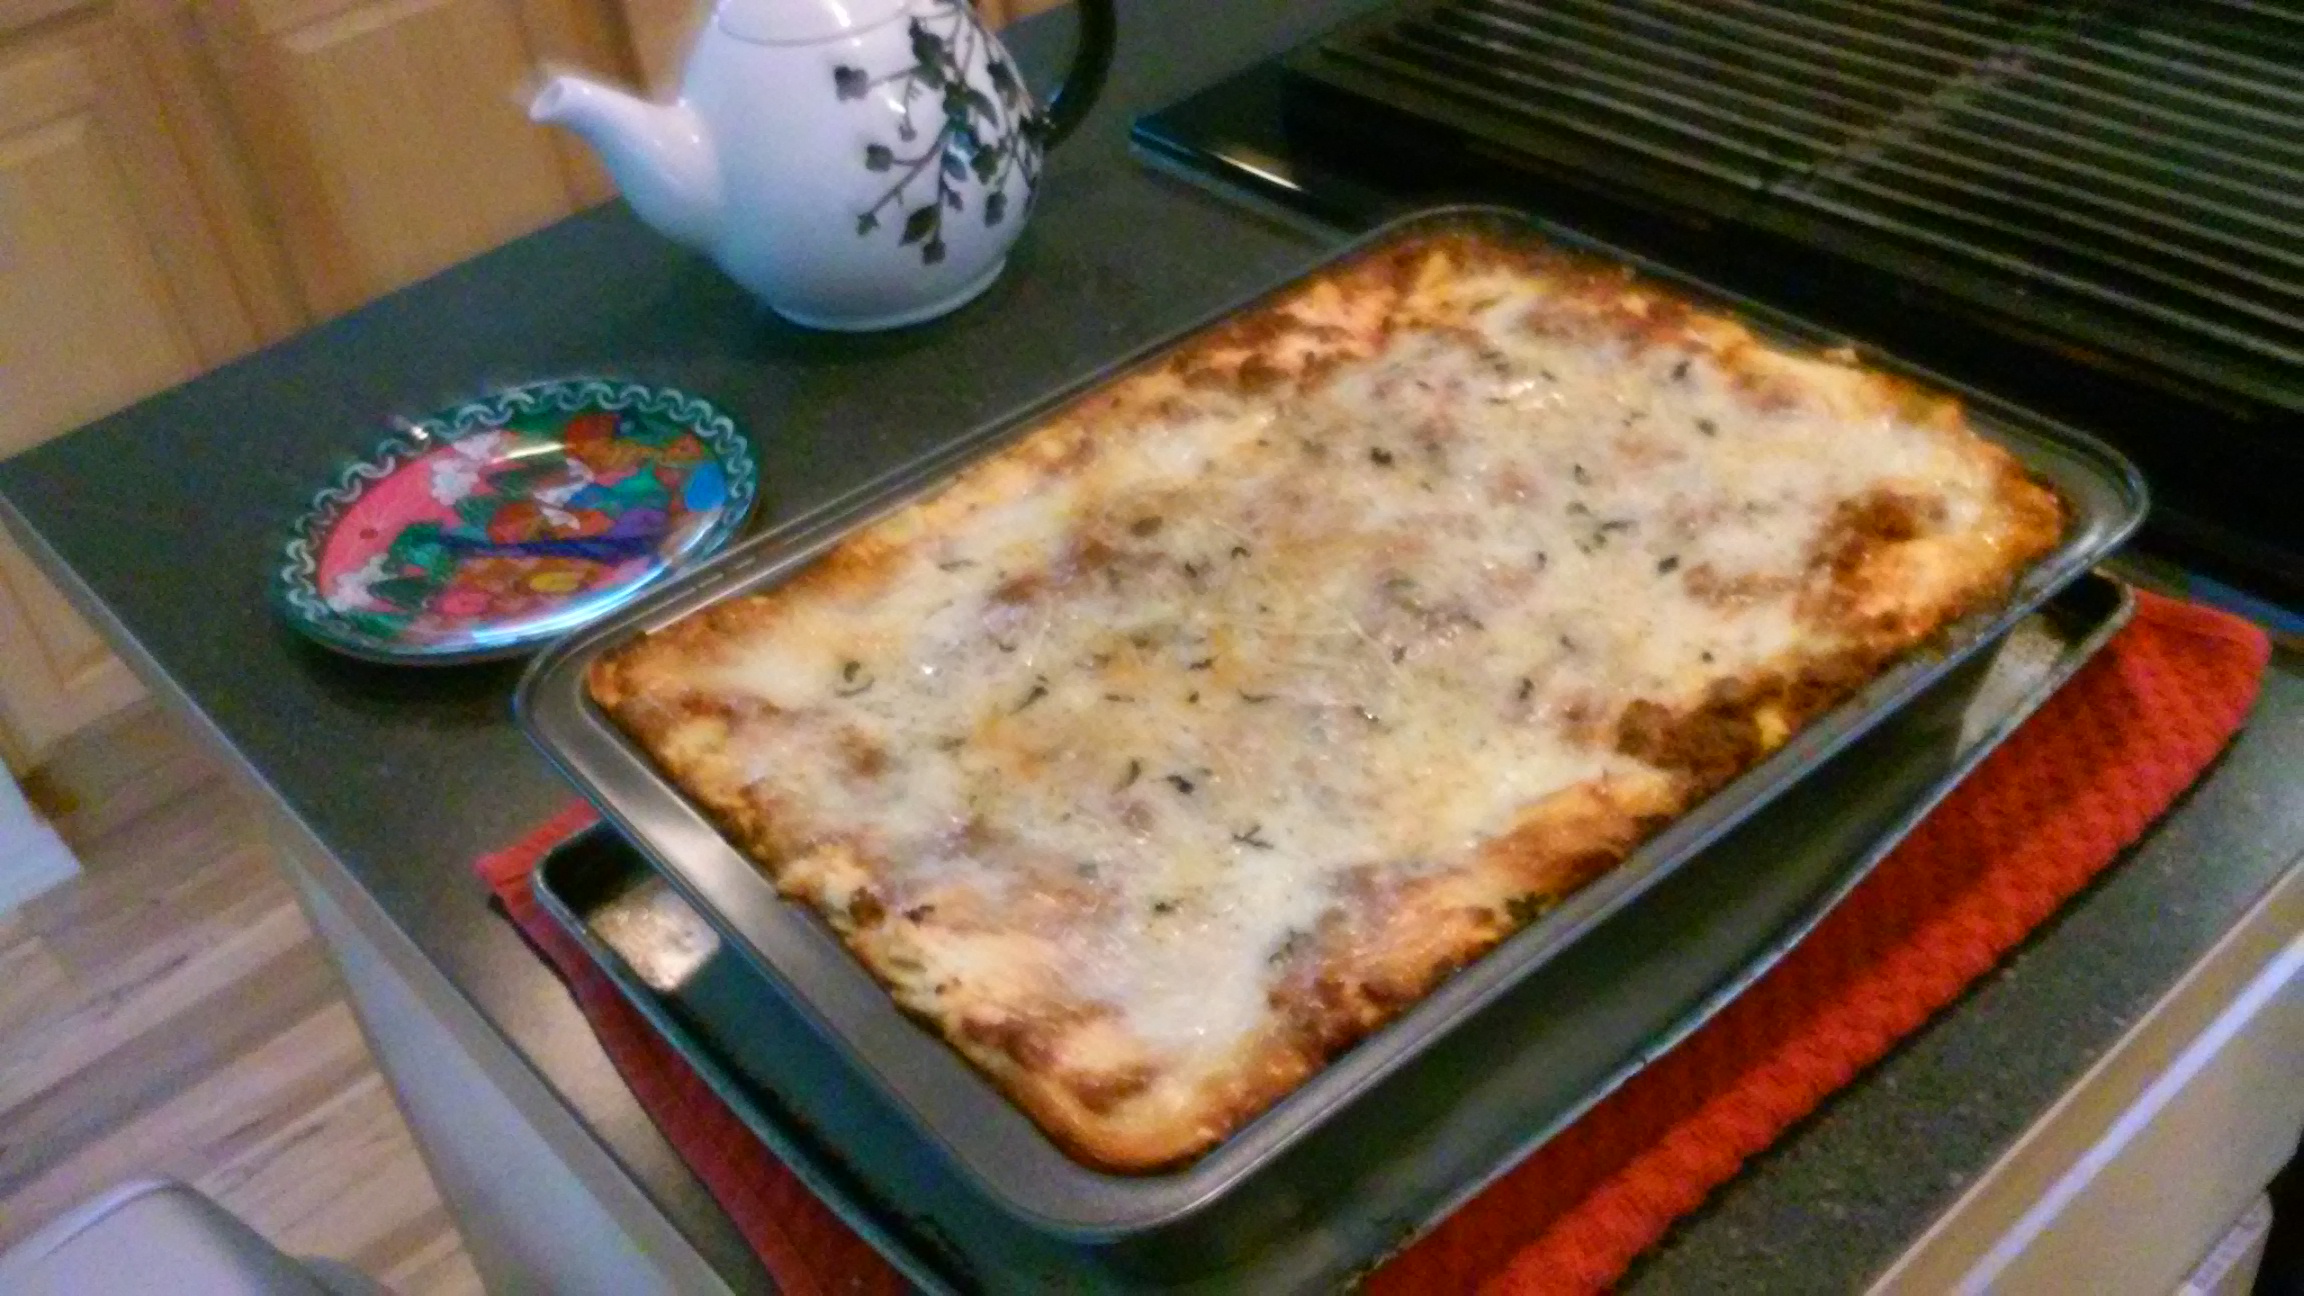
Gluten-Free Homemade Egg Noodle Lasagna
Yield: This recipe makes enough pasta for a 13 x 9 inch pan, basically one lasagna.
There’s nothing like homemade fresh egg pasta. It is quite easy to make yourself at home.
My grandmother used to make fresh egg pasta noodles by hand in the old days. We were really spoiled with good home cooking and great family recipes to share together. We made memories together that I’ll never forget! I learned from the best–how to cook with lots of love and bonding.
So my son, Paul, and I decided to spend an afternoon trying out the new pasta maker he bought me for Christmas. My husband, Cy, was on a business trip, and Paul’s girlfriend, Samantha, was spending the day with her sister. So nice; I love it when families take time together. We all need more of that! Anyway, Paul and I thought we would take a crack at this new pasta maker. Gluten-free pasta from scratch–wow! I hadn’t heard that phrase since the in 1960’s with my grandparents! With so many people having food sensitivities and problems these days and with so much food processing, it makes you wonder if we don’t need to go back to cooking real food with real ingredients the way past generations cooked.
It was quite a process that day, but it was fun! It was another great bonding time for Paul and me in the kitchen like I used to do with my grandmothers and my mother. That’s how people spent their time in my family when I was growing up. Each weekend, there were family gatherings. Everyone pitched in to cook so we could have meals together. One of my great aunts would host these large family get-togethers with aunts, uncles, and cousins all laughing, eating, and playing together. Many of those people are gone now, but I will always love the memories of those times where I learned so much about, not only cooking and serving, but bonding together as well. Lets face it, when tough times come (if they haven’t yet, they will because hard times come to us all), we need each other.
If you don’t have a large family, your friends and acquaintances can become your family. Either way, we need each other. It says in the bible in Ecclesiastes 4:9-10: “two are better than one, for when one falls the other one picks the other up! And pity the man who is alone.” I have seen this to be true and have found great blessing in sharing, not only in family, but with friends also. And I have to tell you, I’ve been very blessed with some beautiful friendships in my lifetime. Some from when I was very little, to the newest ones I have developed as an adult. There’s another principle I have always followed: “In order to have a friend, you must first be a friend.” We get when we give. Inviting people over to break bread with you (and it can be gluten free) is a great way to start a new relationship with someone or a family.
So, check out our time together as we share some photos and directions (under each photo) for the gluten-free pasta Paul and I made. It was a memory we will always cherish! (: Iris
P.S. Ok! So it’s not an easy recipe. Paul said when he was done that he felt like he had done a shift at work. Nevertheless, we bonded! Poor Paul, he had to make up for not having a sister! Lol! (: We did laugh a lot together that day!
Pasta Noodle Ingredients:
2-1/2 cups gluten-free flour mix
2 large whole eggs
3 large egg yokes
Pinch of salt

- Start to make the pasta by mounding the flour on a large pastry board, or on the counter, with the salt. Make a well in the center as pictured above. Then, break the eggs and the yolks in the center of the well and start to scramble each egg with a fork as it is being added.

2. Start to incorporate the eggs and the flour by slowly bringing more flour in from the inside edges of the middle well. Then, continue mixing the flour and the eggs until the eggs are no longer runny.

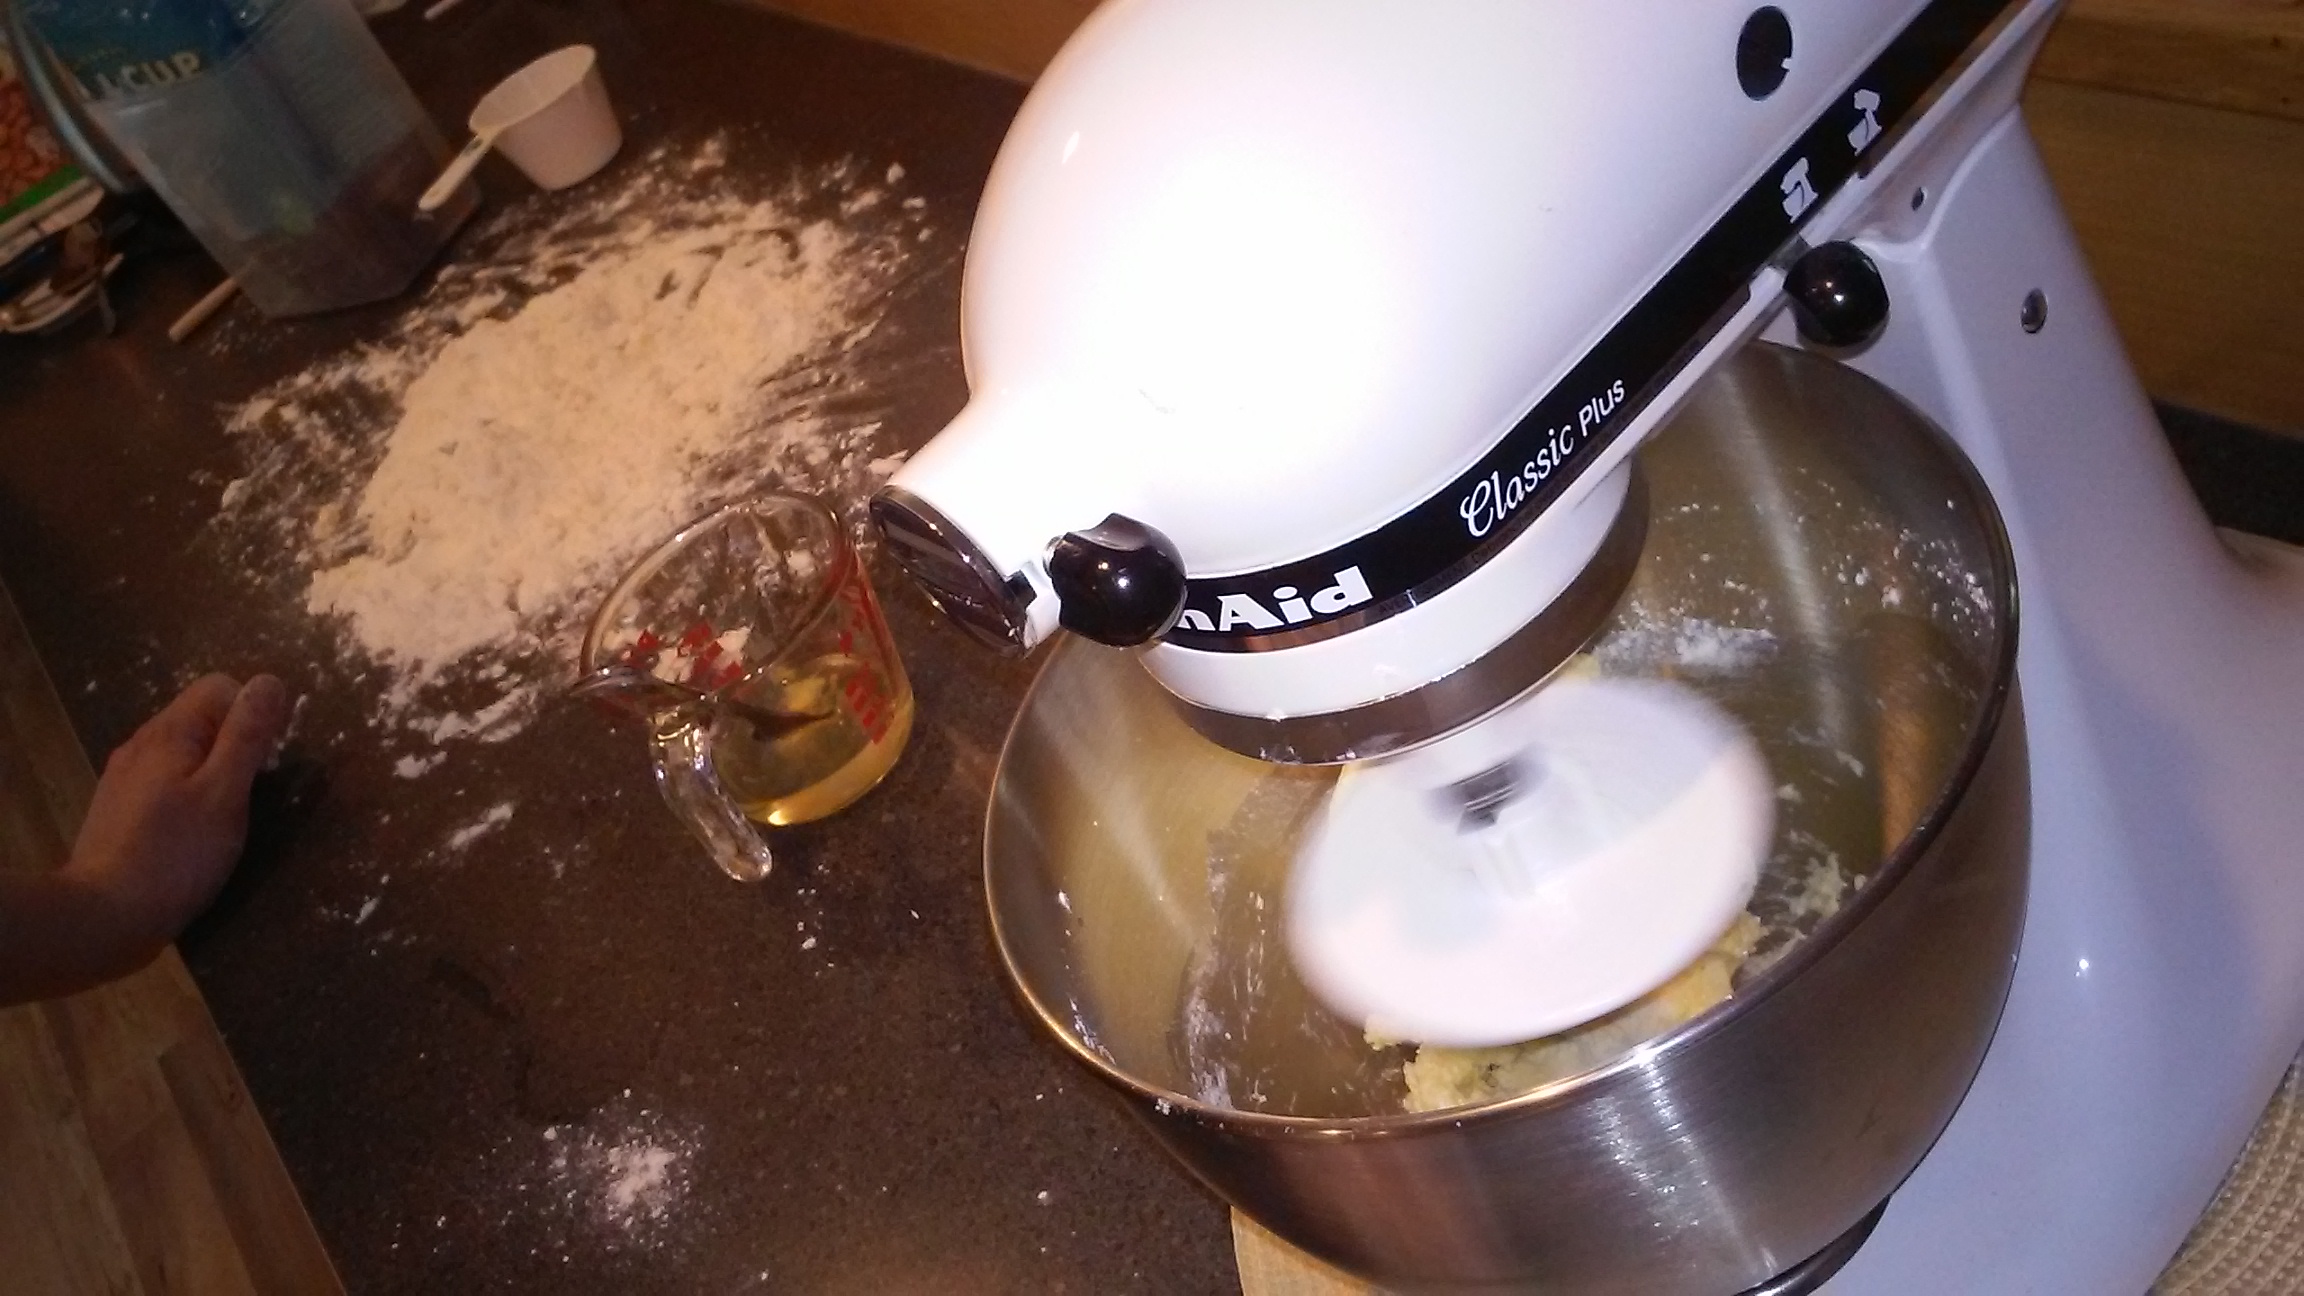
3. Using your hands now , bring the outside edges in, forming a large mass on your board or counter.

4. Use only the right amount of flour to form it the size of a softball. At this point, begin to knead the ball of dough as you would a ball of dough for bread, using the heel of your hand to push it down and knead it. Continue kneading until the dough is smooth, which may take between 5 and 7 minutes.


5. Wrap the dough in plastic wrap and then let it sit for about 30 minutes on the counter or board.


After you have rolled the dough, cut into 12 inch long strips.


6. Use a pasta roller or roll by hand to make long sheets of pasta 1/8 inch thick. (I use my kitchen aid mixer at this point). My son bought me a pasta maker attachment to go with it. With this attachment, I roll my pasta to the third last position or to the number 6 on the dial.
12-inch long strips seen here in the following pictures.


7. Pre-cook the strips in boiling water for 30 seconds is all that’s needed.Then place in ice water for about the same amount of time. Very quick process.

Then dry each strip and set aside on clean kitchen towels.

You are now ready to use the noodles to make your lasagna. Refer to my other recipe on how to make lasagna in this blog. You’ll never go back to store bought noodles or pasta again, except when you are in a hurry. The flavor of the pasta is amazing!


This is what your egg noodle pasta should look like as you prepare the lasagna .

All put together and ready to bake. Enjoy a little vino (wine) with it! Most wines these days are gluten-free and safe for people with Celiac disease.

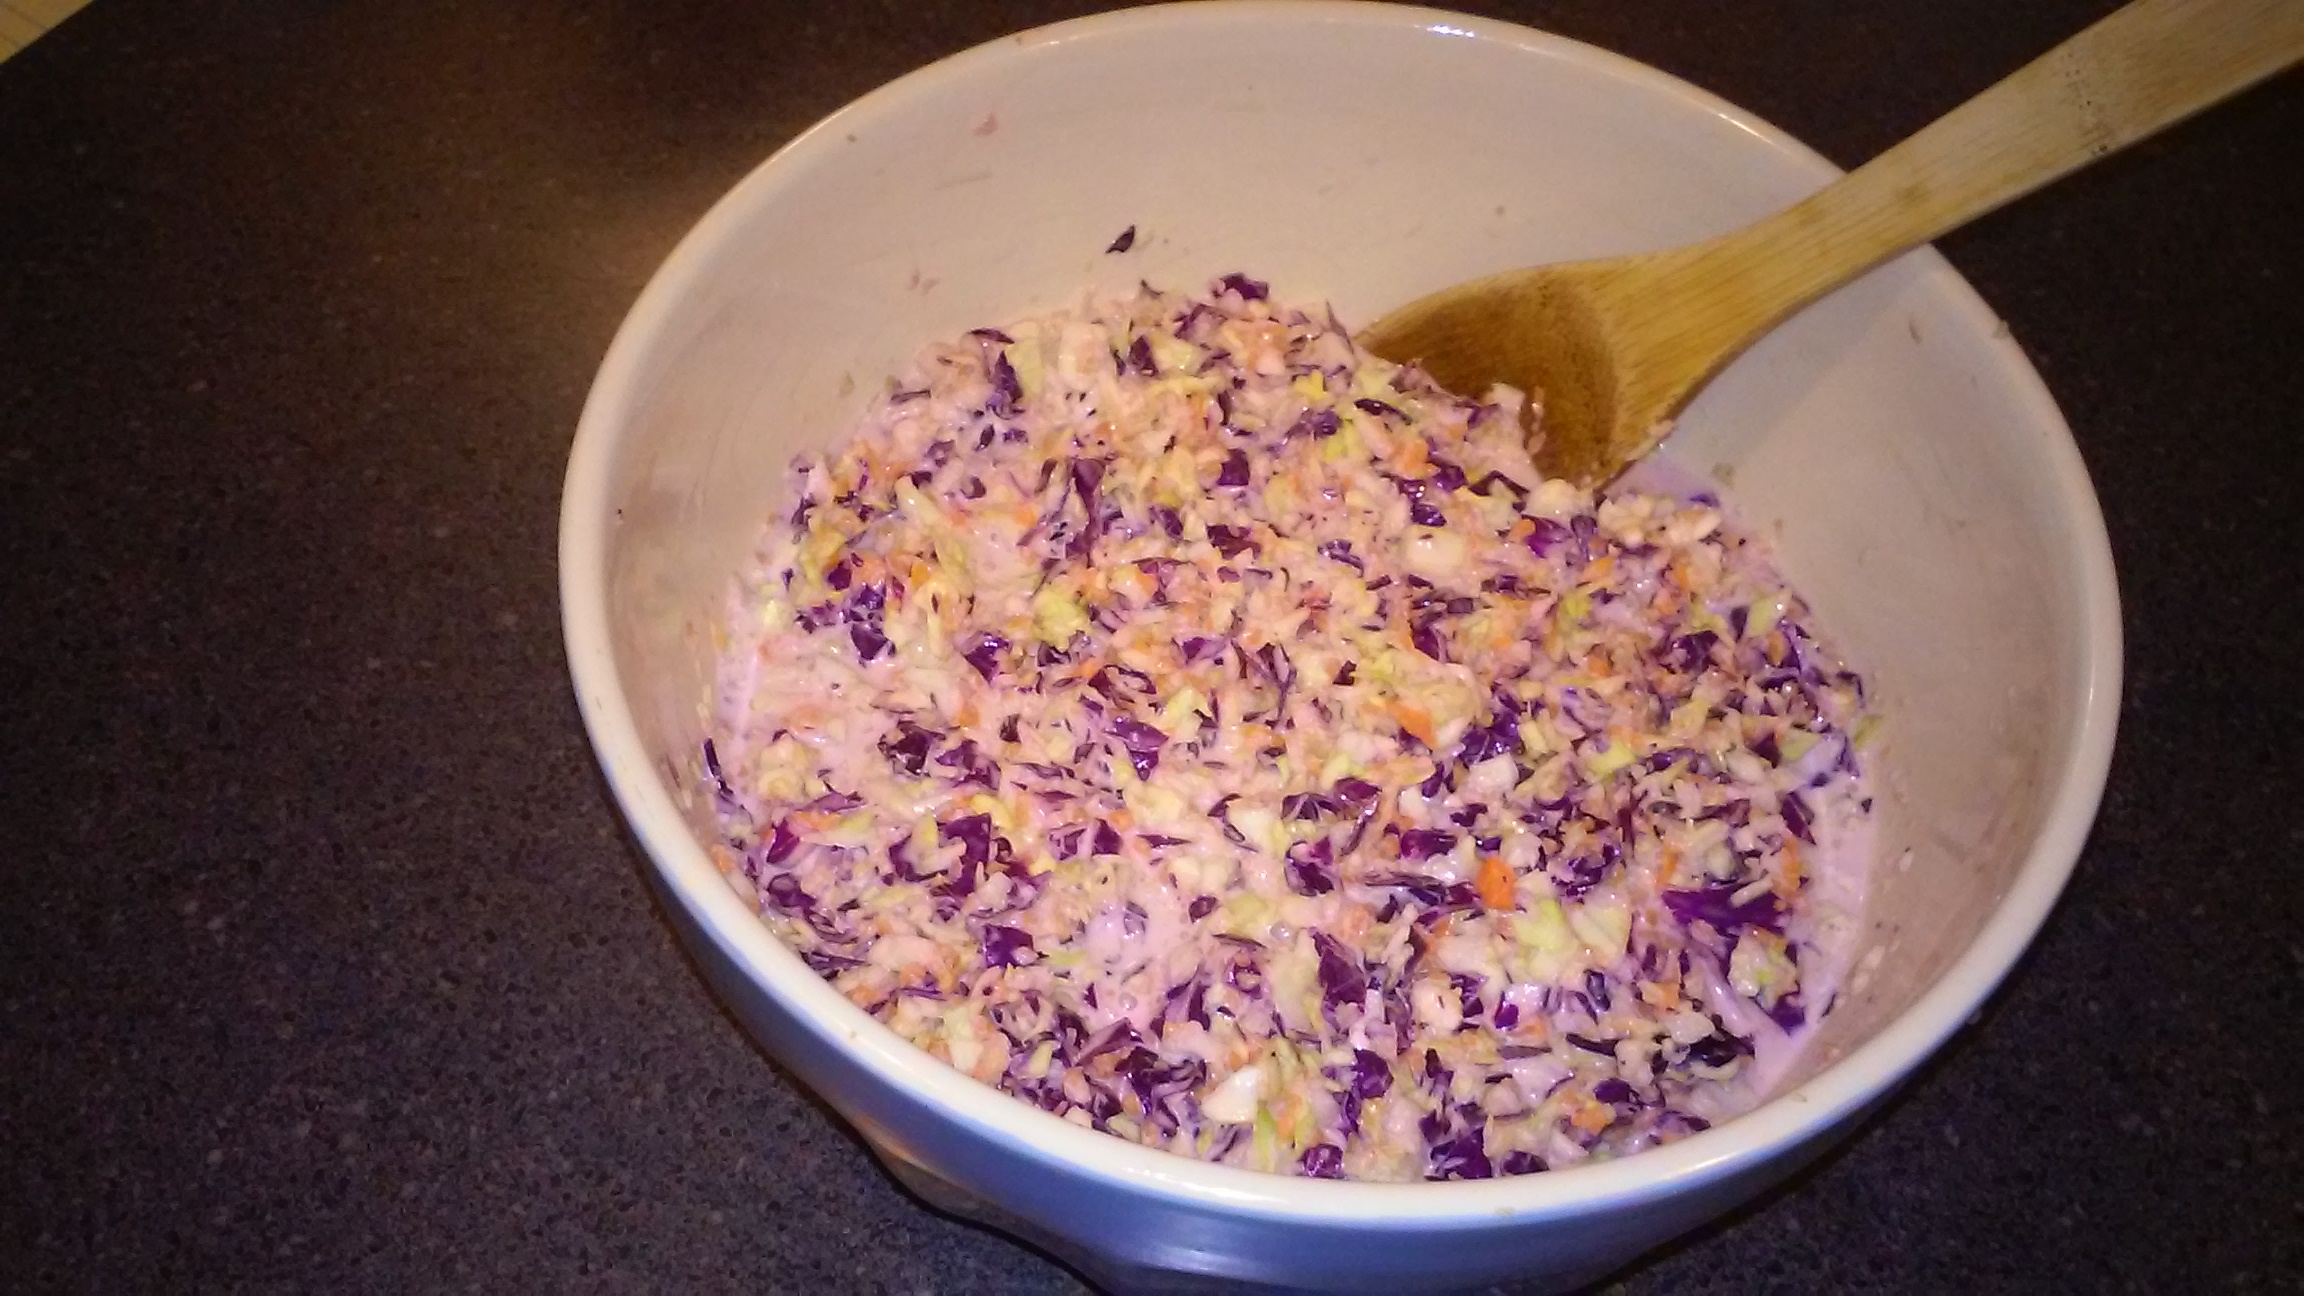
Grandma’s Homemade Coleslaw (from the Old Country)
This is a great coleslaw recipe for barbecues or any family dinner. My grandmother made it this way for our family gatherings when I was growing up. Everyone always talked about what good coleslaw my grandmother made. Till this day, my aunts and many cousins recall her famous coleslaw, so I thought I’d make a batch with a friend and post it here on my blog. Try it–I hope you like it! If time is a factor you can always pick up a bag of pre-shredded coleslaw mix instead of processing the vegetables. It saves time for sure. Personally though, I like fresh shredded vegetables like the old days, as that’s what I learned from my European grandmothers. Everything made from scratch is the best with no preservatives, if you can. It is healthier. Salute (Italian for to your health)!
Ingredients:
1 head of green cabbage
1 head of red cabbage
2 carrots
1/2 cup mayonnaise (gluten-free versions I use are Best Foods® or Hellman’s® mayonnaise)
1/2 cup agave syrup (I use Wholesome Foods brand, but there are other gluten-free versions, too)
1/4 cup almond milk (Blue Diamond® or Silk® almond milk is what I use)
1/4 cup buttermilk (or if you are lactose intolerant you can use another 1/4 cup of almond milk can be substituted in the place of buttermilk)
2-1/2 tablespoons lemon juice
1-1/2 teaspoons of (Bragg gluten-free) apple cider vinegar
2 tablespoons onion, minced very fine
Garlic powder to taste (I use Durkee or McCormick brand spices)
Onion powder to taste
1/4 teaspoon paprika
1/2 cup plain yogurt (I use Chobani brand, or any other brand that’s gluten-free is fine)
1/4 teaspoon salt (optional)
1/8 teaspoon pepper
Directions:
1. Cut both cabbages and the onion together in a food processor. (You want to mince the onion by hand ahead of time and add to processor with the cabbage.) I like the cabbage cut in fine pieces, (some people like the cabbage in slaw in slices). Cut to the size of your choosing.
2. Add the carrots, chopped to desired size . Again I like the carrots chopped in small pieces as well.
3. After processing, remove all the veggies from the food processor and place in a large bowl.
4. In a separate bowl, mix all other ingredients together till well blended. Add to the cabbage and other vegetable mix.
5. Mix well together till smooth and well blended.
6. Cover and refrigerate for at least 2 hours before serving.


I also wanted to add my grandmother’s simpler coleslaw recipe, so here it is.
Ingredients:
Lemon juice, 2 to 3 tablespoons
1 teaspoon garlic powder or more if you like the garlic powder taste
Minced fresh onion, about 2 tablespoons
1 head of regular cabbage
Shredded carrots, 3 to 4 (depending on how much carrot you like)
2 stalks thinly sliced celery
1/2 cup mayonnaise
Salt and pepper to taste
Again, my grandmother rarely measured ingredients, so I’m going by my taste. You may want to add a little more or less of the ingredients to your liking. We love coleslaw and enjoy different recipes. Enjoy!

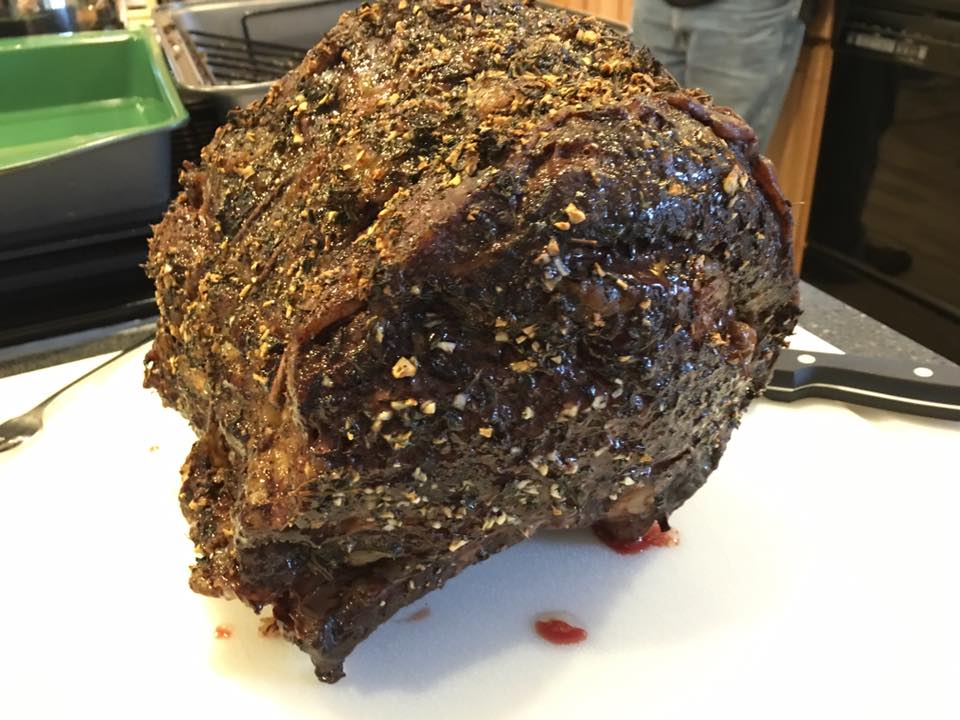
Paul’s Gluten-Free Prime Rib Recipe
This recipe is one my son, Paul, loves to cook for us on special occasions. The one pictured below, he had made for us on this last Easter Sunday when we had his girlfriend, Samantha, and her parents over. It was an incredible meal. He made the prime rib, mashed potatoes, gravy (which he called au jus), and sautéed asparagus. For desert, Samantha and her mother brought a gluten-free carrot cake and some gluten-free Italian cookies they purchased from a gluten-free bakery here in Seattle. You see, if you and others around you either already know how to cook or want to learn so you can improvise without gluten, you can have a great time with cooking and eating. It’s a great social and bonding time cooking with family and friends. For those of you who are very sensitive and can’t risk eating out for fear of gluten exposure, cooking and eating gluten-free in your own home is a great way to enjoy food and social time without feeling deprived. That’s what I do! I enjoy the people and the food and the bonding in cooking together like what I learned from my mother and grandmothers in growing up. And, I never have a gluten hangover, so to speak, with it’s stomach discomfort and multiple symptoms that can last for days, even weeks. Ugh! So Smile! It’s all good! Enjoy!

Ingredients:
1 standing prime rib roast (6-10 pounds)
Salt
Peppercorns
Fresh oregano
Fresh thyme
Diced garlic
Directions:
1. Salt prime rib the night before and let the roast rest in the fridge uncovered overnight.
2. Prior to cooking, let the roast rise to room temperature on the counter.
3. Preheat the oven to 200 degrees F.
4. Chop oregano and thyme and combine with garlic in a mixing bowl.
5. Place the roast fat side up in the center of a v-rack inside a large roasting pan and cover with the herb garlic mixture.
6. Dust with crushed peppercorns.
7. Bake, uncovered, until the internal temperature reads between 120 degrees F- to 125 degrees F for medium rare and 135 degrees F for medium.
8. Take out of oven and turn temperature up to 500 degrees F.
9. Let the roast rest covered in foil on the counter for 30 minutes.
10. Place in the 500 degree oven for an additional 15 to 30 minutes to brown the outside.
11. Remove from oven. Slice and serve.
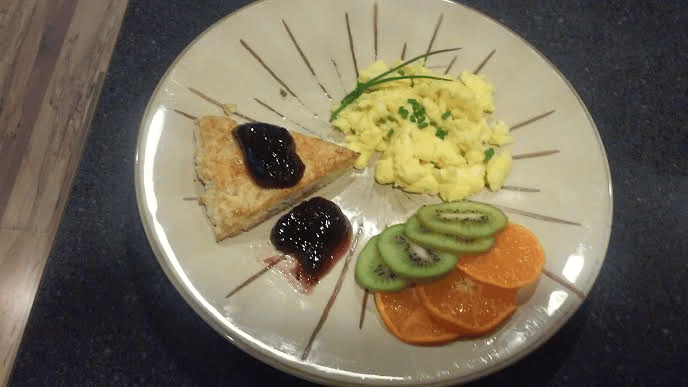
Delicious Gluten-Free Scones
Gluten-Free Scones: Inspired by my friend Rachel Durham
Rachel and I, along with several other friends, got together for a gluten-free brunch one mid-morning recently. We both love to cook and be creative (Rachel is more creative than I am), so this scones recipe is what we came up with. We both have Celiac disease. In fact, to give you a little background on how we met, here’s our little history.
We met at a luncheon about a year ago. I had mentioned to the woman who was putting on the luncheon and was a church friend that I had Celiac disease. I told her I was more than happy to bring my own food to make things easier for her and others. She then said there was at least one other person, maybe two, who were going to be there and who also had Celiac disease or gluten sensitivity. Then, she asked me if I could help to guide her on how to make the whole luncheon gluten free so everyone could enjoy it together. So, we worked together on recipes and ingredients. It was a great luncheon with so much food. She made chicken salad with gluten-free bread, salads, fruit, drinks, tea, coffee, and rice pudding and key lime pie for desert. It was quite a feast! And she learned about cooking gluten free. I sat down at the luncheon next to a young lady named Rachel who had brought her own food. Boy did that look familiar! I asked if she had Celiac disease. She, of course, said yes but with a little apprehension. I know how that feels–you don’t want to draw attention to it or yourself. You just kind of want to blend in. But when I explained to her that all the food was gluten free, she was amazed and relieved that she could be a part of things. I shared about my Celiac disease and, over time, we have become good friends. I’m so grateful I met Rachel! She has been such an inspiration and blessing to me. We have other commonalities and support each other often. Our lives and schedules are busy, but we are finding time periodically to cook together and share family time. Rachel is married with 4 children and has become an amazing gluten-free cook!
As far as the scones recipe goes and the brunch, we combined our efforts in ideas and cooking skills and put together a really neat spread of food. We started by making scones and added scrambled eggs and fruit. All of that was served with coffee and tea and some raspberry jam to spread on the scones. So here is our scones recipe that Rachel would love to share with you. Thanks Rachel! Can’t wait for you to share more!
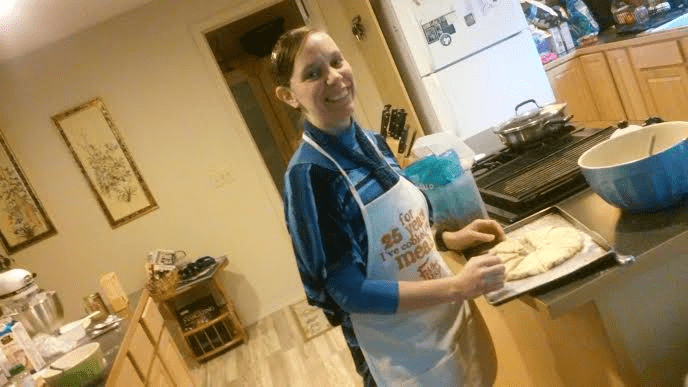
Rachel
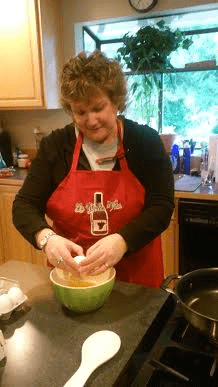
Iris
Scones:
Ingredients:
1/3 cup unsalted gluten-free butter (Land O’Lakes® is one suggestion, or Kerrygold Irish butter)
1-3/4 cups gluten-free flour blend (we used Cup4Cup gluten-free flour blend)
2-1/2 teaspoons baking powder
1/2 teaspoon salt
2 tablespoons of gluten-free agave (we used wholesome foods brand), but any brand that says gluten free on the label is good.
1 egg, beaten
1/2 cup blond or dark raisins (or you can use currants)
3 to 5 Tablespoons coconut creamer (or any Dairy free milk if lactose intolerant); almond milk can be used also
Directions:
1. Preheat oven to 400 degrees
2. Mix flour, baking powder, and salt.
3. Cut in the butter with pastry blender (or two butter knives) until mixture resembles fine crumbs.
4. Beat the egg until fluffy. Wisk in agave nectar.
5. Add egg/agave mixture to dry ingredients, along with the raisins or currants.
6. Add just enough creamer until dough leaves the side of the bowl.
7. Turn the dough onto lightly floured surface and knead lightly, about 10 times.
8. Then pat it into a round, about 1/2 inch thick. Cut into wedges and separate.
9. Brush dough with egg. (If you don’t have a brush-we used a rolled paper towel as a brush.)
10. Bake until golden brown, about 10-12 minutes.
11. Immediately remove from cookie sheet:
12. Split scones. Spread with butter and serve with raspberry jam if you like.

 Jessica, Iris and Rachel
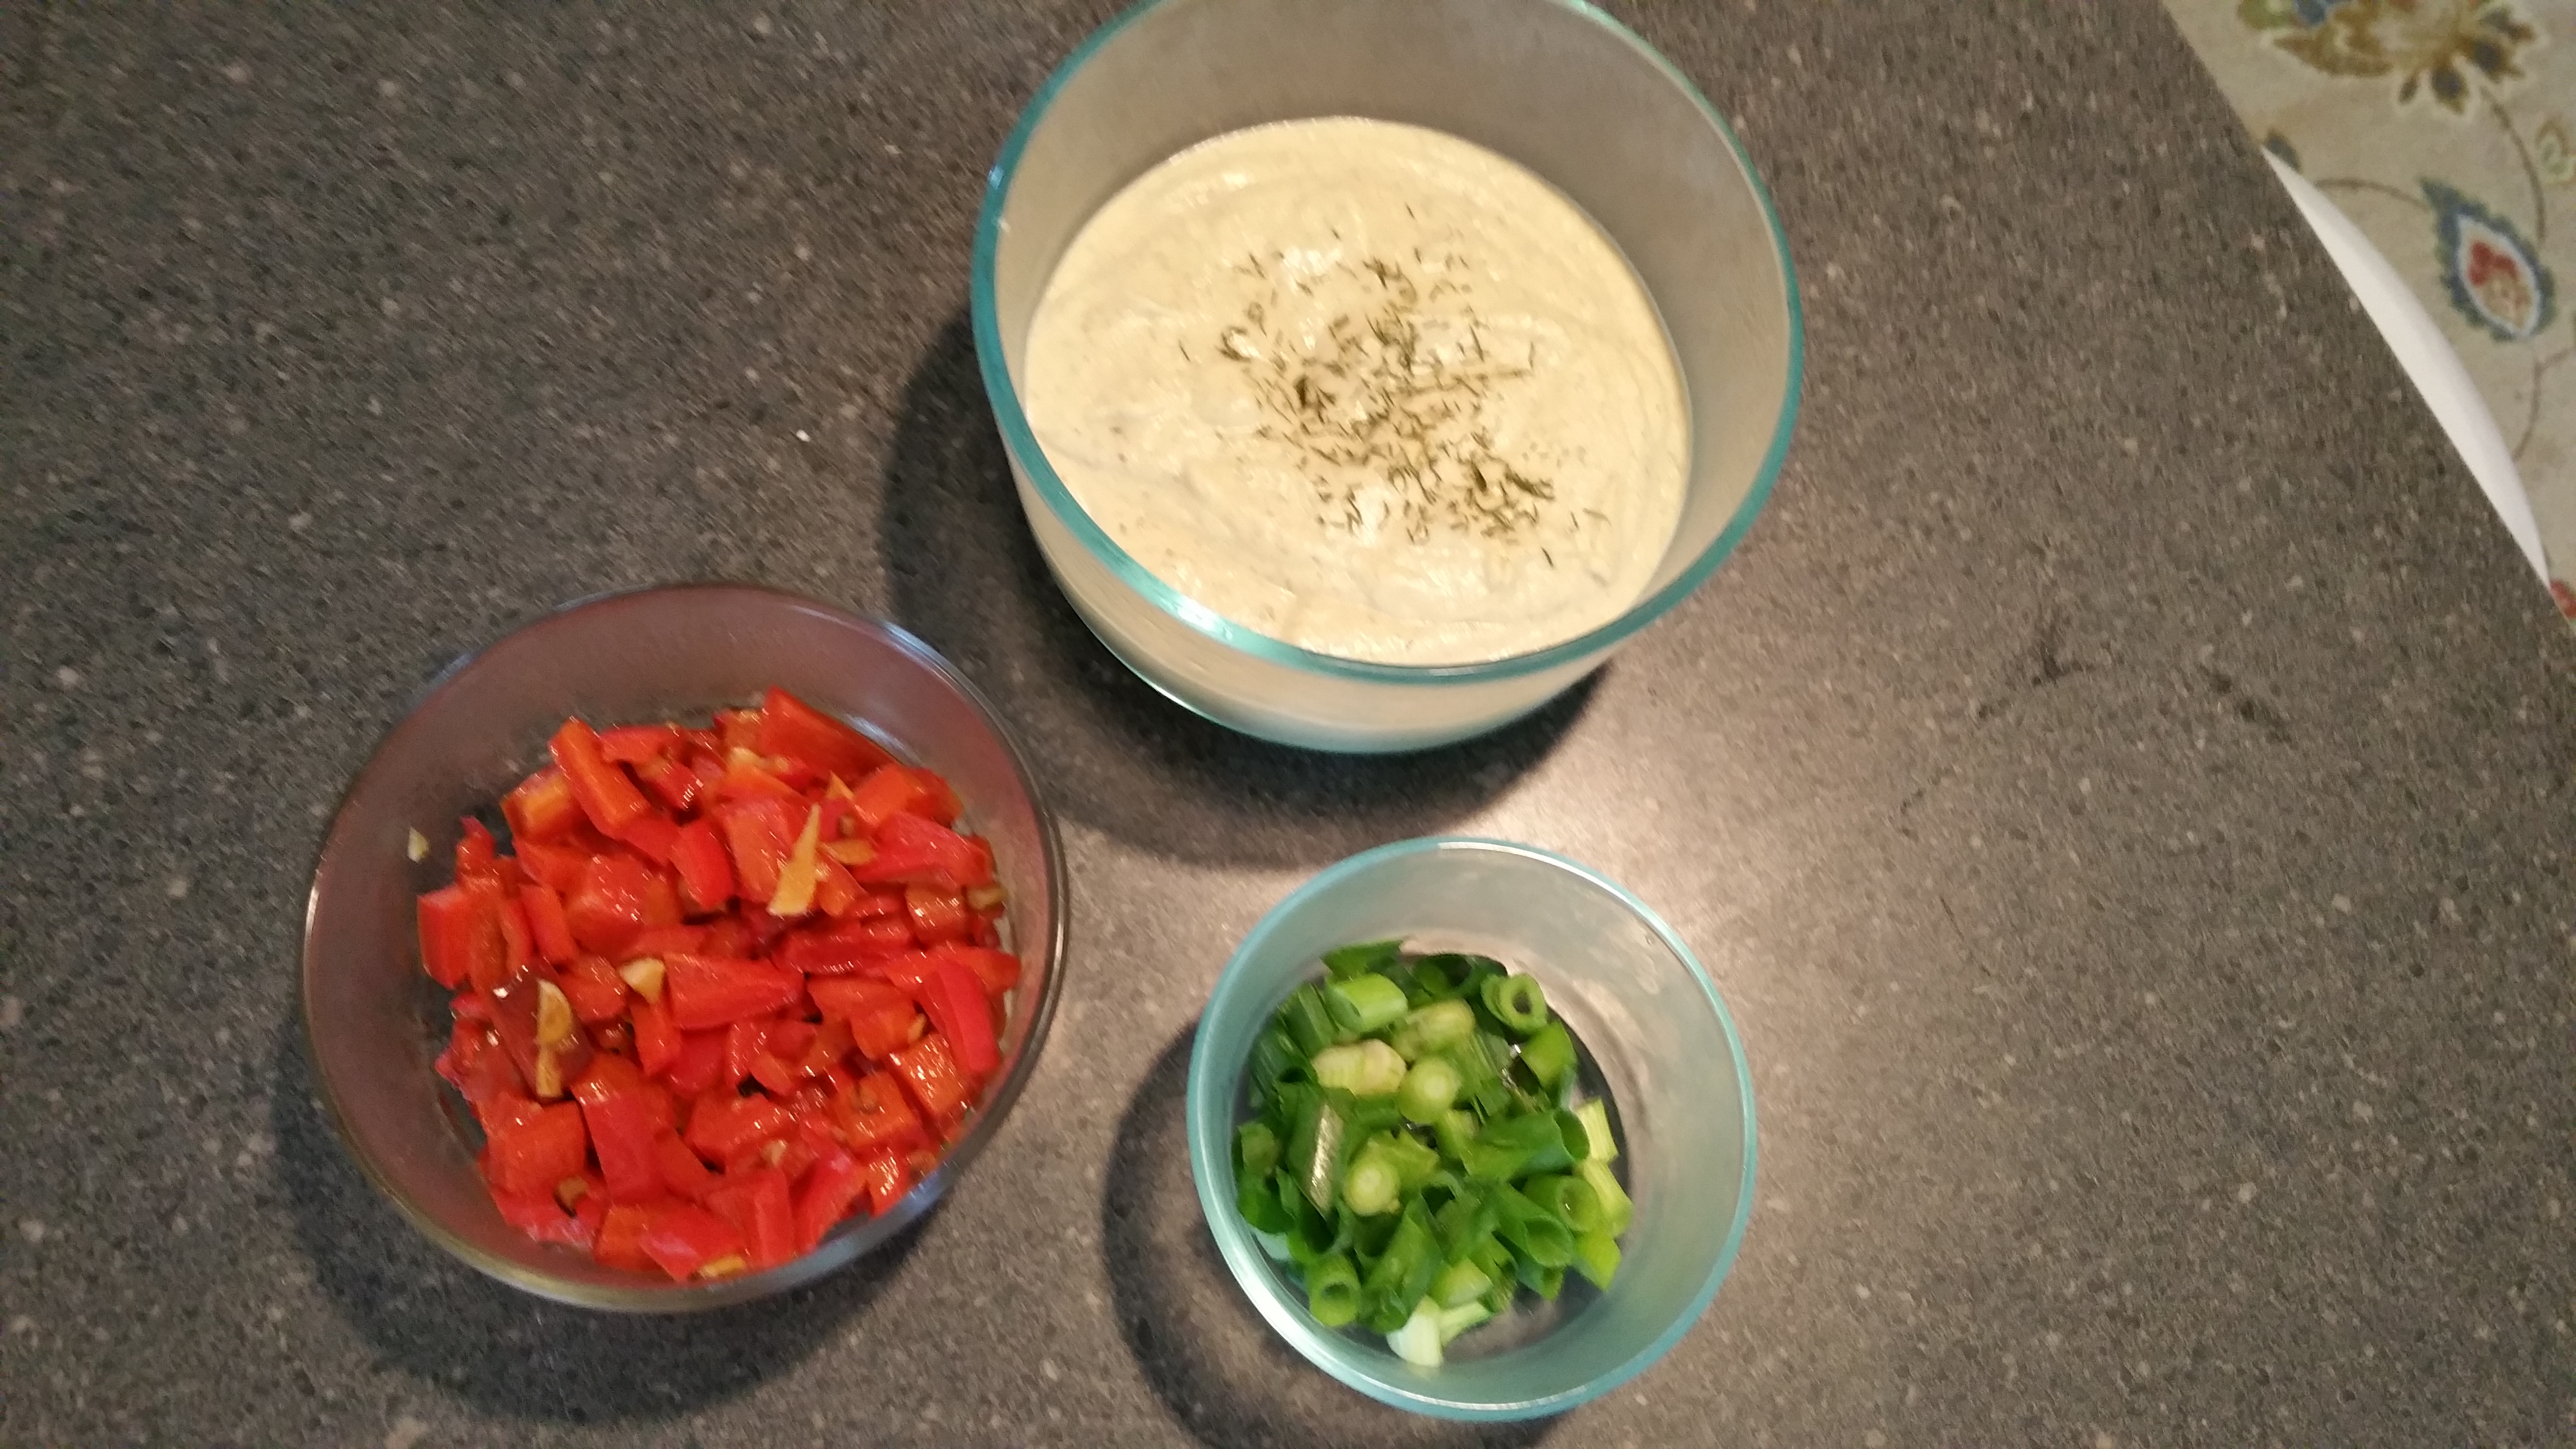
Gluten-Free Hummus (my own variations)
For those of us who enjoy a vegetarian recipe, here is my own hummus recipe. There are so many variations to a basic hummus recipe. You can take what I suggest and add your own extra ingredients. Or, you can also omit an ingredient if you want that is not to your liking. But always keep the main ingredient (chickpeas, also known as garbanzo beans), or just won’t be hummus! Did you know that the word hummus is an Arabic word meaning, “chickpea”. It is actually an Levantine Arab dip. Chickpeas are a vegetable that have been cultivated throughout the Middle East and India for thousands of years. It’s entire history is originated in the Middle East dating back thousands of years. Plato and Socrates made references to them in their ancient writings. Nutritionally, hummus is a useful food for vegetarians. Combined with bread or gluten-free bread, it serves as a complete protein, similar to grains and legumes combinations. It is known to be very nutritious, as it is high in iron, vitamin C, B-6, folate, protein, fiber, and potassium. The combination of sesame tahini (made from sesame seeds) and chickpeas is very nutritious for people who don’t eat meat. I’ve made this recipe with family and friends at gatherings, and it is a wonderful delight for Celiac disease. It can be served, as I said, with gluten-free bread and a salad. As suggested below, I like to serve it as an appetizer with corn tortillas, chopped scallions, and roasted red peppers with garlic.
Ingredients:
Note: Be sure to use all gluten-free spices–I use McCormick or Durkee. But, there are others too.
1-15 ounce can of chickpeas (garbanzo beans), drained
1/2 teaspoons cumin
1 to 2 cloves fresh garlic, minced (2 for a strong garlic flavor, 1 for less zesty)
2 teaspoons parsley–fresh, chopped, or bottled
2 tablespoons fresh lemon juice
2 tablespoons extra virgin olive oil
Just a pinch of black pepper (I like freshly ground)
1/8 teaspoon dill spice
A sprinkle of onion powder (maybe up to 1/4 teaspoon)–taste it first, you may want more or less
Just a pinch of salt or up to an 1/8th teaspoon
1 tablespoon sesame tahini (or another variation could be almond butter)–this gives it a nice flavor!
1/4 cup water (or almond milk)
Directions:
1. Combine all ingredients in a blender or food processor and blend till very smooth.
If hummus is too thick, which it usually isn’t, add more water or almond milk until it gets to desired consistency. Some people like it very thick, some people like it a little less thick. Use your judgment.
2. Chill in the refrigerator.
Roasted Red Peppers:
Ingredients:
1 red pepper, chopped
2-tablespoons olive oil
1 to 2 cloves fresh garlic, minced
Directions:
1. In a skillet add olive oil bring to medium heat.
2. Add chopped red pepper and fresh minced garlic.
3. Stir fry till tender. Allow to cool.
4. Top it on the hummus and refrigerate.
Slice some green onions as an extra garnish!
This recipe will serve 8 people at about 1/4 of a cup each.
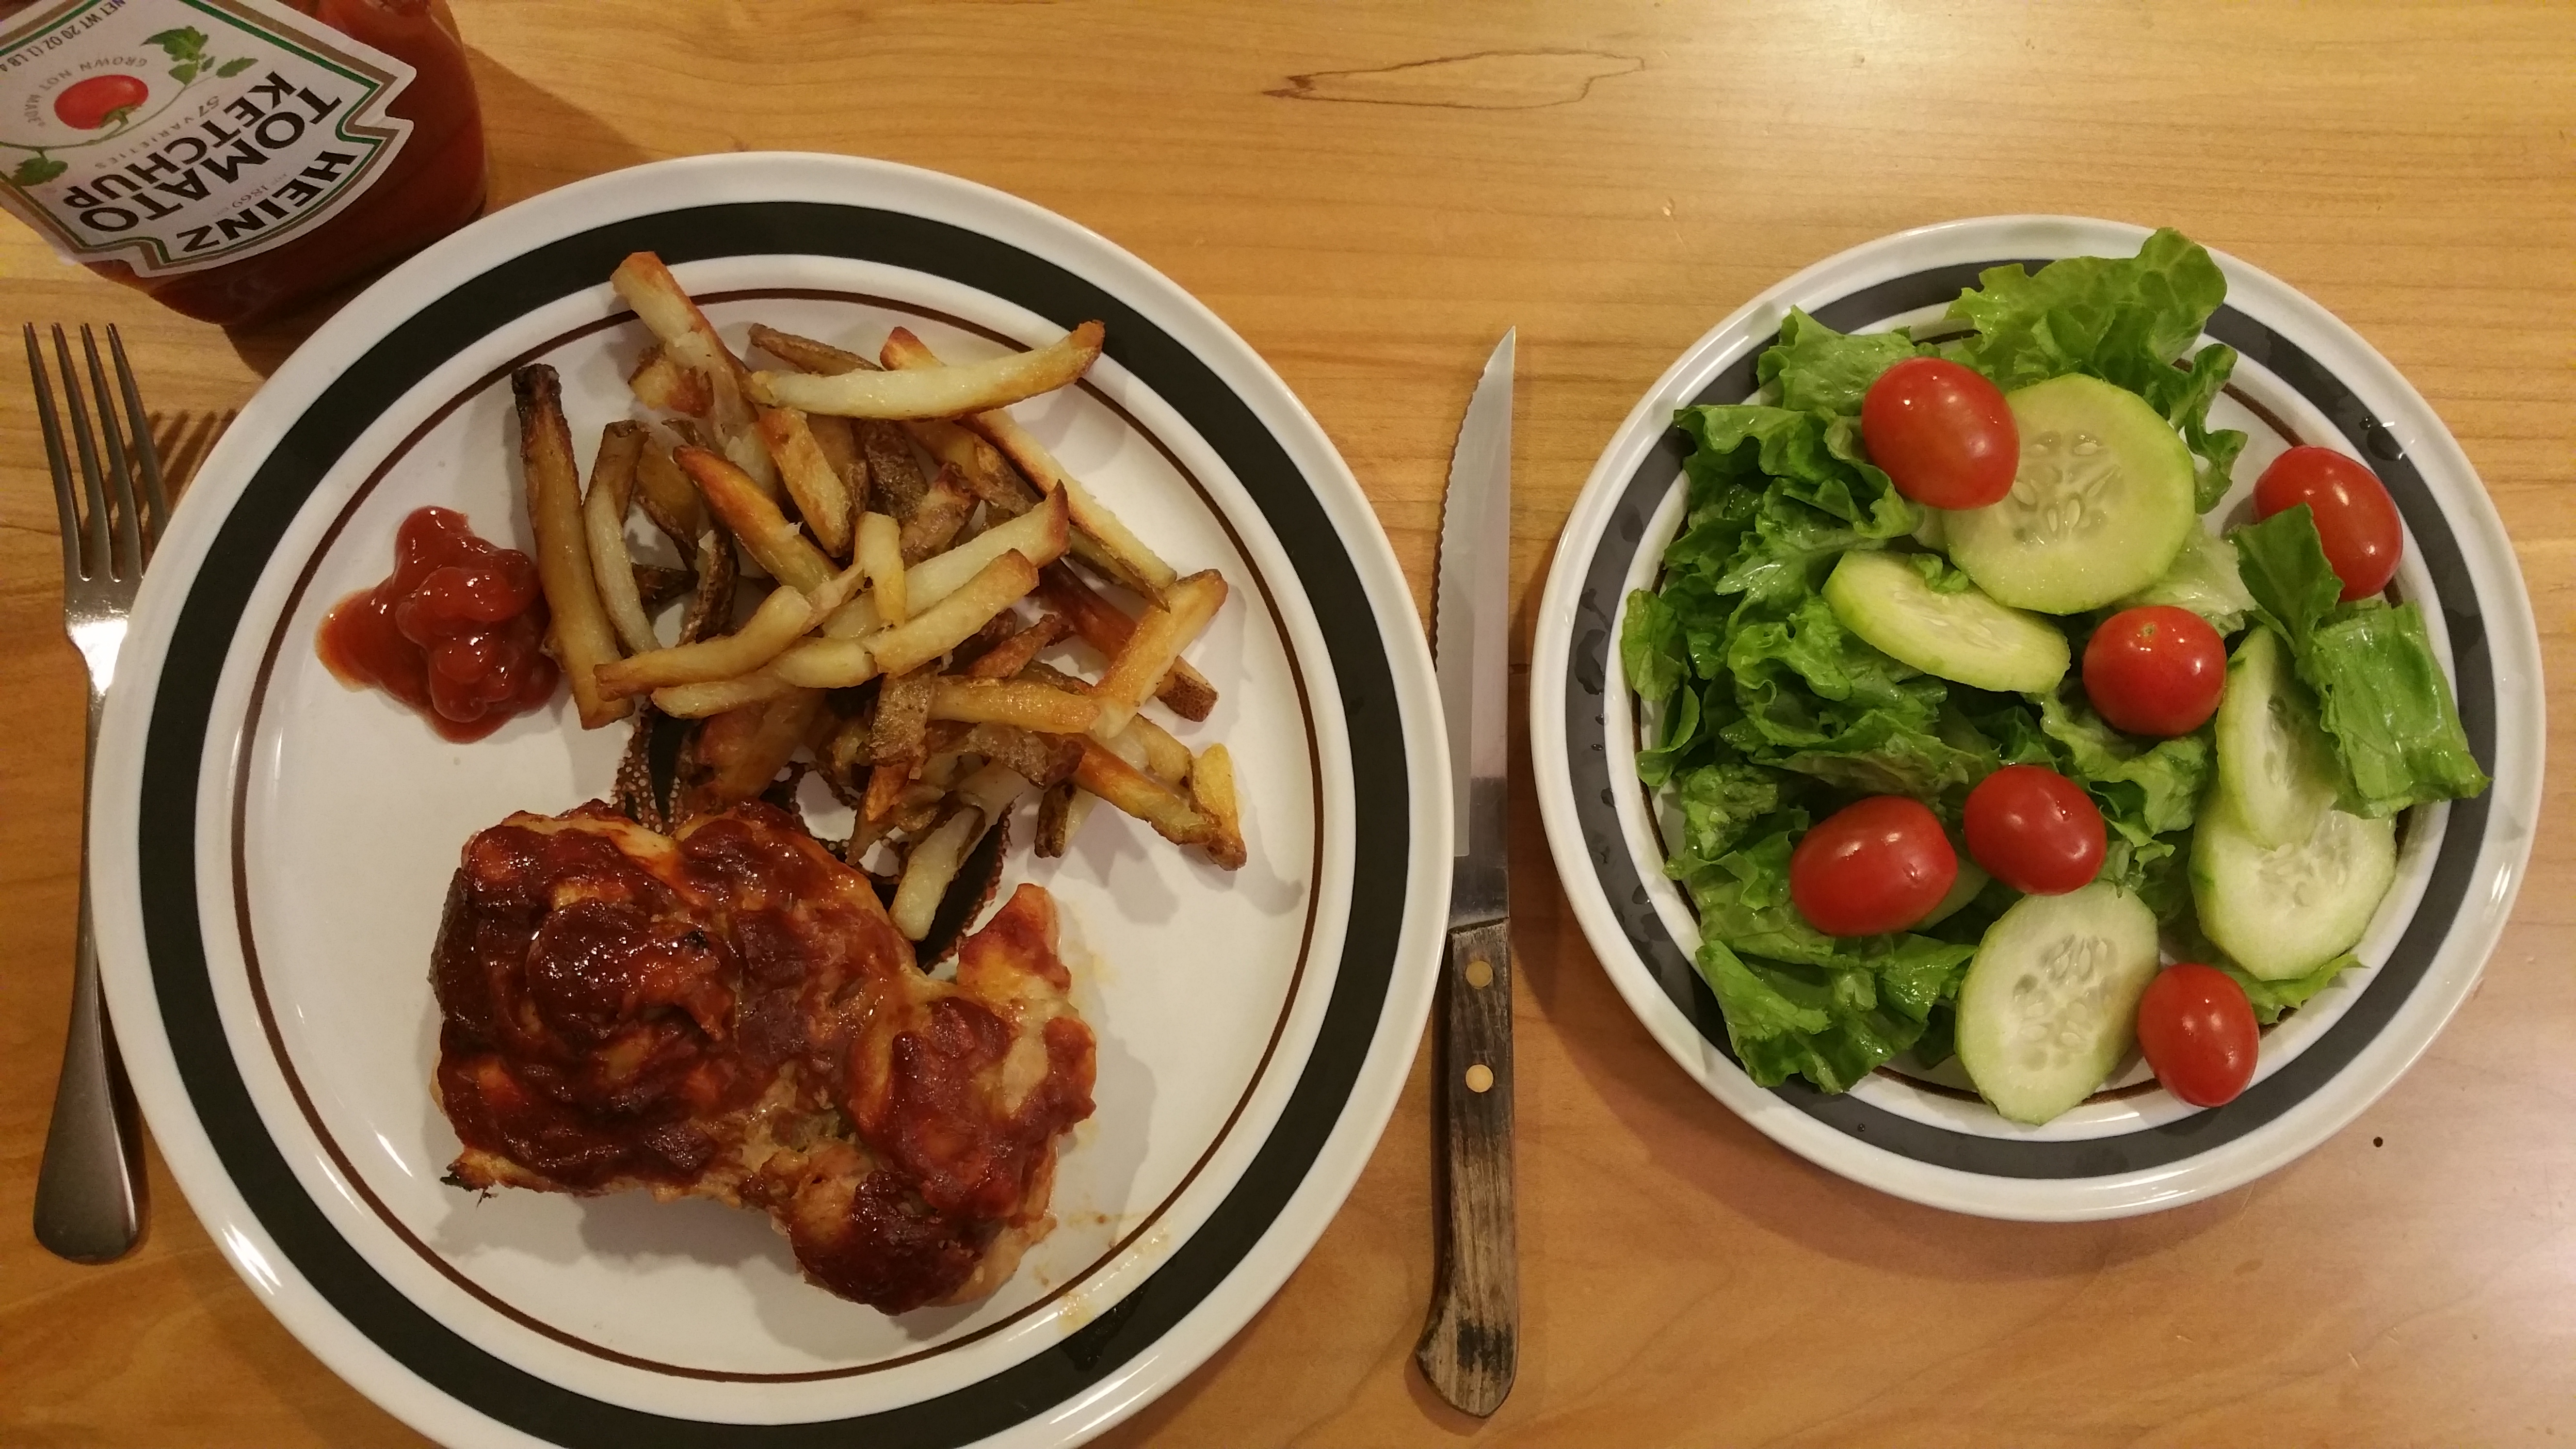
Oven Baked Boneless Chicken Thighs with Homemade BBQ Sauce and Homemade French Fries.
This is a recipe my family loved and made often while I was growing up. The barbecue (BBQ) sauce is a combination of ideas from a friend and my own added touches. It can be used with chicken, or pork, or beef ribs. The meat can be made in the oven as I describe here or on the outdoor grill. Both ways are very good, although the oven method can make a better, more moist meat. For more BBQ flavor to be absorbed by the meat, you can marinate the meat in the sauce wrapped in foil and placed in the refrigerator for 8 hours before you cook it. This makes the meat moist and tasty, and the flavor really gets absorbed by the meat this way.
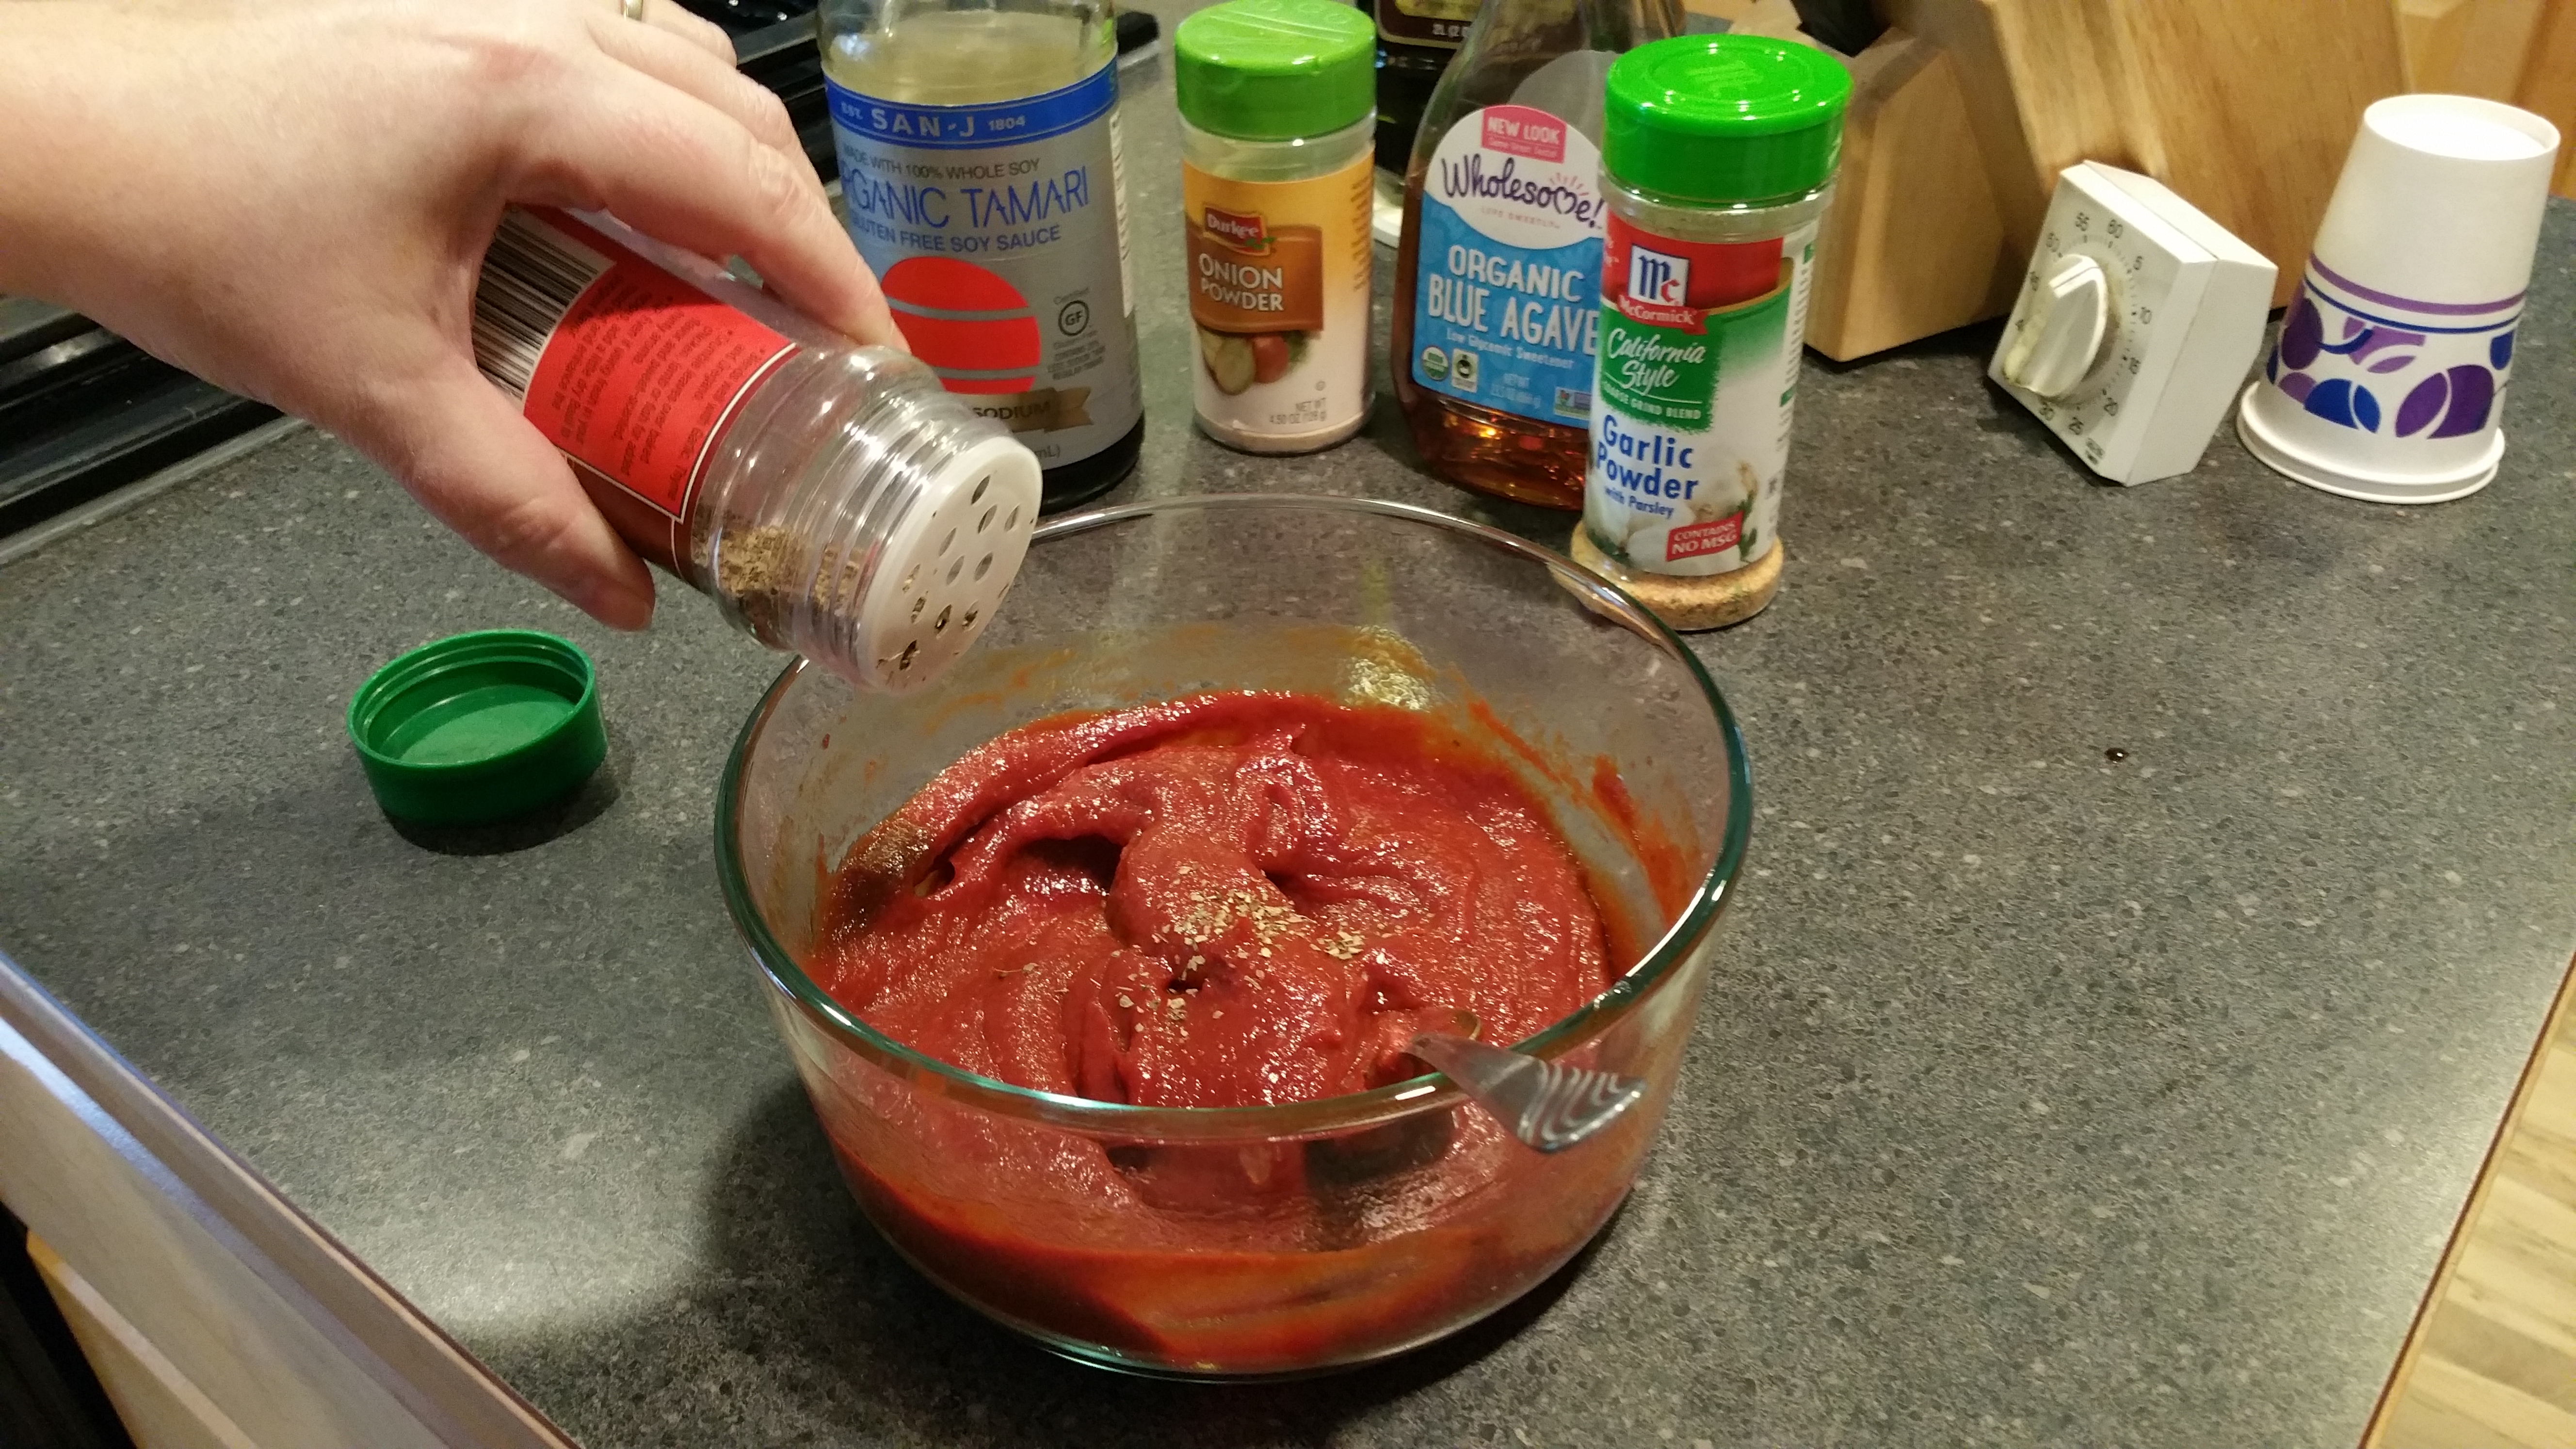
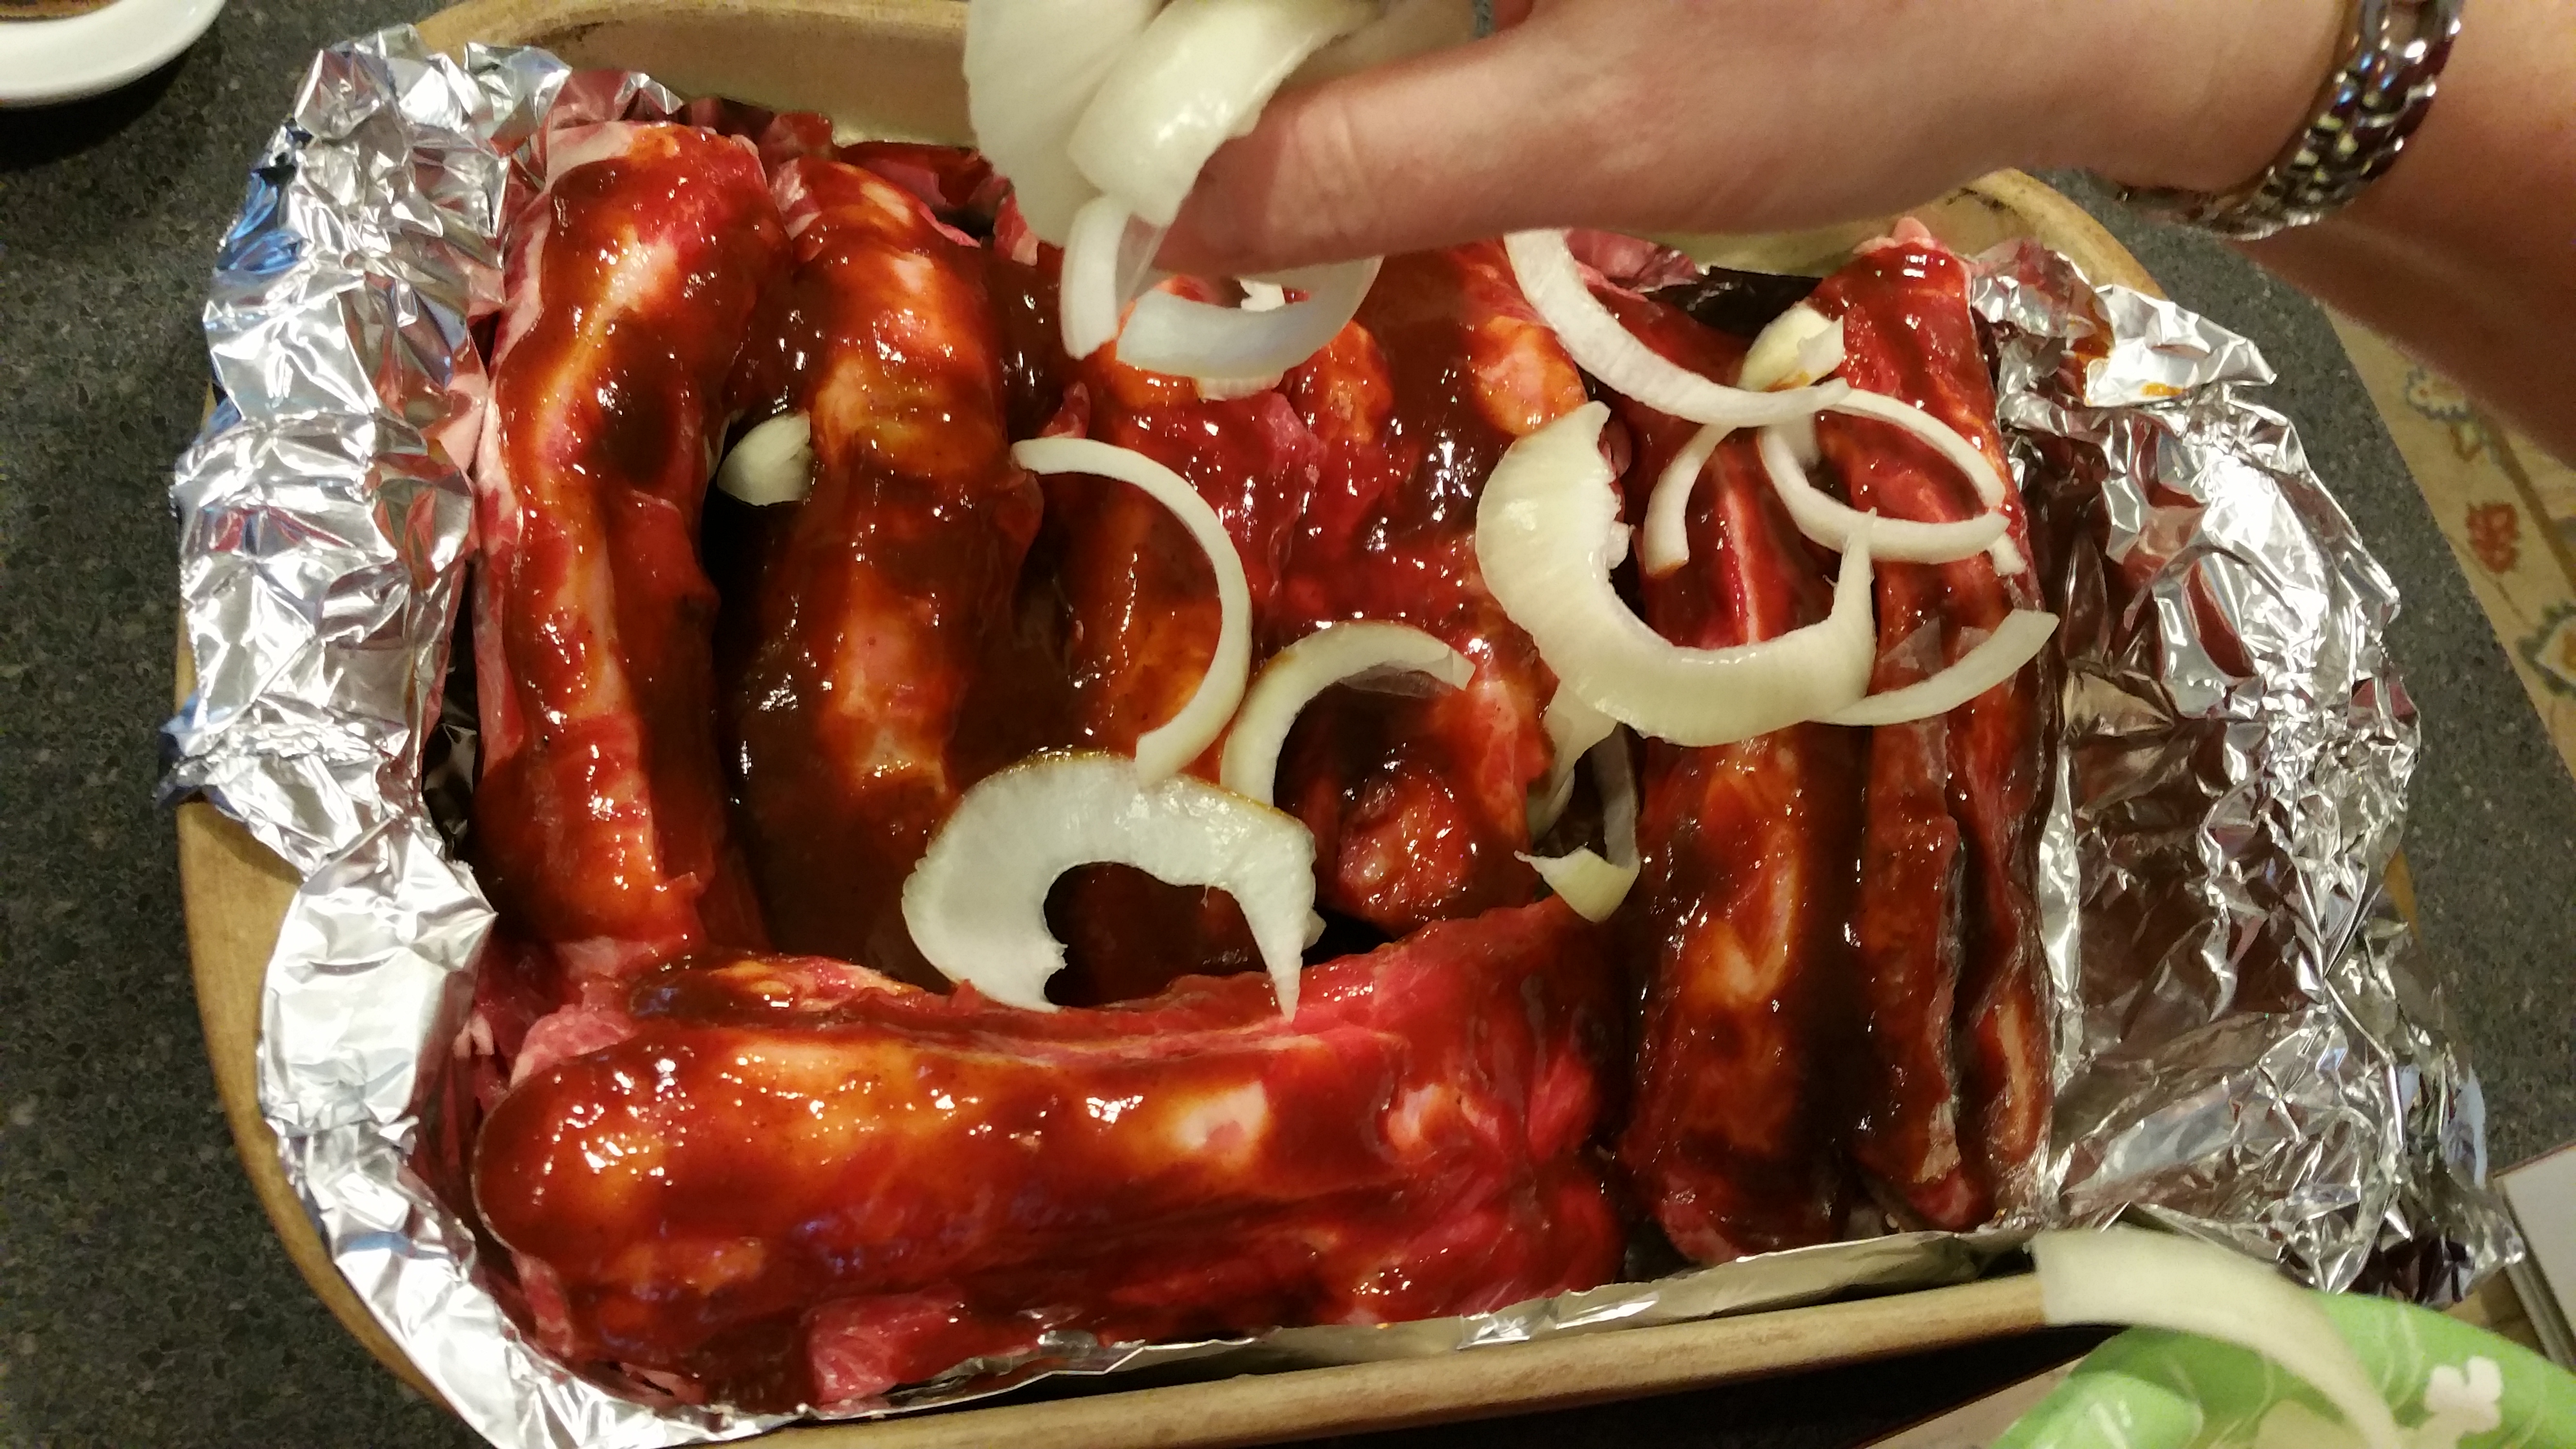

BBQ SAUCE FOR CHICKEN OR RIBS
Ingredients:
6 boneless chicken thighs
Sauce:
1/4 to 1/2 cup of water (depending on how thick you like your sauce)
1 cup of ketchup (Heinz ketchup is gluten-free. Read labels–most will say if it’s gluten-free)
2 tablespoons tomato paste
1/4 cup of low sodium, gluten-free soy sauce
1/4 cup of agave syrup (maybe a little more if you like it sweet) or brown sugar can be used
1 teaspoon of olive oil
Dash of cayenne pepper
2 teaspoons chili powder
2 teaspoons Worcestershire sauce
1 teaspoon apple cider vinegar
1/2 teaspoon basil
1 tablespoon lemon juice
2 teaspoons garlic powder
2 teaspoons onion powder
Directions:
1. Preheat the oven to 400 degrees.
2. Whisk all the ingredients together in a bowl.
3. Pour sauce mixture over chicken or ribs.
4. Cover with aluminum foil
5. Bake meat in preheated oven for about 45 minutes. Turn the meat once halfway through, putting more sauce on the other side. Cook until meat is no longer pink at the bone for chicken (or pork especially). For beef ribs, 35 to 40 minutes should be sufficient. If you use a meat thermometer (with chicken), insert the meat thermometer near the bone. It should read about 165 degrees.
Note: Especially with pork and chicken be sure meat is no longer pink at the bone, it needs to be thoroughly cooked.
This BBQ meat recipe can be served also with a side salad and homemade French fries. Here’s a recipe I’d like to share for Fries.
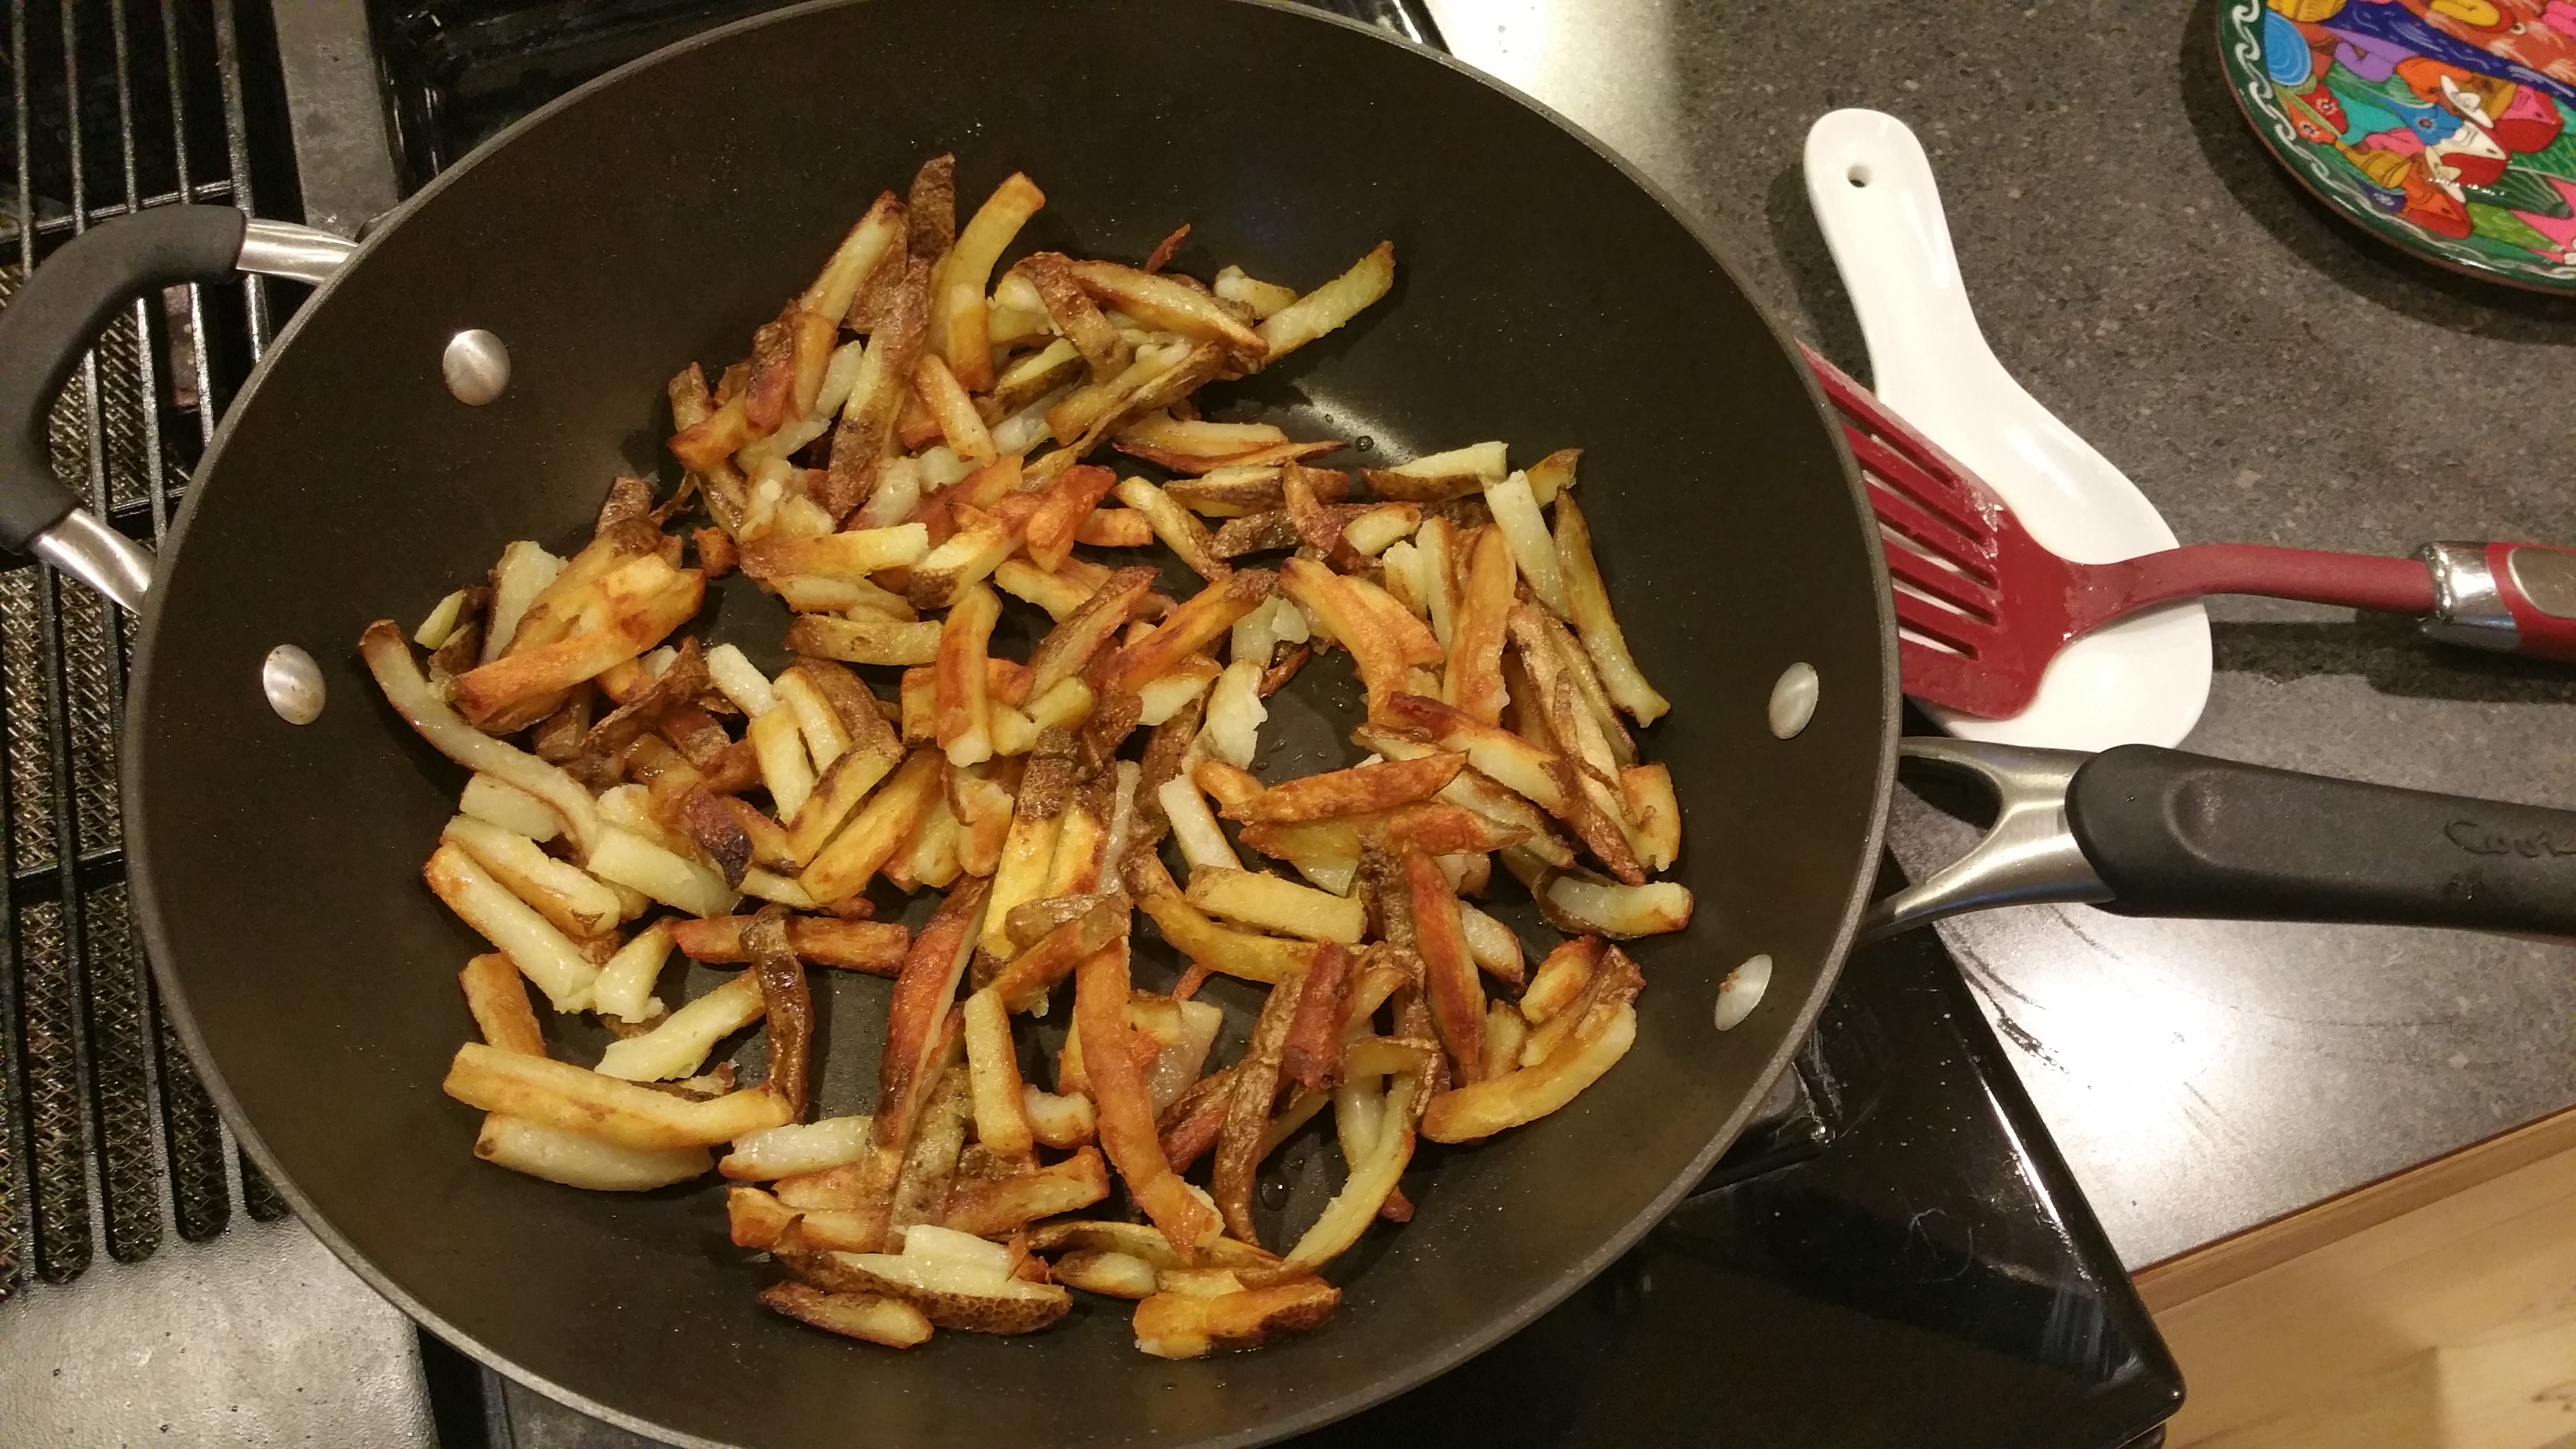
HOMEMADE FRENCH FRIES
Ingredients:
2 to 4 russet potatoes (1 potato per person is what I suggest)
2 tablespoons olive oil
Salt (optional)
Directions:
1. Wash potatoes well and scrub with a vegetable brush. Cut up potatoes with a French fry chopper. Or, using a knife, you can cut to shape into French fries.
2. Pour olive oil into a deep frying pan and cook until crisp, tossing carefully and frequently. Cook on medium heat. Raw potatoes can take up to 45 minutes to cook crispy. Use your judgment on tenderness and crispiness.
Variation: You can also oven fry them at 400 degrees with a little olive oil on a cookie sheet. Bake them for about 45 minutes turning occasionally, until they look brown and crispy and are soft when poked with a fork. If cooking them in the oven, it’s a good idea to toss the cut-up fries in a bowl with the olive oil and a little salt before baking them. The fries will be crispier that way and less likely to dry out.
Other ideas for serving with BBQ meat: you can have side dishes of baked beans or your favorite vegetable. Busch’s baked beans or Heinz gluten-free baked beans are brands I use.
* For more ideas on gluten-free products to use in my recipes, you can refer to the gluten-free mall on this blog. Also, you can refer to celiac.org
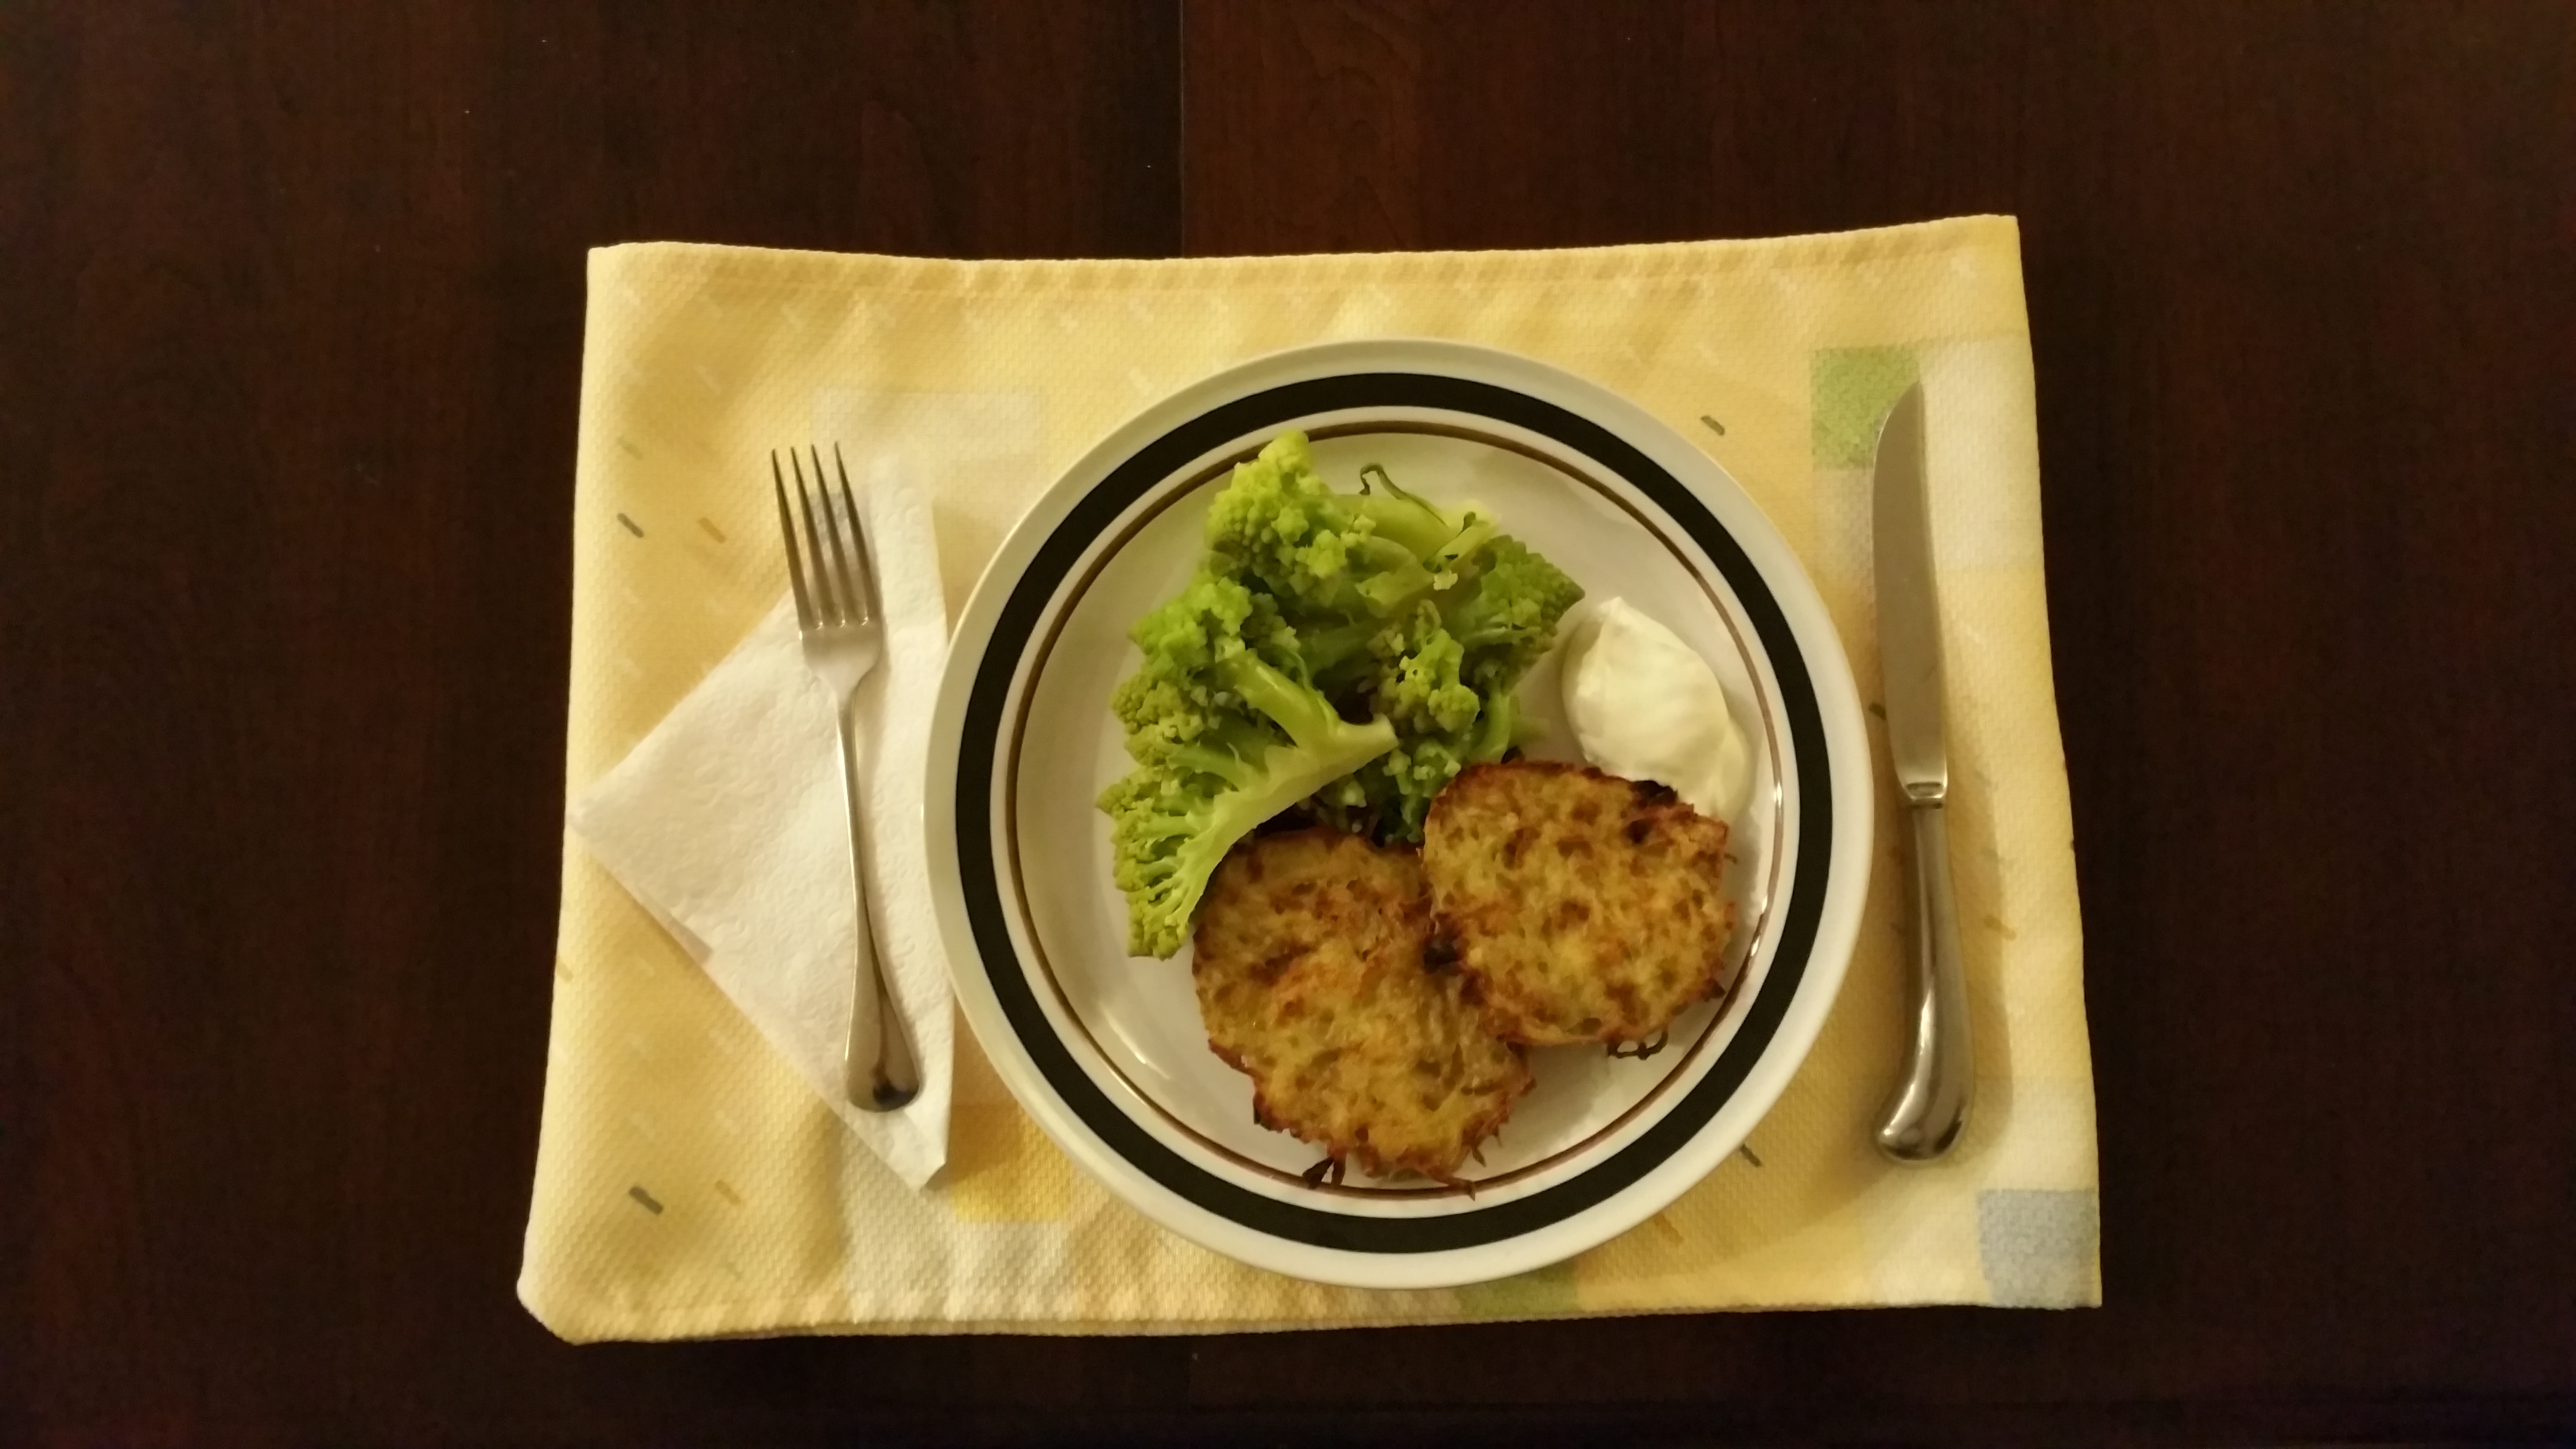
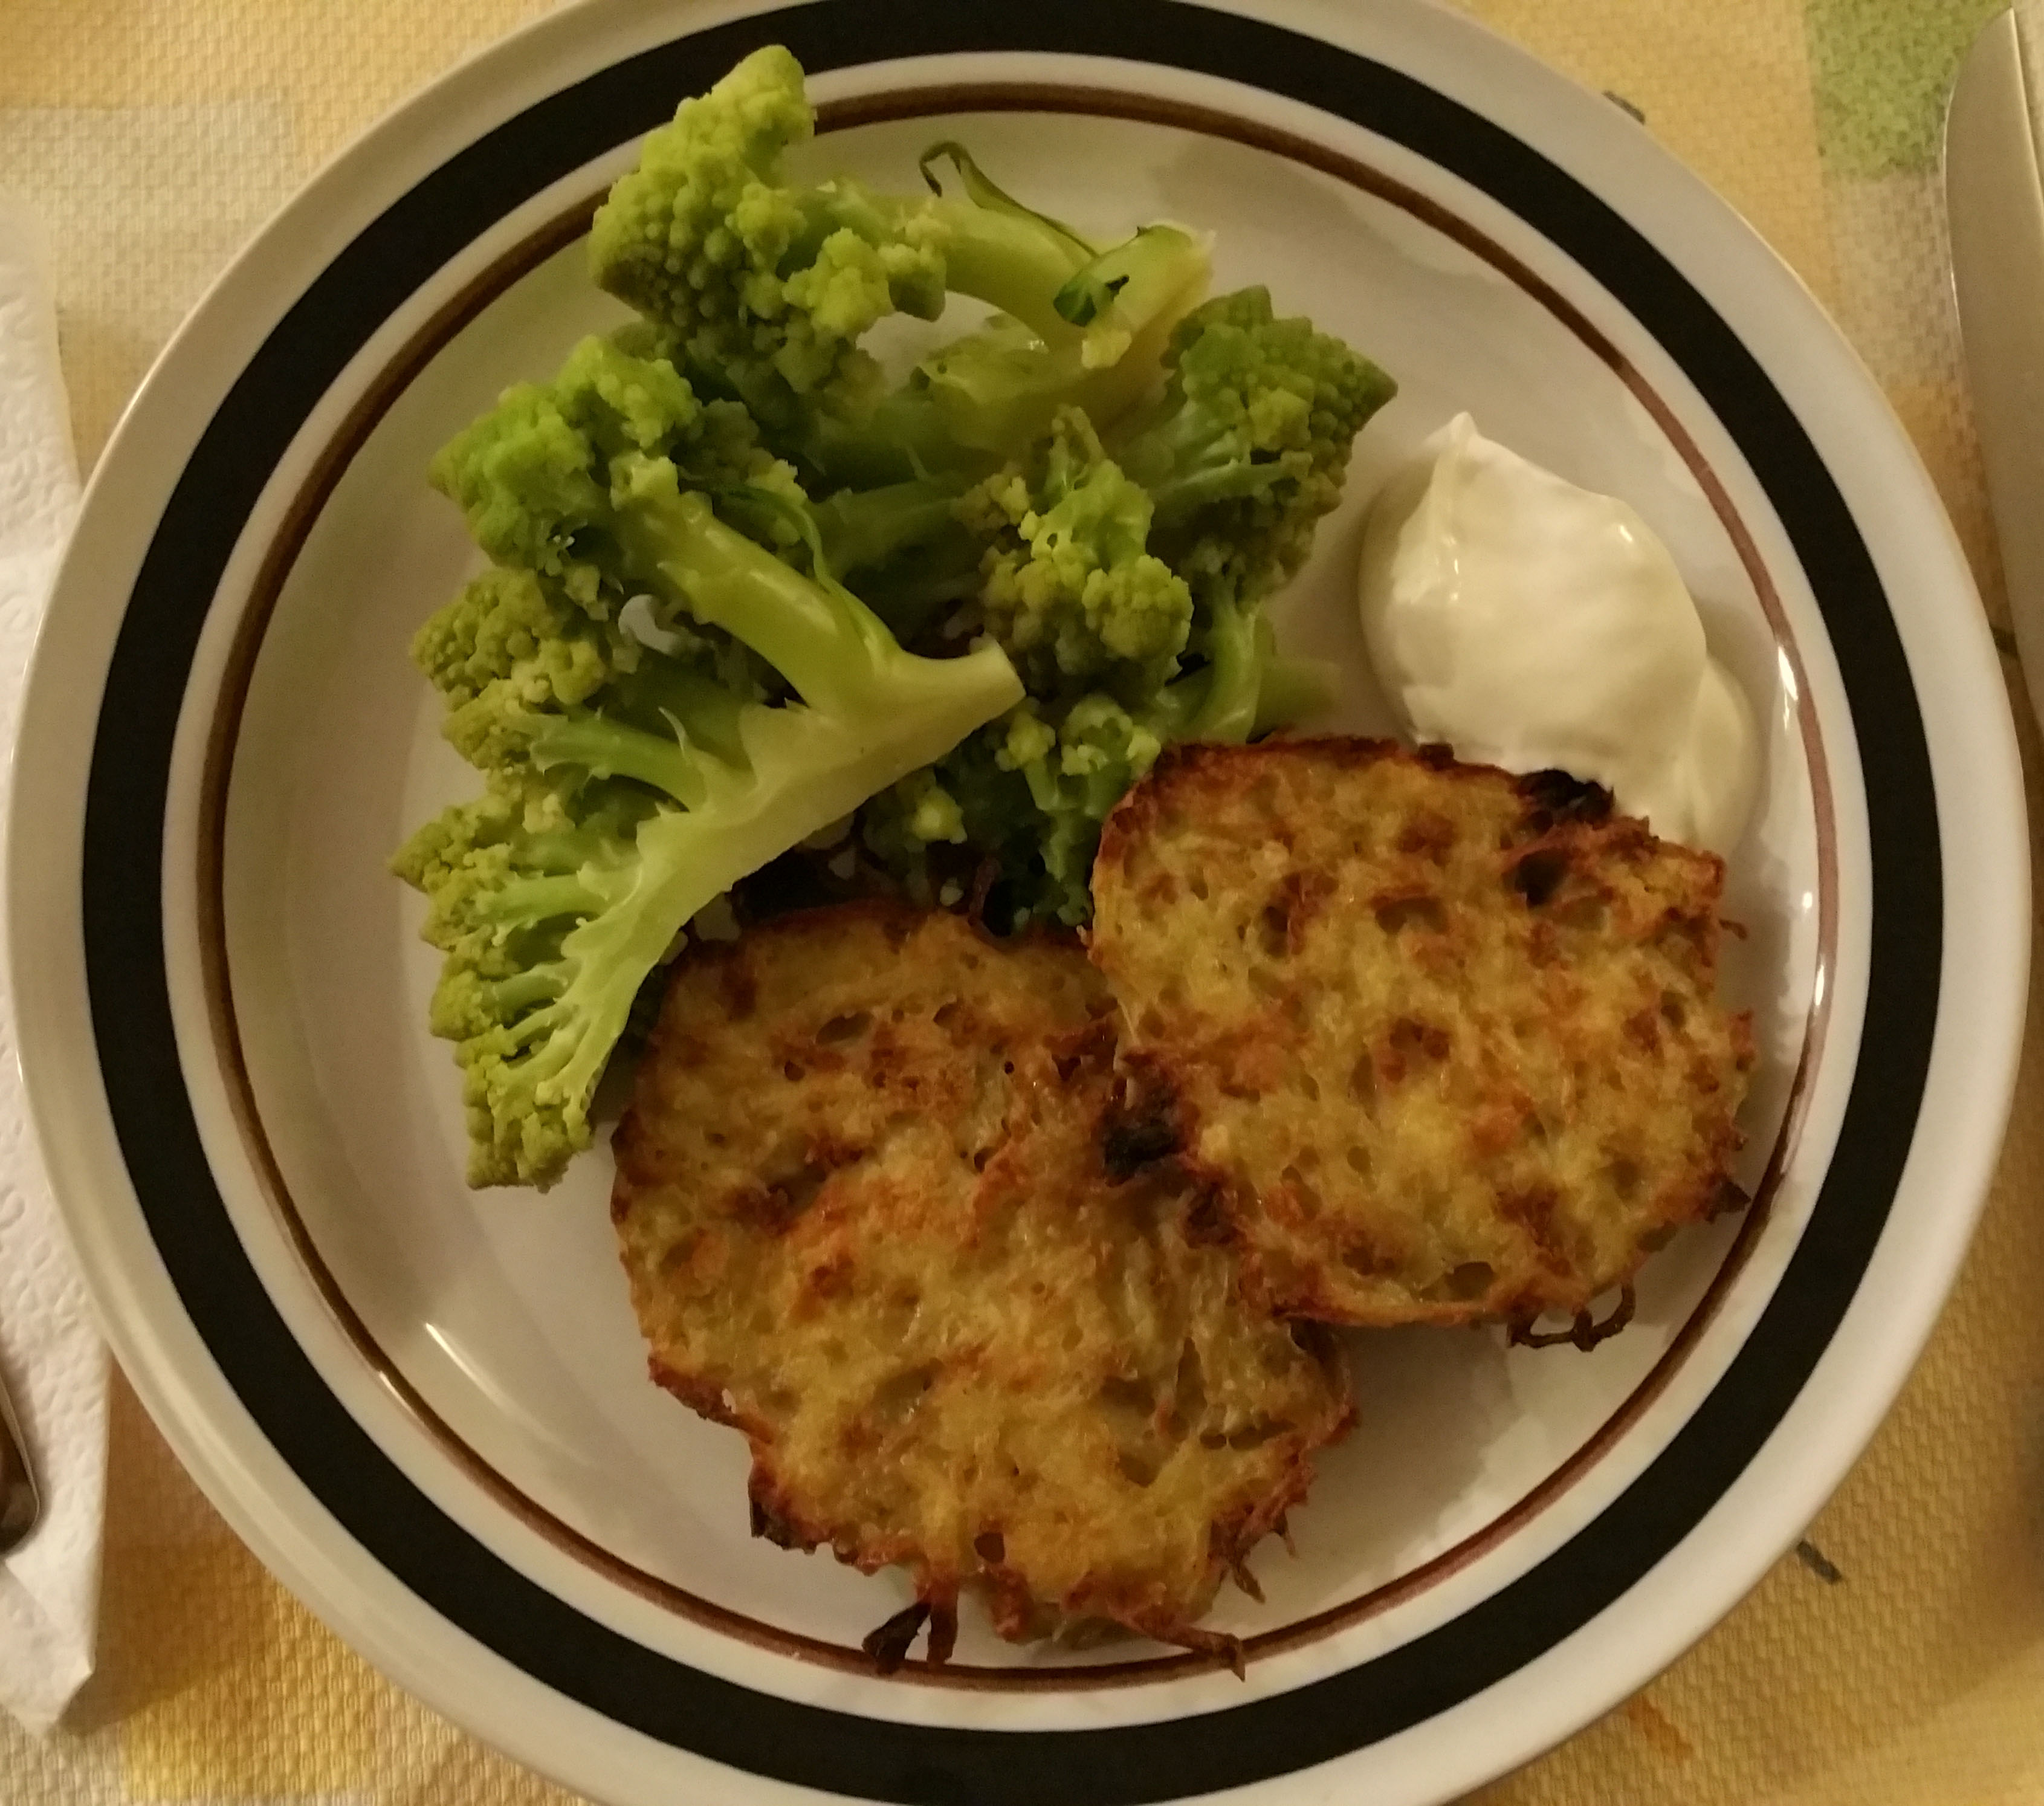
Bubbi’s Potato Pancake Recipe
From Russia with Love. Wasn’t that a movie? Why, yes it was! It was a 1963 James Bond thriller/action movie from Ian Fleming’s book by the same title. Sean Connery starred as agent 007. I was a Bond fan, as was most of my family. So this recipe for potato pancakes was a passed down from my Russian grandmother to us with love. She loved to make them for us and share the family stories from Russia that went with the meals she served to us. I loved to listen to her interesting stories about her family! Some were hard to listen to and imagine; others were quite pleasant and entertaining. They were about her life and growing up at the turn of the century during the Russian revolution. She and only two other surviving siblings (out of 11) survived the revolution and came to the United States. If you’ve ever seen the movie “Fiddler on the Roof,” the story of her immigration from Russia was similar to that.
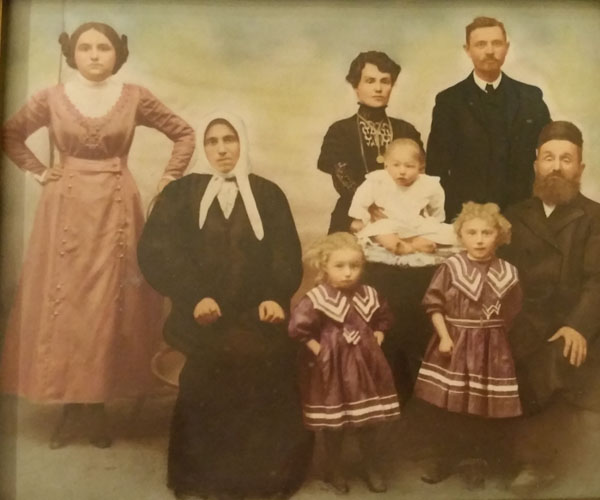
Pictured below from left to right: My grandmother at age 18 in the pink dress, her mother seated (Martha Kaplinovich), her sister Bessie and her husband Avrum, and their three children, (Jenny, Hymey, and Esther). Her father is seated on the far right with the beard and hat. This photo was originally in black and white, my mother had it colorized for her home sometime around 1974. The photo is circa 1920
I would go over to her house when I was very young because we lived nearby. I loved to have breakfast with her! She lived in a grey house with a side porch that she called the piazza. She was a petite woman with an erect bearing that commanded respect. In English Her name was Rose, and I always think of her when I see roses, even to this day. In Russian , Rose is translated to “Rhazelle,” or “Roza”. In Yiddish which was the European version of Hebrew it was “Royz”. In any language she loved roses. You see, there were rose bushes on the slope beside the stairs that went to the piazza door. When it was spring time, I could smell their fragrance as I waited for her to answer the door. Peering through the kitchen window, she’d turn her head this way and that to make out whose face was behind the lace curtain. She always wore an expression of apprehension until she saw it was me. Then, I would hear multiple clicks of lock after lock as she unbarred the door that protected her from a decaying neighborhood, where she had been broken into once while she was home. The break-in happened in the early 1970s. The robbers tied her, my grandfather, and Aunt Ruthie up, and stole what they could get. It broke my heart to hear about this, but I was so grateful they were all okay. Thank God the thieves didn’t hurt them.
Back to my visit. As she answered the door, she would give me the biggest smile and called me her Iris’l. This was her Russian/Yiddish pet name for me. (My other siblings had pet names from her, too.) Then this tiny woman would hug me as I looked up at her. She had a teased coif (hairdo) that looked like brown cotton candy–the style of the day. People back then said she resembled Rose Kennedy. It was a major compliment to be told you look like the President’s mother. We called her “our Bubbi,” which means grandmother in Yiddish. True spelling of that is “Bobe” . She always dressed well. As I grew up, she always told me how nice and pretty I looked. With a knitted brow and holding me at arms length for a good look, she would say in a heavy Russian accent,”Iris’l , you look so pretty in your new outfit, but you are too skinny.” I had Celiac disease to thank for that! “Come sit on the piazza and I will get you a nosh! What would you like?” The choices were sponge cake, mundlebread, poppy seed cookies, and even wheatena cereal. I loved all of these, but they all contained wheat. No wonder I felt so sick after leaving her home! I used to question why I never felt well around meal times.
Bubbi and I would sit and visit and she would share some of her cooking thoughts with me. I would first answer her questions until the conversation turned to the past, as it did so often. These were the stories I loved to hear–those about relatives I never met and about the Russia she fled as a young girl. Then, I would ask a question of my own, such as: “What was the name of the village where you grew up, Bubbi?” I always listened so carefully, because I loved her and felt what she felt, even at a young age. Her spoken English was still very poor, and she couldn’t read English. She had newspapers delivered to her home that were in Russian or Yiddish. The Italians I knew also got newspapers from Italy or locally news translated into Italian. As a youngster I learned to read Italian that way, inspired by my father’s mother! Back then, there were so many immigrants from Russia, Italy etc. that they made newspapers available to people who couldn’t read English.
Anyway, back to Bubbi sharing with me. “I grew up in the village of Zaslavl near the city of Minsk,” she told me. “I was a beauty then, though you might not guess it now.” Hey, was she kidding? She was a dead ringer for Rose Kennedy! She’d laugh when I would remind her of that. She then said, “Anyway, I was just coming of age prior to the Russian revolution. I had a big family of 11 brothers and sisters but only 3 of us lived to grow old. I know it sounds hard, and it was. There were no antibiotics or shots for polio or measles. It was hard to get enough food for the whole family and to keep warm and dry in the bitter Russian winters. To look at me, I was just a little bit, but I was a healthy strong girl. My cheeks were pink, and I had thick dark hair that hung down all the way to my waist. All my sisters were jealous of my hair. I used to wear it in two braids crisscrossed across the top of my head like a queen’s crown. I had the family’s dark eyes, and I used them to tease all the boys my age.” Bubbi you cad, I thought! It was hard to picture my grandmother teasing boys, but I continued to listen while smirking to myself. She said she only did it for fun, because there was only one boy she really loved and wanted to marry. His name was Maiche, which translated in English was “Morris.” She went on to tell me that they had known each other since childhood, and he was always her favorite. He even talked of marrying her when she was in her late teens. He didn’t want to live without her. Through her, I learned what to look for in real true love that would last!
Unfortunately, while she and Maiche were thinking marrying, political tensions in Russia were mounting. Life for Russian Jews became increasingly difficult. There were “pogroms” in all the villages. “Pogrom” is a Yiddish term for an organized massacre of helpless people. It was terrifying for me to hear Bubbi’s account of this at times. The Gentiles organized pogroms against all the Russian Jews. She described how they stampeded into her village on huge horses like in the movie, “Fiddler on the Roof.” The galloping of the horses sounded like a horrific thunder. The dust they kicked up looked like a tornado coming to destroy them. They looted the Jewish shops, burned Jewish homes, and raped the Jewish women. They took whatever they wanted and killed anyone who got in the way. My great-grandmother had asthma, and she had a bad attack during one of the raids in her village. My great-grandfather (Bubbi’s father) couldn’t do anything for her during the chaos. There were no doctors around–there was only chaos. There was no one to help her, so she died. I have asthma myself, and can’t imagine this! I have woken in the middle of the night gasping for air, but I had an inhaler. I hate the thought that my great-grandmother died that way. When my grandmother told the story, I could see it still affected her.
After my great-grandmother’s death, my great-grandfather decided it was time to leave Russia. He’d seen too many of his family members die. He wanted a better life for the remaining children, so he began making plans for escape. So to not be noticed, my grandmother and her brothers and sisters were taken one by one to the Poland border by guides her father paid. They were smuggled across into Poland in a small band with other Jews who were also desperate to escape. My grandmother was one of the first in the family to make the trip. After crossing the border, she made her way to Warsaw where she waited for the rest of her family. Warsaw was like heaven compared to where they had been. It was beautiful without any soldiers. The streets near the train station were paved with beautiful tiles. There were great opera houses and fine museums. The streets were full of colorful markets filled with food and trinkets. There was music and theater. It was like a new city compared to the old village she had left behind. She waited 13 months in Warsaw for her family. “It would have been a wonderful time,” she told me except that she was preoccupied worrying about her family! She wondered if she would ever see them again.
Finally they came and were all together again. Her older sister, Bessie, had the hardest time of them all. She had been married by then with a home of her own. All the plans were in place, the guide was waiting, and the bags were packed. The night before her turn to leave, the Russian soldiers got wind of her plan and raided her home. They opened all her luggage and took anything and everything they wanted–silver that had been in the family for generations, jewelry, candlesticks, and handmade linens covered with embroidery and lace that were the pride of her household. Then, the soldiers almost beat Bessie to death as her children watched. My grandmother said, “she was lucky they didn’t rape or kill her.” She was in prison for two weeks and then released. Eventually, she and her children were able to join my grandmother in Warsaw. From Warsaw they traveled to Paris, and from Paris went on to Holland where they boarded a ship sailing for Ellis Island with many other emigrants alike. The further they got away from Russia, the safer they felt. But, they weren’t to America yet. The ship they sailed on was dirty, and it was crowded. Many people were sick. Day after day the waves of the sea tossed them to and fro. My grandmother said it was hard to sleep. There was food for them, but it was terrible! She said she liked to stand on deck and look for land because the hold of the ship smelled so bad. She couldn’t wait to see the country where she and her family would be safe at last. My grandmother was only 18 years old when she experienced coming to America on such an arduous journey. No wonder she was so strong. She had to be. As I listened to her tell this story, it was hard to understand every word, because her English was so poor. But, I was both fascinated by the stories and chilled to realize these things really happened to people in my family. And I thought a burst appendix and Celiac disease was bad! What was I complaining about?
In New York City at Ellis Island, they were detained for 6 weeks while they were screened for diseases, etc. They then traveled to Boston to start a new life. She found work as a seamstress in a garment factory. Then, she met my grandfather (Joseph Millman). They married and had two daughters (my mother and Aunt Ruthie). Even though she loved Joseph, she never forgot Morris. They were separated during the revolution, and she had no idea if he survived. She never forgot the friends and neighbors and family members lost. This is making a long story short, to say the least, because I could literally write a whole book on my grandmother’s life and her incredible story. My grandmother lived with Joseph until my mother was 10 years old in May 1942. That day, it was a sunny afternoon. While my grandmother was at work, my grandfather was heading up the street where they lived to go home. At the same time my mother was playing with a friend nearby. Suddenly there were fire engines and my mother and her friend ran up the street to see what it was happening. On the way, she met her father. He stopped her and took her by the hand. As they approached their home, they soon realized that it was on fire. In all the excitement, my grandfather fell dead of a heart attack while holding my mothers hand. She kept trying to shake him to wake him up. But he never responded! The impact that this had on my mother was lifelong. She never got over the feeling of abandonment after that. She loved her father, and it hurt her deeply that he died right in front of her. My mother was also a strong woman as a result. Hardships in life can either make or break us. My mother and grandmother chose strength, and moving on over crumbling due to hardship. I am so grateful for these role models in my life, where giving in to weakness was never a thought!
To continue, my grandmother went on to raise her two daughters and work hard in Boston. Later on, around the time my mother was 27 and married with children of her own, another interesting thing occurred. She was walking to work one morning. As she was beginning to open the door to the factory she looked down the street, and noticed a man walking toward who looked vaguely familiar. She walked toward him and, as she got closer, he recognized her. Her mouth dropped. It was Morris, her old love, from Russia. Well, they immediately realized (through just a few words) that they were both widowed with children. They agreed to meet after she got off work. Was this coincidence–that he had been recently widowed also? I doubt it! My grandmother was a praying, God-fearing woman. This was God’s answer to her prayers! You know, they fell back in love and soon married. They were in their 50’s by then. Morris was well to do in a fur business that he had worked hard for. Nothing was handed to either one of them. And you know, he took very good care of my grandmother for the remainder of her years. And, my grandmother never had to work again. Finally, she reached a place of peace and rest provided by the man she never forgot and always wanted to marry. Fairy tales really can come true! She went on to make many “potato Latkes” as they called them, and here is her amazing recipe. It is simple, passed onto me from Russia with love and through several generations to mine! My grandmother was my 007 agent. Thanks for allowing me to share!
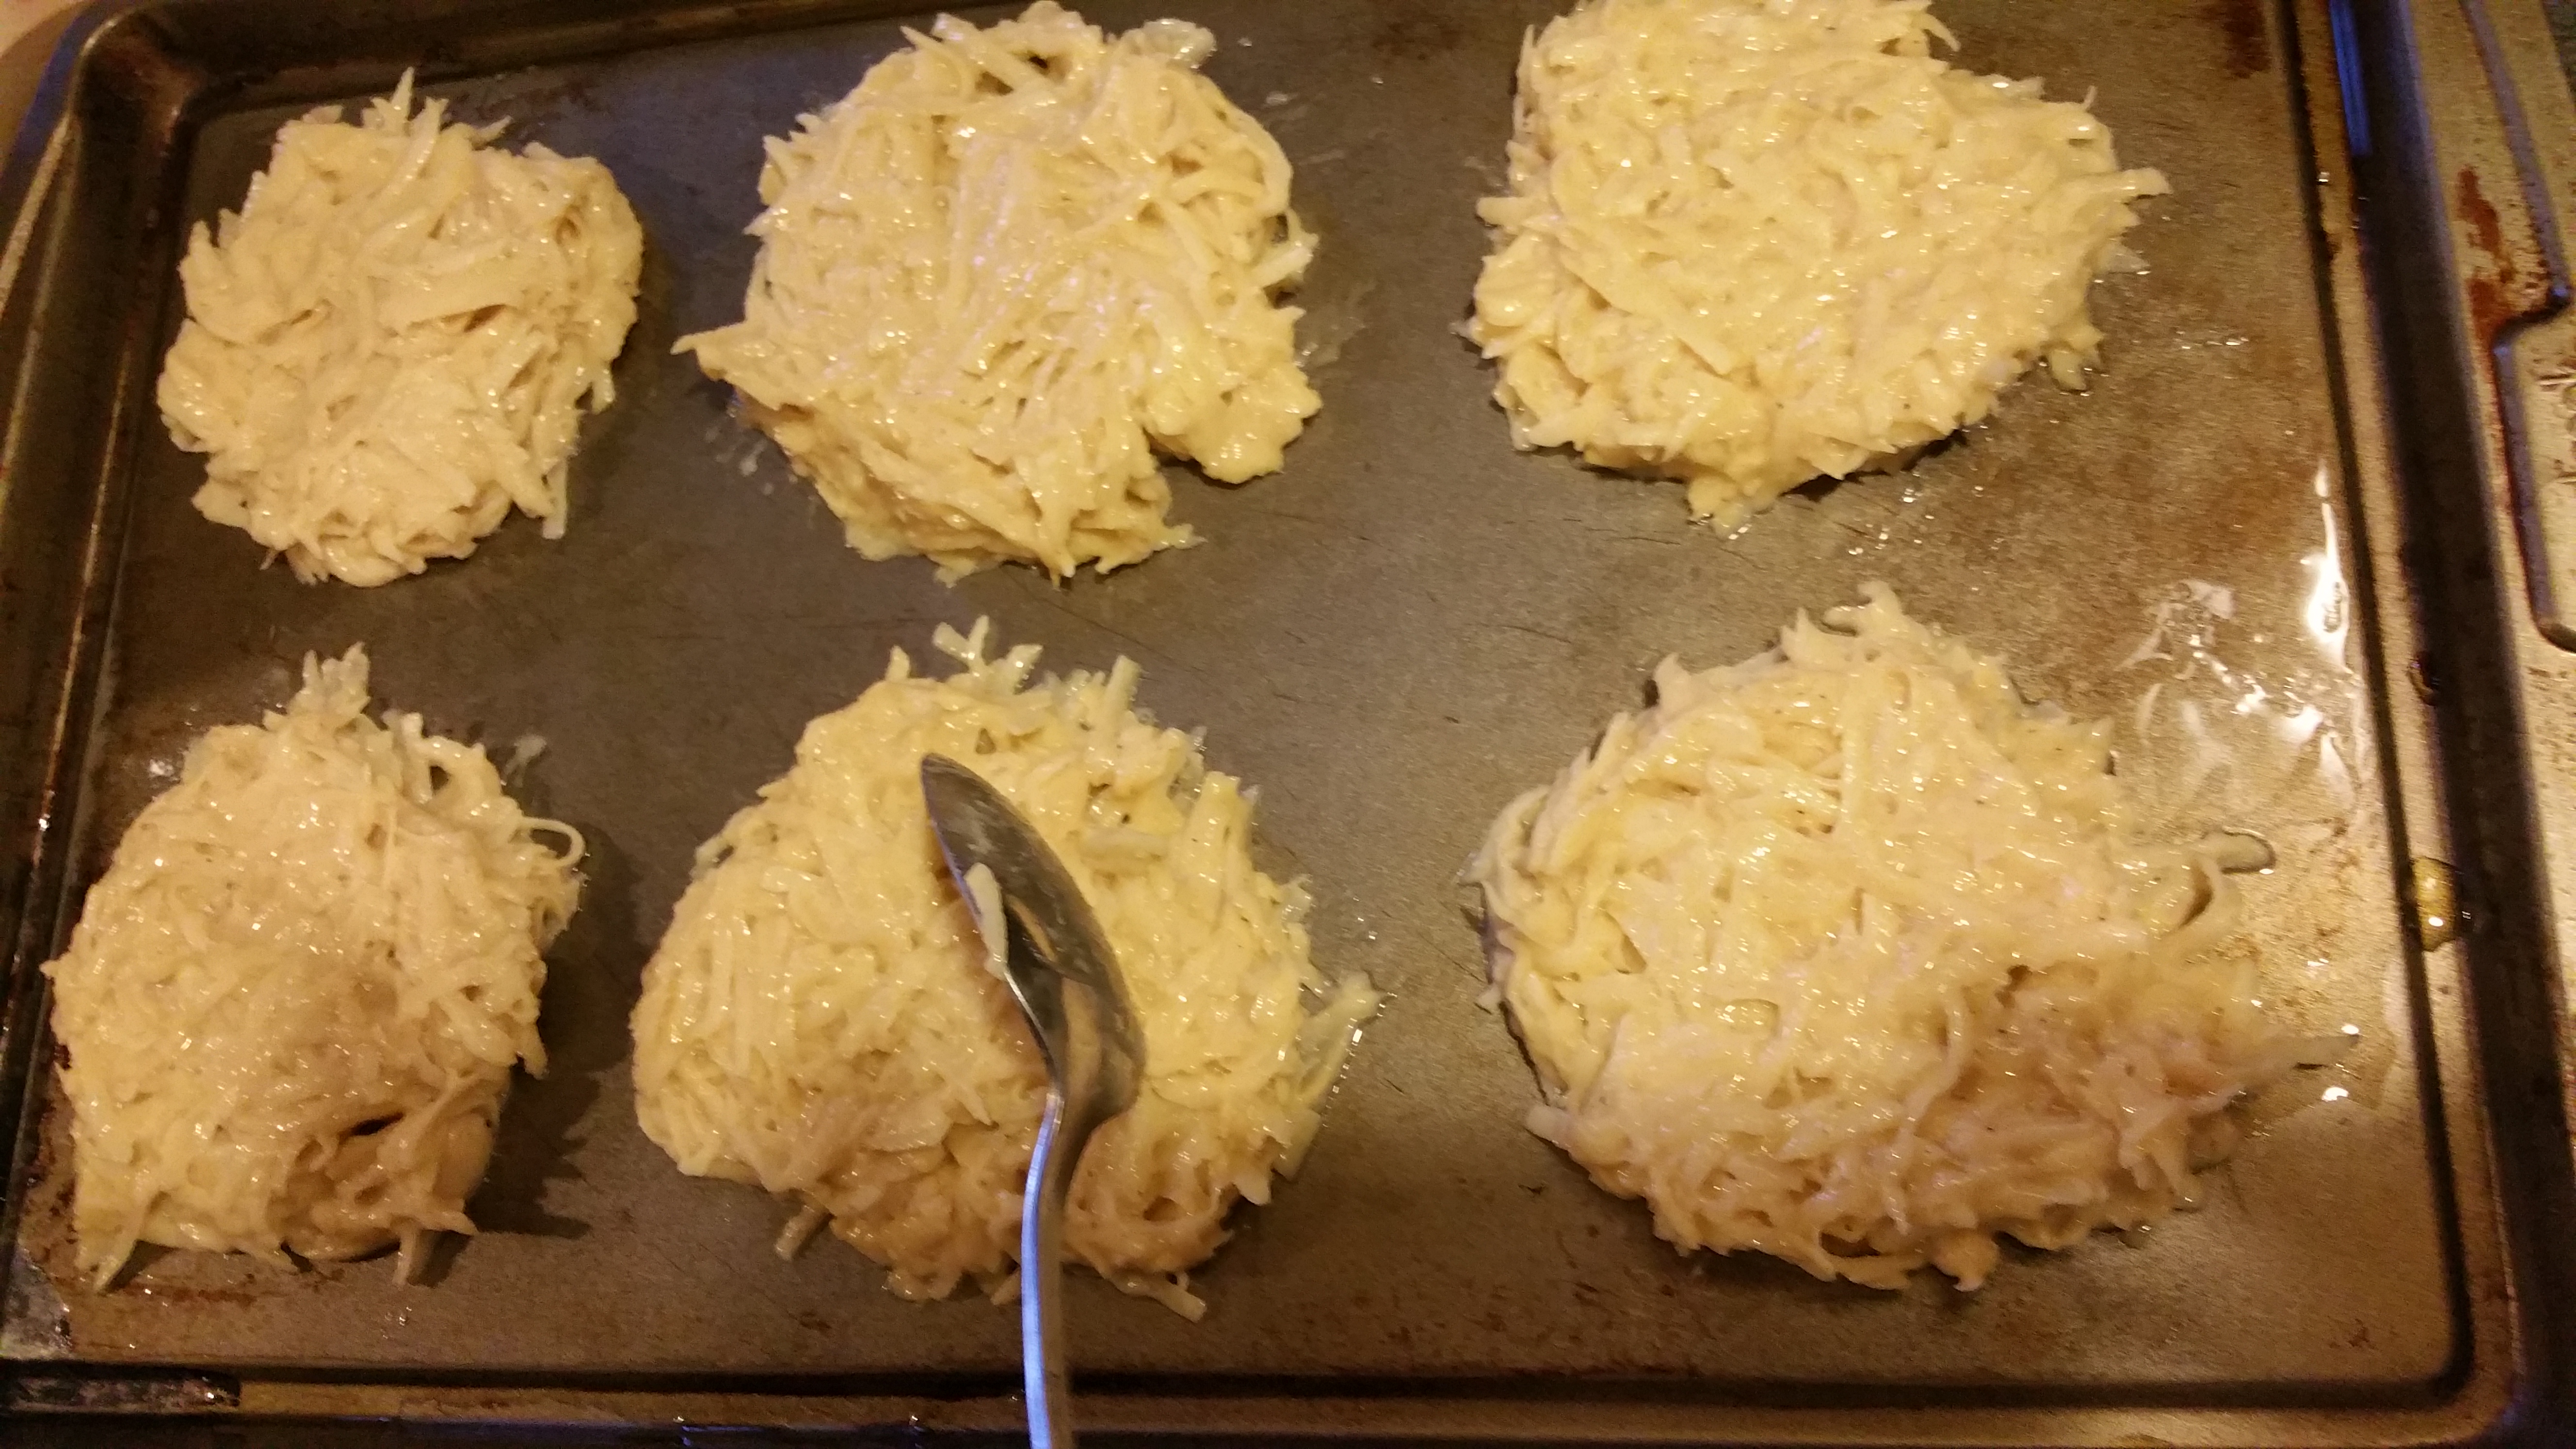

POTATO LATKES (PANCAKES)
Ingredients:
4 large russet potatoes
1 small grated onion (or onion powder sprinkled in)
2 eggs
1/3 cup of gluten-free flour mix
Olive oil to coat cookie sheet with (or vegetable oil for frying if you choose to fry the pancakes)
Pepper
Directions:
1. Preheat oven to 350 degrees.
2. Shred all 4 potatoes with a hand vegetable grater or food processor. Place into a mixing bowl.
3. Beat the eggs together well.
4. Add grated onion or onion powder, mix together well.
5. Then add the flour mix and stir till smooth as possible.
6. Add the grated potatoes to mix and fold in well. Add a sprinkle of pepper and mix in.
7. Spoon potato mixture (measuring about a half cup) onto cookie sheet. Flatten to about 4-inch round cakes.
8. Bake 30 minutes turning once after 15 minutes.
9. At the end you can broil for just a few moments to crisp them up.
Variation: If you prefer to fry them:
In a large skillet, heat stove to medium heat, drop potato mixture in pan to form 1/2 cup measurement of cakes like instructed in baking. Flatten cakes till they are round, but not too thick. Cook until golden brown about 4-5 minutes. Turn once and cook an additional 4-5 minutes. Cook until crispy.
Serve with sour cream, a favorite meat, and vegetable.
The latkes are also good served with applesauce in place of the sour cream. My family has used both.
These can also be served as a breakfast dish with white fish, scrambled eggs, and a favorite fruit.
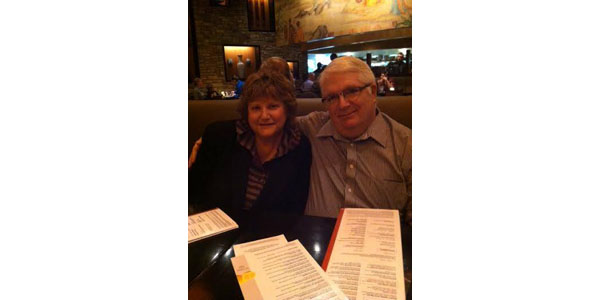
My First Visit to a Chinese Restaurant Since my Celiac Disease Diagnosis
Wow! I could hardly believe it! After years of not being able to eat Chinese food out in a restaurant because of the gluten issue, finally there it was: a Chinese restaurant with a gluten-free menu. My favorite food, and it was gluten free! Woo! Hoo!–As they say here in the West. We had moved to Seattle from the East Coast to live near our son, and there was my reward. That and seeing and living near our son again was, literally, like dying and going to heaven. I must have spent the whole meal saying ummmmmm, no less than 30 times. My son, his girlfriend Samantha, and my husband were getting a kick out of me saying that through the whole meal. My goodness, I was like a kid in a candy store. After all, it had been 20 years. Before my diagnosis, we had a Christmas Eve Tradition of going out for Chinese food. It was left on hold for a few years. I was disappointed! And Before moving to Seattle and while waiting for this momentous occasion, I was so desperate for Chinese food that I was trying to learn to make it gluten free at home. I didn’t do half bad, but it just wasn’t the same. So, my Swedish friend Gunilla felt so badly for me that she asked if she could make me a Chinese meal for my birthday one year. I responded, “Yes, of course! How about egg fu yong?” She agreed, but had no idea what she was getting into. It was such a process to make it, I thought she was going to cry! But being the loving friend she is, she finished it and then said, “All that work for a simple stupid omelette! How ridiculous.” We laugh about it now. Gunilla has an incredible sense of humor, and I love that about her. So, now when she visits me in Seattle, I’m sure she will love to sit in the restaurant and be served and just enjoy without the hassle. Just think Gunilla, no dishes! And, a Ferris wheel ride! Hint! Hint!
My son told me there were a lot of gluten-free options at some of the restaurants in the Seattle area. He certainly knew the bait me that would entice me to come move here: my son and Chinese food! A winning combination, for sure. Well, I haven’t been disappointed. While it can be a bit risky in some places with cross contamination, it has sure felt good to be able to eat out again. Thanks Paul–this has been a blessing. I’m so glad we came, and thanks for all you’ve done. Here are two photos of our visit to PF Changs in the Seattle area when we first arrived almost two years ago. And, I’m still having fun!

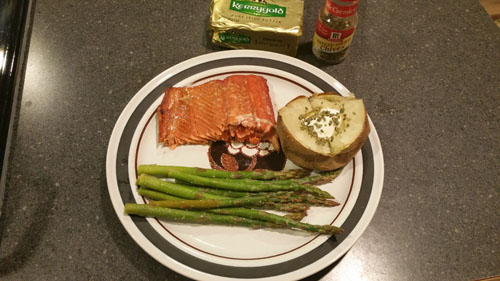
My Own Wild Broiled Salmon
This is a recipe I like to make for my husband. It’s a healthy recipe, and I’m always encouraging him to eat healthy meals and stay away from prepared foods from fast food restaurants. He was a junk food junky for many years in his youth. So when he married me and over time, I have swayed him into making healthier choices, especially when eating out in restaurants. My having to be gluten free at home has worked for his good. Because he wanted me to get well and heal, he ate gluten free at home with me. After a while, he realized how good the food was, and he couldn’t tell the difference between gluten free foods and foods that contained wheat and gluten. He began to prefer my meals over restaurants. I was very pleased he was enjoying my cooking! And, I was enjoying him doing the dishes. This is his part in helping me. Lol!
One of his favorite meals was spaghetti with meat sauce, a favorite Italian meal I often made for him and my son. Lasagna was another favorite of theirs. They thought these recipes were never going to be the same. And at first, I have to admit, it took me a long time to find a good gluten-free pasta. Once I did, none of us could tell the difference, and my Italian meals were saved and did not have to be deleted from the menu. Thank God! Since I was of Italian descent, I wasn’t really willing to give up those wonderful Italian meals inspired by my grandmother. My mother also enjoyed making some of her mother-in-law’s Italian dishes. Thank God society has caught on to gluten-free living.
So, enjoy this meal of salmon, baked potatoes, and asparagus!
BROILED SALMON
Ingredients:
1-1/2 pounds of salmon fillets
1 fresh lemon
Garlic powder to taste
Salt, very light
1/3 cup of gluten-free, low-sodium soy sauce
1/4 cup agave or maple syrup (I use Wholesome Foods agave, as it is certified gluten free)
1/3 cup water
1/4 cup extra virgin olive oil
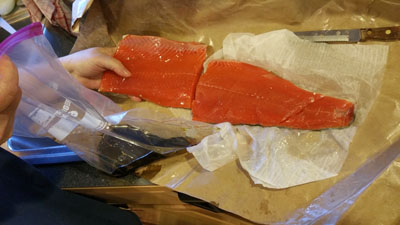
Directions:
Note: Before beginning this fish recipe, there’s something I do while the fish marinates in the refrigerator. The last hour of marinating the fish, I put some potatoes in the oven to bake for an hour. When the potatoes are done, I take them out and wrap them in foil to keep them warm. Then, I begin broiling the fish. While the fish broils, which is only for about 12 minutes, the asparagus can be steaming. Then, everything is done at the same time, and nothing is cold.
1 – Rinse salmon fillets with a little water from the sink (I do this just in case the fish might have been exposed to some grams of gluten accidentally during cutting and packaging at the store). For this reason, I rinse all my meats! Then, pat dry with a paper towel and place fillets in a Ziploc bag for marinade.
2 – In a small bowl , mix together low sodium soy sauce, agave, water, and olive oil.
3 – Pour marinade over fish in the Ziploc® bag.
4 – Close the bag tightly. Be sure there are no leaks before gently tossing the fish in marinade.
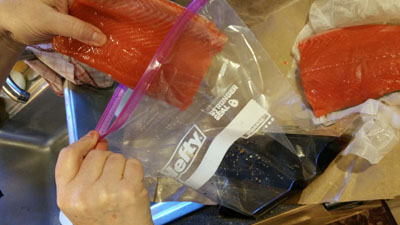
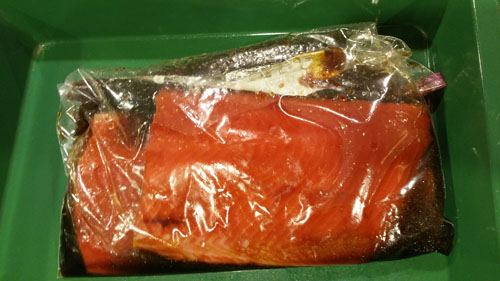
5 – Place the bag with the fish and marinade on a tray in the refrigerator for about 2 hours. This will give the fish a good amount of time to absorb the flavors. Note: If you want a less strong marinade, you can reduce the time to 1 hour in the refrigerator. But I find that the two hours gives the fish a chance to really absorb some nice flavor’s.
6 – Preheat the oven to low broil.
7 – Lightly grease a pan. Take the fish and a small amount of marinade out of Ziploc® bag and place the fish on the pan to be broiled.
8 – Squeeze a small amount of fresh lemon over the fish.
9 – Broil on low broil for about 12 minutes. To test the salmon, use a fork–if there is no raw pink in the middle and it flakes off the fork easily, it is done. You don’t want to over cook, because this makes the salmon (or any kind of fish) too dry. The less cooking time, the better. You want it to be moist!
Baked Potatoes:
Preheat oven to 400 degrees.
Bake for 1-hour until crispy on the outside and soft on the inside. Top with fresh chives, a pat of unsalted butter, and a teaspoon or two of low fat sour cream. If you are lactose intolerant, you can use a brand of gluten-free, soy sour cream, or yogurt. The same with the butter; there is gluten-free and dairy-free butter and cheeses.
Steamed, sautéed Asparagus:
1 – Wash a bunch of asparagus spears well and then pat dry with a paper towel.
2 – Pour about 2 tablespoons of olive oil in the bottom of a non-stick pan.
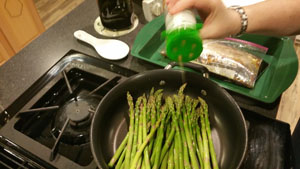
3 – Place asparagus in the pan and season with garlic powder, parsley, salt, onion powder, and pepper to taste.
4 – Saute’ the asparagus on low to medium till al dente (not soft). It should be a little crispy but also not raw.
5 – Turn off the burner, cover, and let it steam for just a few minutes. This will allow the asparagus to absorb the flavors of the seasonings.
Mom’s Chicken Fried Cubed Steak with Cream Gravy
Mom’s chicken fried cubed steak memories:
Since my mother grew up in a kosher home, this was a recipe she only made “once in a blue moon,” so to speak. When she made this recipe, it was a real treat. Her greatest joy in life was seeing her family happy. She was the most sacrificial woman I knew! My mother was the type of woman who would have literally died for her children. She loved us that much! True, we could feel a little smothered at times, but there was never any doubt that we were loved by her. Sometimes, we heard it loud and clear. And, she didn’t mince words letting us know the sacrifice involved, and the respect she deserved! She was a very funny woman, even when she was serious. People thought she was cute and funny. When Fran (Fran Drescher) the Nanny’s show came out in the 90’s (1993-1999), my friends I grew up with never let me live it down. They would say things like”did you know that’s how your mother sounds?” No kidding! My mother’s tone and accent, was just like Fran. Oh boy! As a kid I remember wondering if there was something wrong with my mother, because she talked so nasal. But when I learned a famous actress sounded like that, it made all the difference! (Well, sort of, anyway!) My mother was attractive, but not exactly like Fran who looked like a super model. And yes, at times, our home was like living in a sitcom. Whenever we were in a store for example, if I disappeared into a different aisle (heaven forbid), the entire store would soon know my name. “IIIIIrrrrriiiiisss!” Just imagine Fran, the Nanny yelling this, because that’s exactly how it sounded. Of course, I would look around, and say,”I don’t know any Iris.” Until my mother found me, and then I’d get dirty looks for being unkind to my mother. Oh brother! Although hard at the time, what I wouldn’t give to hear her yell, “IIIIIrrrrriiiiisss!” one more time in aisle 7. I do miss her.
In the area of food, I remember she would often make something special and fun like this steak recipe on a winter Sunday when we may have been housebound when, perhaps, traveling on the roads anywhere was difficult. Many times my father would make the suggestion. He’d say, “Charlotte, lets make something fun for the kids to eat.” Of course, he was included in that! After the special meal we had game time, which included games like Rock’em Sock’em Robots®, Battleship, or chess (my father and older brother Alan would play together). If it was a real snowy day, we would delve into Monopoly® or Risk. Whatever we did together, we had fun! My father was all about fun. My mother often wondered if he had had kids just so he could play with them. He was like a big kid himself, and I loved that about him! Even when times were tough, he always found ways to have fun whether with us, family members, friends etc. He found a way. I think my mother loved that about him too, since she grew up in such a serious family.
There were four of us kids in the family. Between my older sister and youngest brother, there was a 13-year difference with Alan and me in between. My youngest brother Lance was still a baby as I’m remembering this particular recipe. Often times, my mother or I would do something special with him, while Alan and Dad played chess. Or “Little Lancel” (as my Bubbie called him), was content to play in his playpen occupying himself with his toys and imagination. He was a jovial little guy! You could tell he was always thinking and planning the next activity, even as a baby. He looked just like a little version of my father–a little teeny Lenny, all squished up. He was cute!
Before game time, my mother and father would put together a dish like this. It was nice for us kids to see the two of them cooking together, since most of the time it was just my mother doing the cooking during the week while we were at school and my father was at work. That’s how it was back then–we had my mother home during the day tending to the house and the family. It brought us a sense of warmth and security to know she was waiting for us at home each day with snacks and then a good meal with the support and love we needed. Discipline was involved, too Oh gosh, we can’t forget that! We hated it as kids but are so thankful for it today! It taught us accountability, respect, and many other valuable tools to get us through life. My mother was so busy raising 4 children, helping a disabled sister and my grandmother, and caring for the home, that she had little time to put up with our shenanigans. She had a mantra, “Behave or die!” That was it. It taught us home values and a lot of discipline. We are strong individuals today, I’m convinced, because of her.
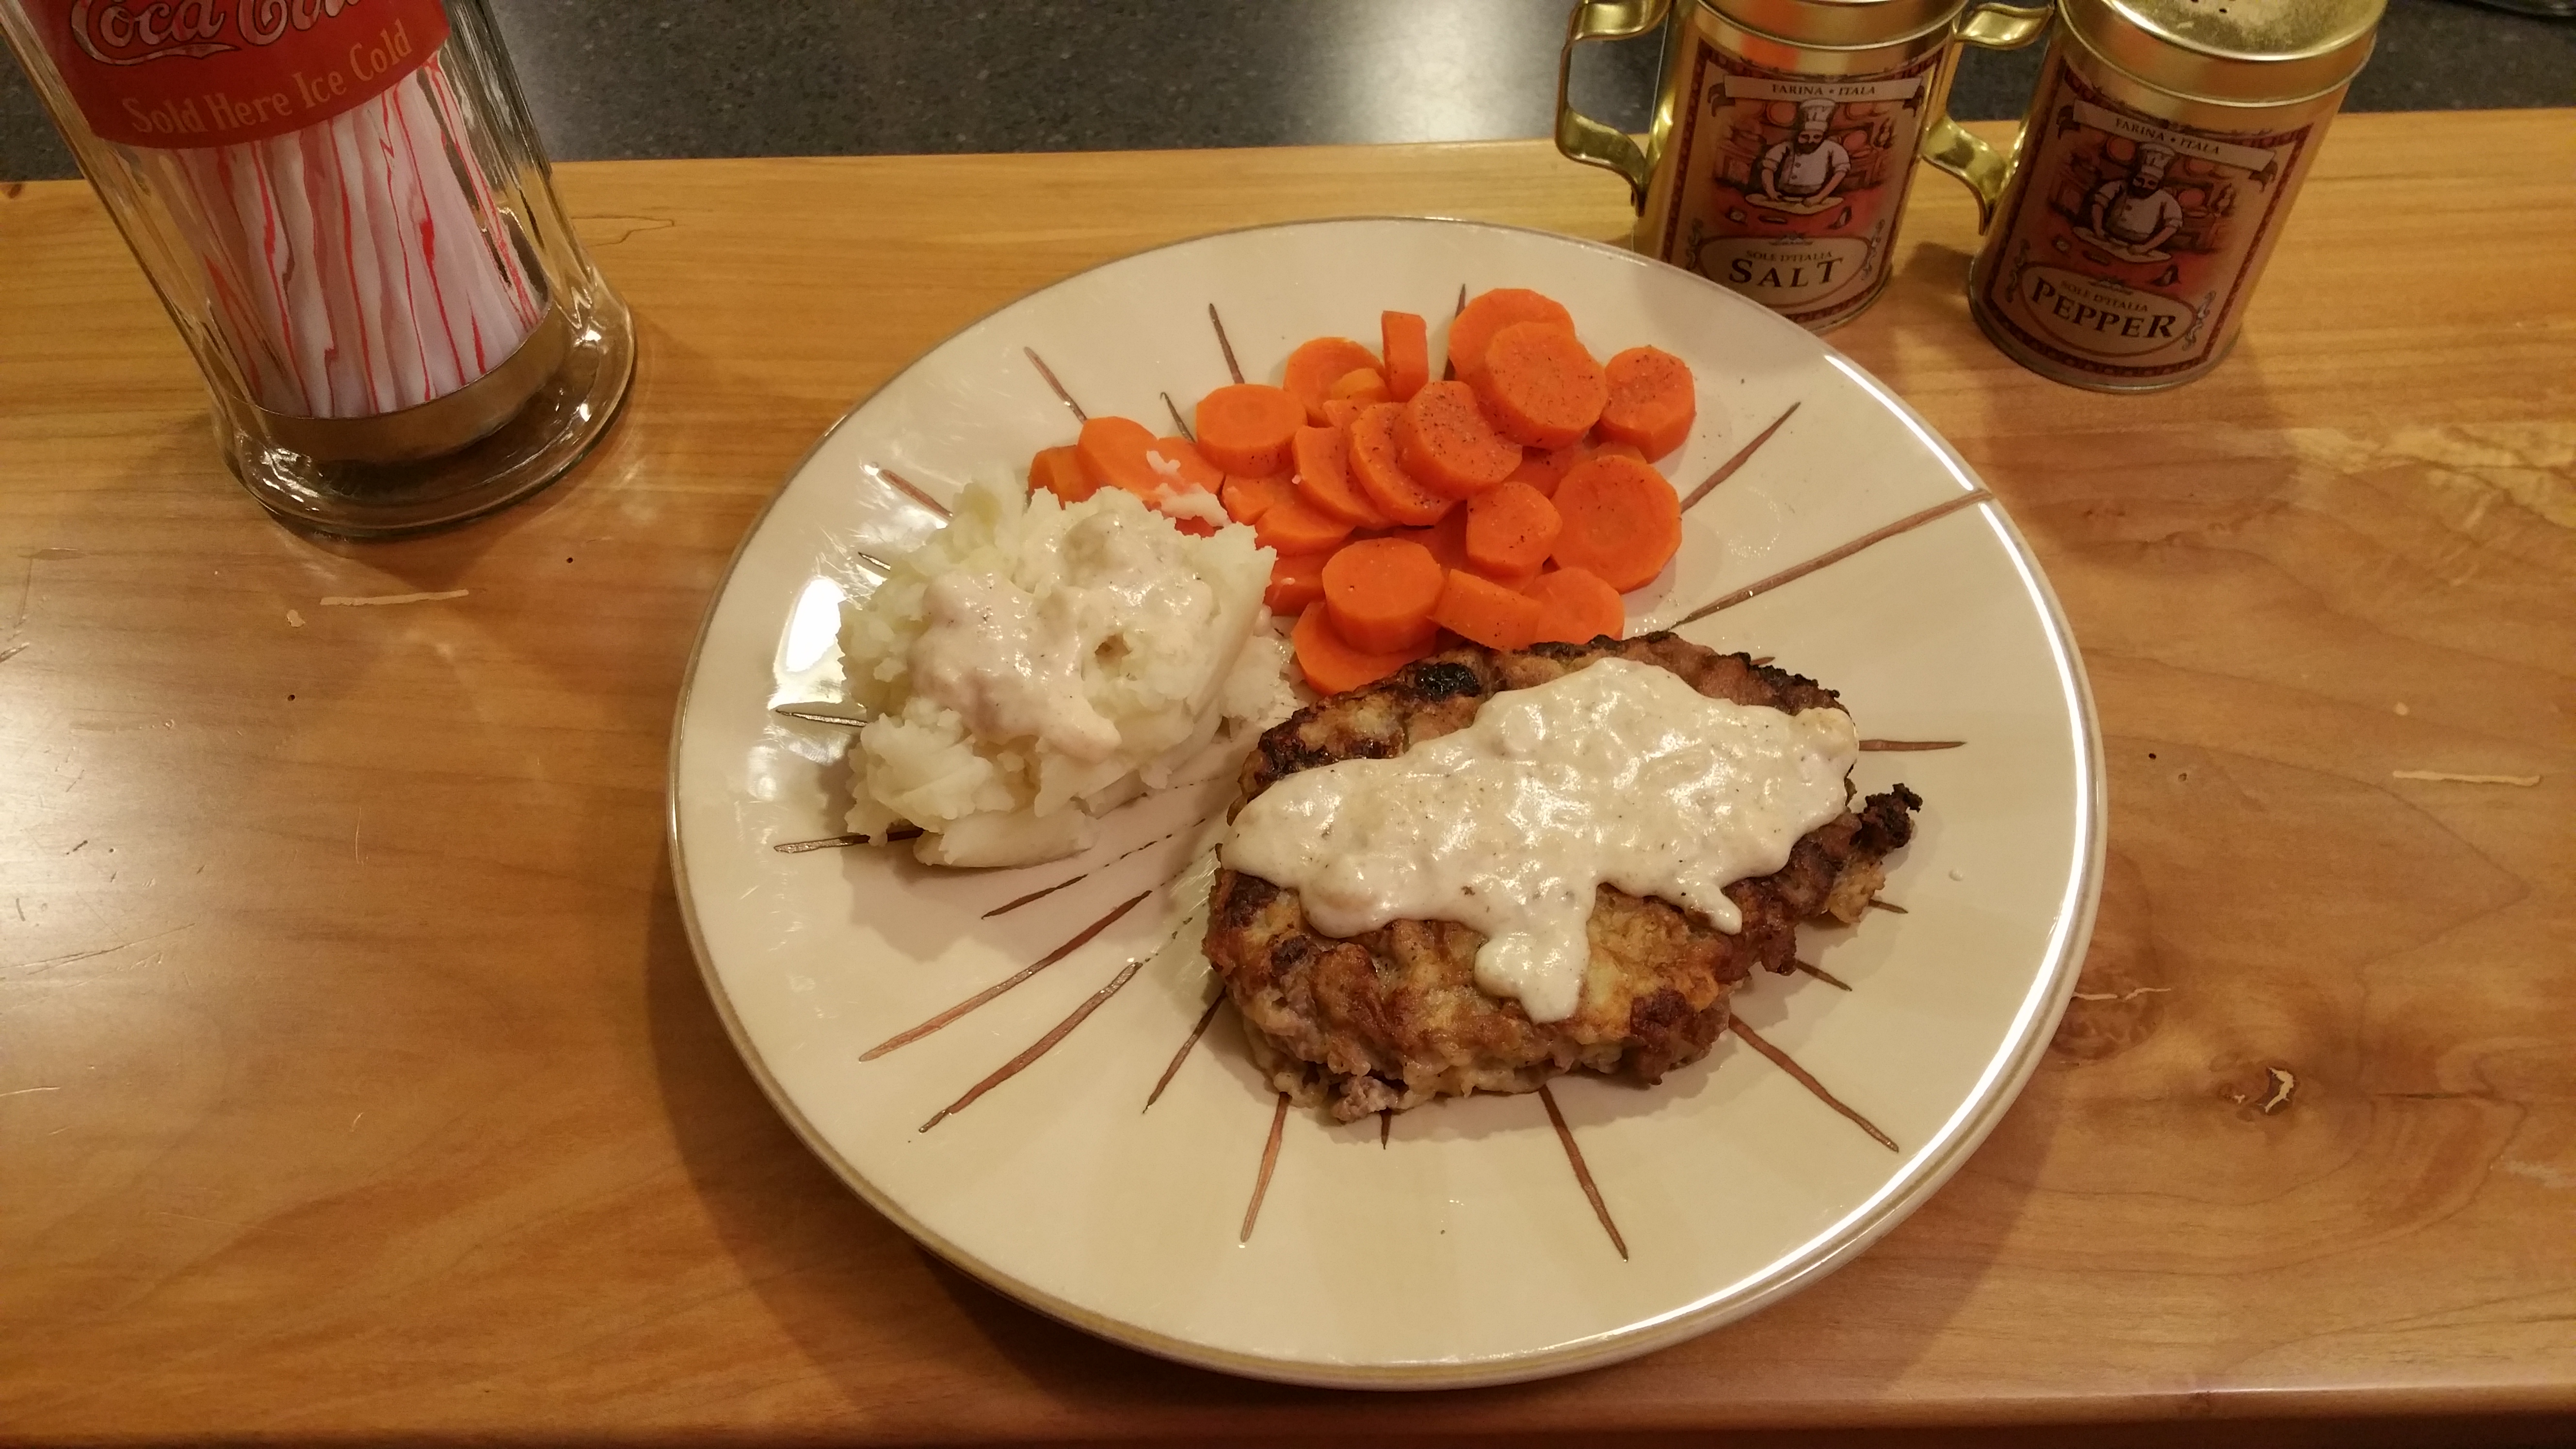
So, here is my mother’s recipe. I hope you enjoy it! It is a good winter weather comfort food and a fun meal. I come from a long line of good cooks. And, thank goodness I have learned to improvise with gluten-free ingredients!

Ingredients:
4 beef cutlets (known as cubed steaks)
1 to 2 eggs
1/2 cup of regular milk or almond milk if you have a lactose intolerance
Cooking oil (I use extra virgin olive oil) about 3 – 4 tablespoons
Black pepper
White pepper
Salt (I use a pinch or so, not much as I try to keep it low sodium)
Directions:
Start by beating together the eggs and milk and pour it into a shallow pan for dipping. Set aside.
Mix together peppers (white and black) and salt; sprinkle on both sides of the cube steaks.
Pour the flour into another shallow pan. Coat each cubed steak with gluten-free flour; shake off the excess flour. Dip each cubed steak into eggs and milk and then into the flour mixture.
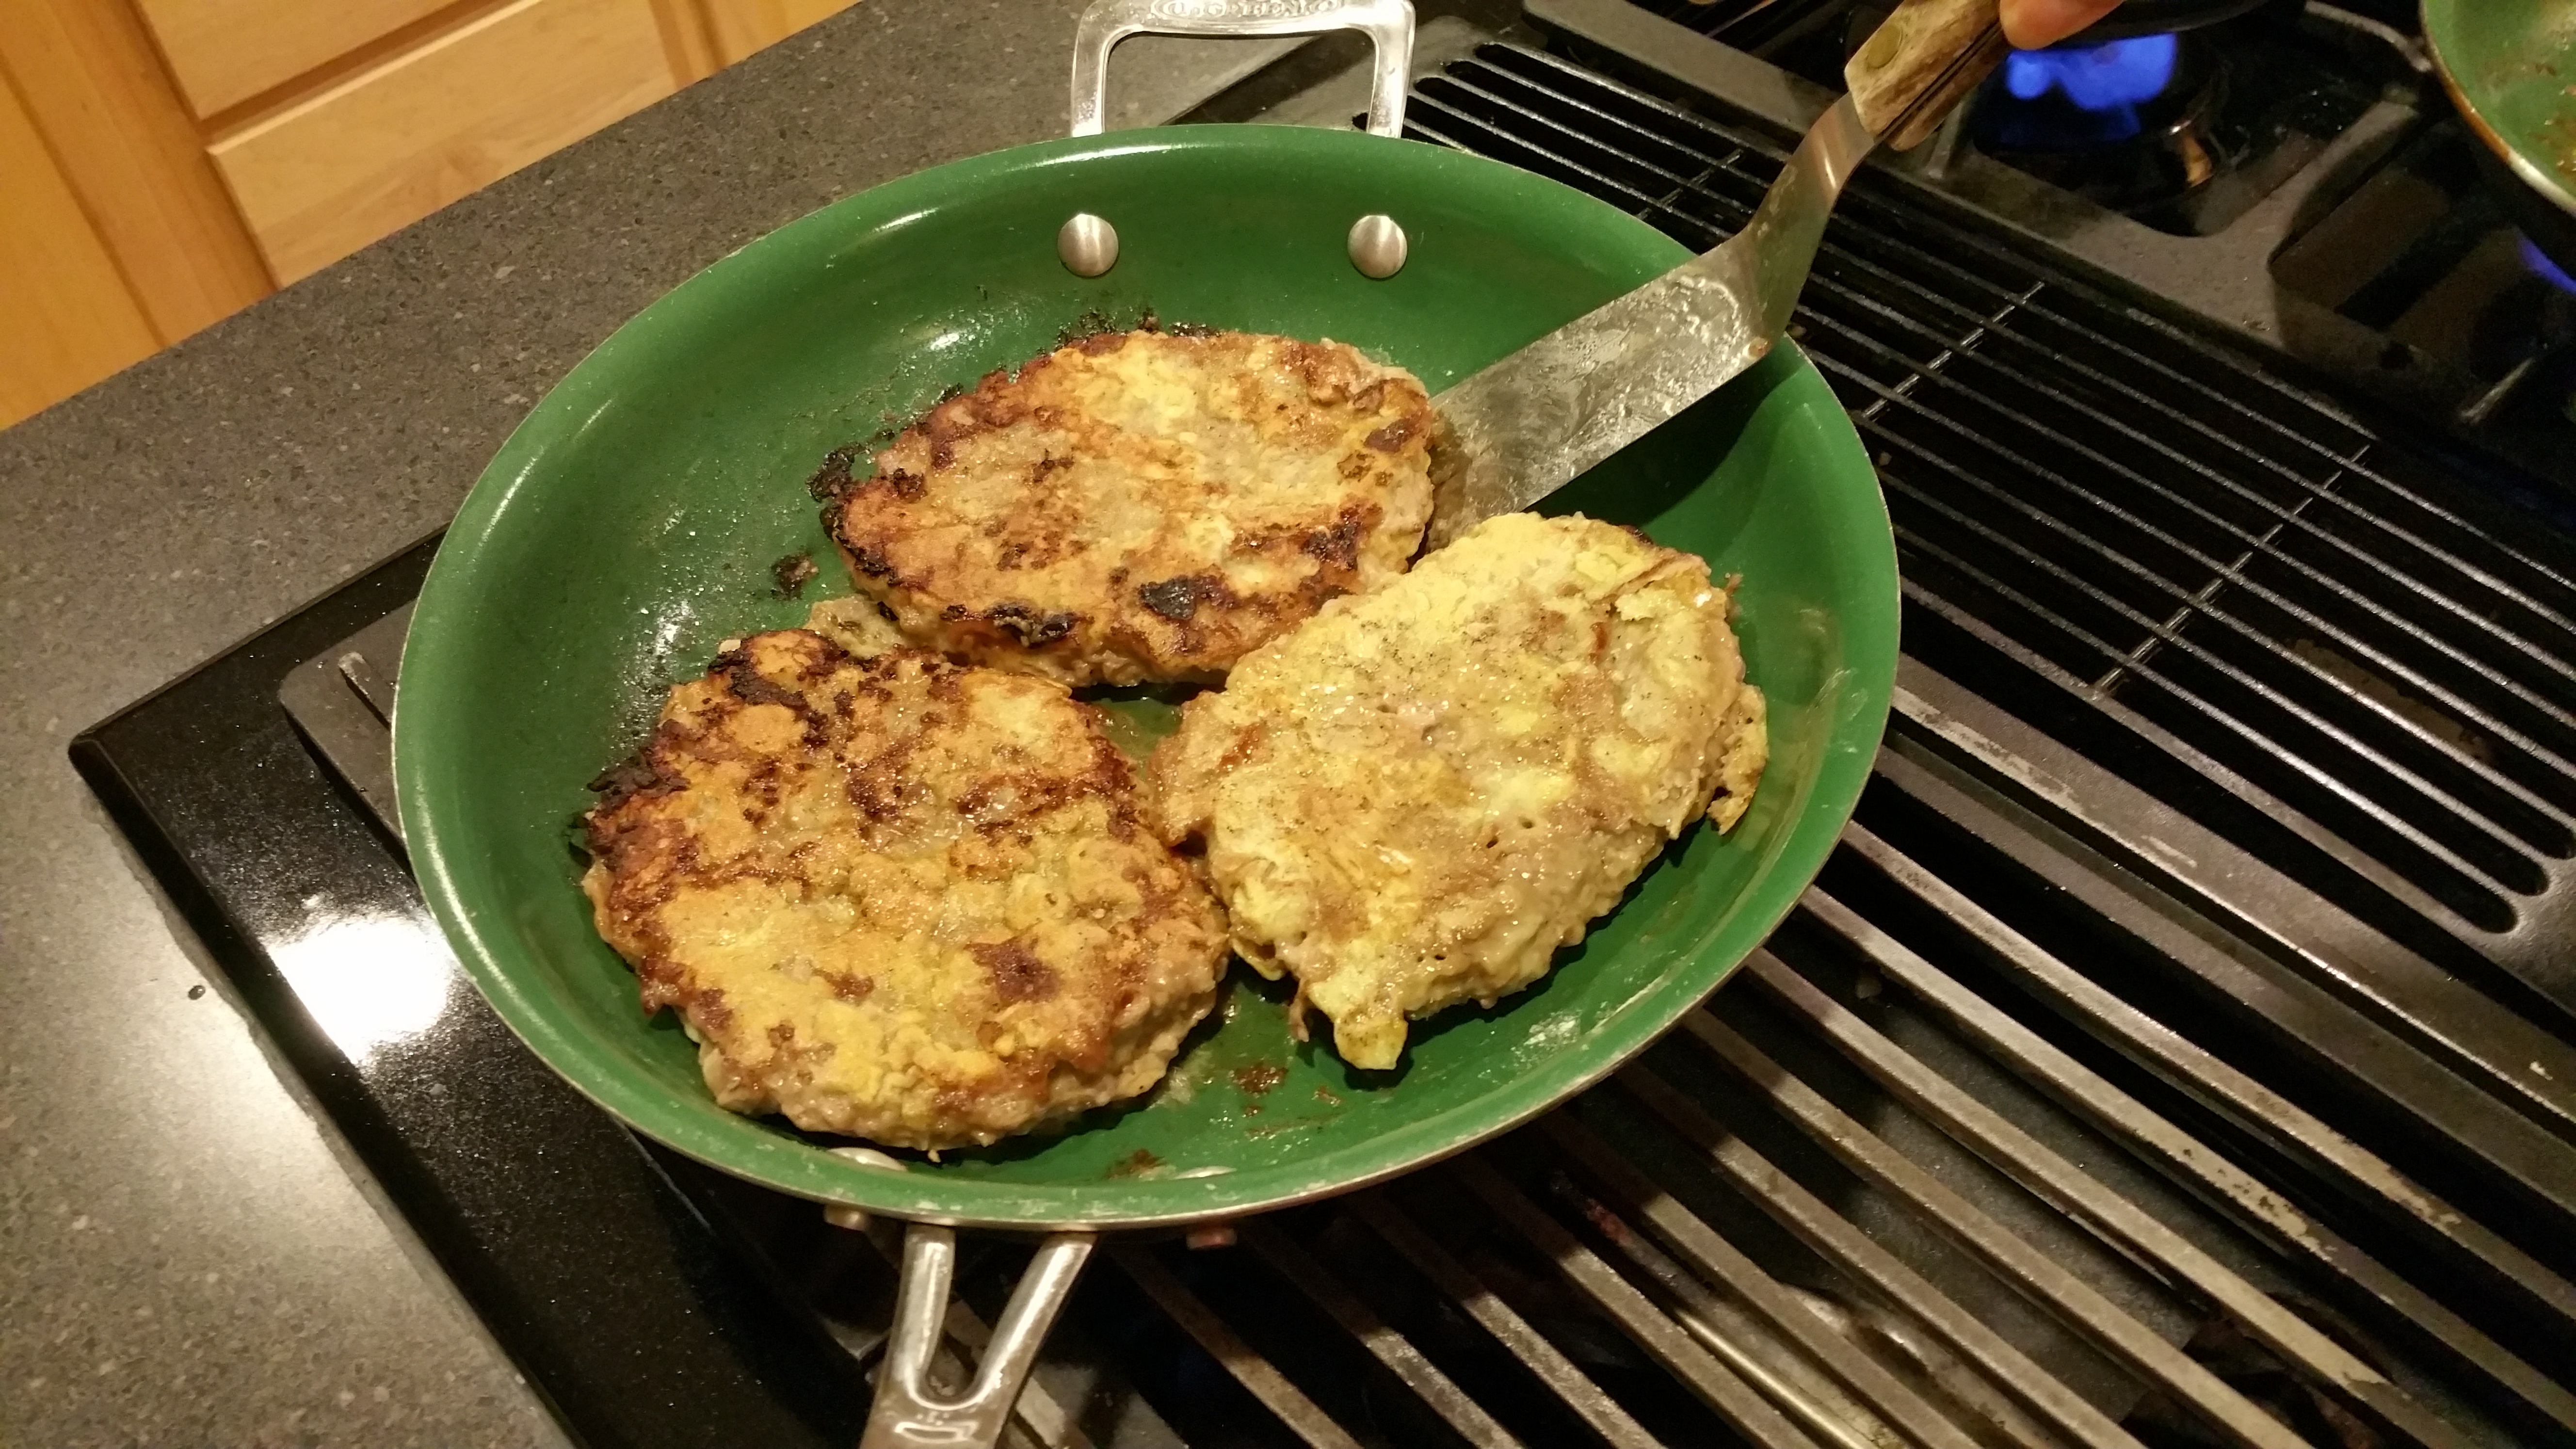
Note: Before dipping the steaks, I have the pan ready with the oil in it. I turn the heat on low for a few moments to prepare the temperature in the pan. (To check the temperature of the pan with the oil to see if it’s ready to cook the steaks, you can drop a drop of water in the oil. If it pops and spatters back at you, it’s ready to cook). As I finish dipping each cubed steak, I place it in the pan ready. You want to be sure to use a large pan cast iron or a heavy skillet is best. I use the organic green pans. They work well. Then turn the heat up to medium.
Note: The oil in the pan should be less than one-half inch deep to try keeping the fat content down!
Carefully place each cube steak in the pan with a fork (long handled is best). Caution: Protect yourself from popping grease as the steaks cook. Fry cube steaks on both sides (approximately 5 to 7 minutes on each side), turning only once until golden brown. Reduce heat to low and let it cook through another few minutes to finish cooking. I don’t recommend covering it, as this can make them too soggy. Then place them on a plate. I don’t place them on a paper towel because the towel tends to pull the cooked flour off the steak. And there isn’t enough oil to be concerned about draining the fat.
Gluten-free Cream Gravy:
So after the steaks are cooked and removed from the pan, pour off the pan drippings, reserving about 2 to 3 tablespoons. Keep any residue from steak droppings in the pan also, as this makes a nice gravy taste. Return the drippings to the pan and heat oil over medium heat until hot.
At that point, sprinkle 2 to 3 tablespoons of gluten-free flour into the hot grease. Stir well and vigorously with a wooden spoon to make a roux (a cooked mixture of butter or other fat and flour used to thicken sauces, soups, etc.).
Gradually stir in 1-1/2 cups of milk, stirring constantly with wooden spoon to prevent lumping. Bring to a boil. Stir until gravy reaches the desired thickness you like. Add salt and pepper to taste. After gravy thickens, keep warm on low till you are ready to serve over steaks. If the Gravy becomes too thick while cooking, you can always add more milk to reduce thickness. Or vice versa: if it’s too loose (which it shouldn’t be), you can add more flour. It’s not an exact science, you may have to play with it a little to get the thickness you desire.
Serving suggestions:
I like to serve the cubed steaks with fresh steamed carrots and mashed potatos. For the mashed potatoes I use 2 tablespoons of both almond milk and butter in about 4 russet potatoes. Add just salt and pepper on the carrots to keep the fat lower.
While this was traditionally a southern dish (some fry the steaks in bacon grease; a no-no for high cholesterol), it worked in Boston and now in Seattle too! (:
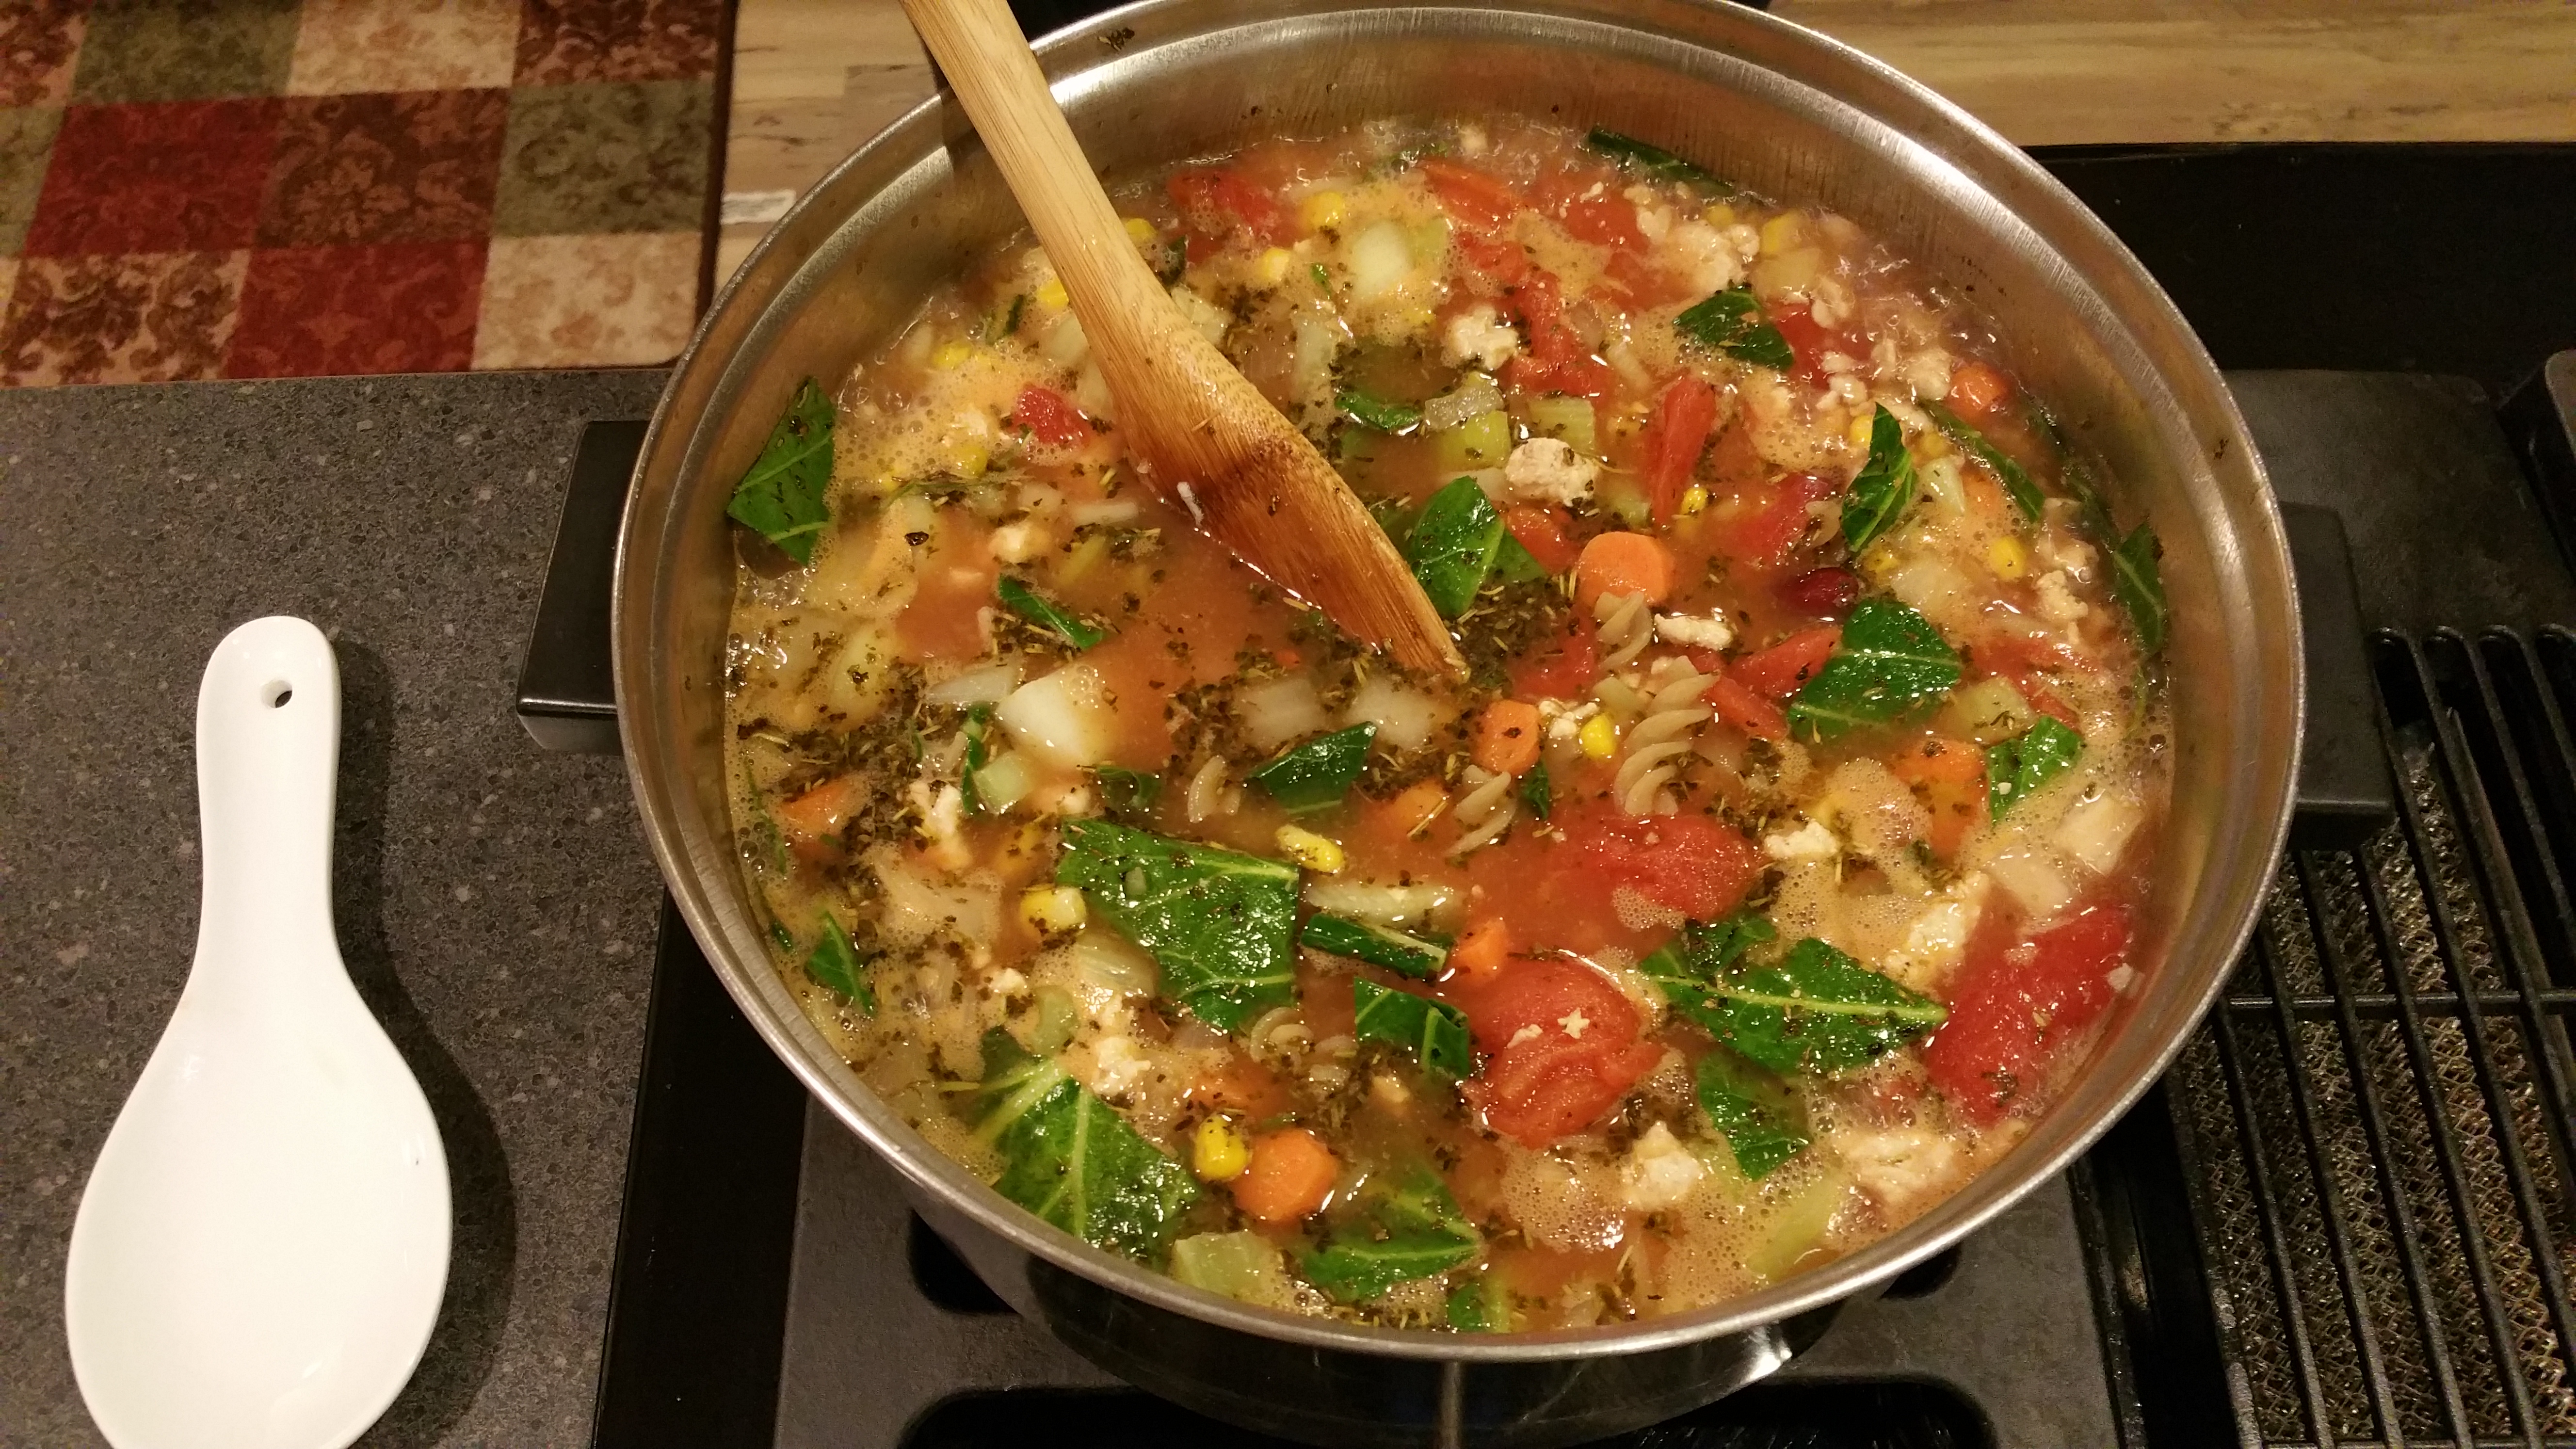
Grandma’s Minestrone Soup
This was one of my grandmother’s favorite Italian soup recipes. This was her version of it, although traditionally minestrone soup doesn’t have beef or turkey added to it. Her recipe contained mainly vegetables, beans, and pasta! My grandmother made it this way so that it would be more hearty for her family which included 3 growing boys (my father and his brothers). She didn’t feel it was enough to satisfy their large appetites with just beans. I remember her house always smelled of home cooking whenever anyone would visit. She lived in a large multi-family tenement home back then. And, between her and other Italian women living in the same building, it would always smell of multiple recipes as you entered the hallway. It smelled like “Little Italy,” as it was known as back then. No wonder that when people enter my home today, they say the same thing. My house always smells like home cooking, and as if they’ve come home. Something I learned well from my family was this: always welcome everyone who enters your home with hospitality and love. I hope you enjoy my grandmother’s minestrone soup made, as she always said, “With lots of love.” I think that was mostly because she never measured anything! She was just intuitive and smart.
Minestrone Soup

Ingredients:
4 cups of Vegetable stock
2 – 14.5 oz. cans of stewed tomatoes
1 large potato cubed
1 small onion chopped
2 cloves fresh garlic
1 lb. ground turkey
2 tablespoons Italian seasoning
1 – 15 oz. can of dark red kidney beans
2 cups frozen corn kernels
1 small zucchini, sliced
3 carrots, sliced and chopped
1 cup of gluten-free pasta (spirals work well), uncooked
1 large head of cabbage (or you can substitute with collard greens) finely chopped
1 tablespoon of olive oil
salt and pepper to taste (I rarely add extra salt, there’s enough sodium in the cans of tomatoes). But to your liking!
Directions:
1). In a large soup pot stir fry the onions, ground turkey, and garlic in olive oil.
Note: I find that when I use lean ground turkey, there isn’t much fat. So, I don’t usually strain the ground turkey. If you do, you may find it to be too dry.
2) Add the vegetable stock, undrained cans of tomatoes, potato, celery, carrots, cabbage (or collard greens), and Italian seasoning. Bring it to a boil and reduce heat to a simmer for approximately 15-20 minutes.
3). Stir in beans, corn, zucchini, and pasta. Simmer an additional 15 minutes, more or less until the vegetables are tender, but not mushy. Season with salt and pepper if you choose.
One variation I like to do is add green beans also. I like to add as many vegetables as I can for nutrition reasons and taste. You will find that this recipe is a nice spicy soup with real Italian flavor and authenticity. So lastly, just top with a sprinkle of grated Parmesan cheese. You can serve it with a gluten-free corn bread or some nice gluten-free Italian bread (either made from scratch, or there are some nice gluten-free mixes). I use Bob’s Red Mill® brand gluten-free cornbread mix.
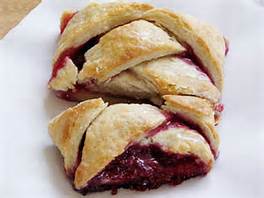
Bubbie’s Strudel (Recipe from Zaslov, Russia)

Dough:
1 cup of butter softened
3/4 cup of sour cream
3 cups of flour
(Of course white flour is most often used. However, for gluten sensitivities, a nice rice flour mix works just as well.)
Cream together butter, sour cream, and rice flour mix. Roll out into small balls and refrigerate overnight. You will fill and bake the next day.
Jam filling:
1- small jar raspberry jam
1- small jar strawberry jam
Chopped walnuts (approximately one cup but more or less depending on how much you want to add)
Raisins – add to desired amount. My grandmother never measured some of this. She just added what she felt looked like it would work. So add the amount you think you would like.
Cinnamon/sugar mixture (equal amounts of sugar and cinnamon mixed together for sprinkling on dough)
Instructions:
First, combine jams with walnuts and raisins; mix well. When ready to fill the dough, roll it out and sprinkle with cinnamon and sugar mixture. Then spread with jam filling. Roll into a ball. There will be enough dough to separate in to several mounds or loaves, the amount will depend on how large or small you want the mounds to be. Place each mound onto a greased cookie sheet with enough space in between each mound , so they don’t bake into each other. Bake at 350 degrees for 45 minutes to 1 hour until browned. Cool, and cut each mound into slices.
Note: This recipe has been passed down through 4 generations of my family. Most of it has been written from my memory of baking it with my mother and grandmother. Like both of them, I am used to improving without exact measurements. So bear with me on this one. I recommend rolling all the dough into one ball initially. Wrap it in wax paper, then refrigerate the dough overnight. The next day, roll the dough out flat and sprinkle with cinnamon /sugar mixture. Spread the jelly filling. Then (with your hands), roll into like a jelly roll. If the dough is too sticky, rub some flour on your hands to prevent the dough from becoming too sticky in your hands. Then cut into separate mounds or loaves, and bake as instructed above. This is a difficult recipe but well worth the time. When completed, it is so delicious! Back in the old days, 4 generations ago, they had more time to spend on recipes from scratch like this. This recipe was made by my great grandmother, then my grandmother–both in Russia. It was passed down to my mother and then to me. I remember my grandmother, together with my mother, my aunt Ruthie, myself, and sometimes my older sister, baking this together during the holidays. We lived very nearby my grandmother back in those days in Boston, so it was possible to do it all together. Fun memories! The bonding that took place between us was priceless! Bubbie’s Strudel (recipe from Zaslov Russia)
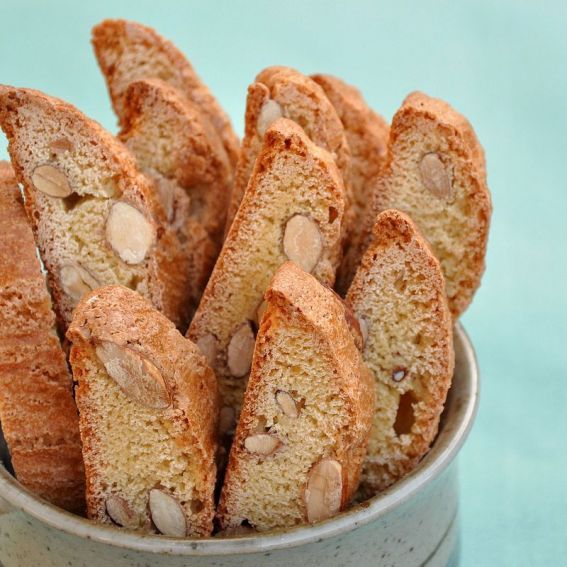
Nona’s Italian Biscotti
Serves 10-15 people
Ingredients:
1½ cups butter, softened (can substitute a lower fat spread or vegetable oil)
1¾ cups sugar
6 eggs
1 teaspoon anise extract (McCormick is a good gluten-free brand)
2 teaspoons vanilla extract
6 cups gluten-free flour mix*
½ teaspoon salt
2 teaspoons baking powder
8 ounces chopped nuts (almonds are traditionally used but walnuts can be used,
depending on preference)
Directions:
1. Preheat oven to 350°
2. In a large bowl, cream butter and sugar (be sure it’s creamed together well).
3. Add the eggs, one at a time to ensure a creamy mixture. Continue to stir until fluffy.
4. Stir in anise and vanilla extracts.
5. In a separate bowl, sift together dry ingredients: flour, baking powder, and salt. When thoroughly mixed, add to egg and butter mixture. Add chopped nuts.
6. Stir mixture with a wooden spoon. Once dough starts sticking together, knead dough by hand until heavy dough is formed.
7. Divide dough into 4 parts. Roll each piece into a log shape approximately 10-15 inches long, depending on how long you like them.
8. Place logs onto ungreased cookie sheets the long way, 2 to a sheet.
9. Flatten the logs out until they are about 3 inches wide with a slight hump traveling down the middle.
10. Bake 25-30 minutes. Logs (now loaves) should be firm.
11. Cut loaves into diagonal slices ½ inch wide. Place back onto cookie sheets and return to oven. You want a toast-like effect, so toast them on one side, and then turn over and toast on other side. (7-10 minutes total).
*Tom Sawyer flour mixes are a close substitute to white flour that mix as well as white or wheat flour. I use this because if you use rice flour alone, the biscotti will turn out too flat and grainy. Using Tom Sawyer mix makes it as close to a gluten recipe as possible. You can use this or a similar product. You can purchase these products locally. For more information go to: http://www.glutenfreeflour.com/ or contact them at: Sawyer & Associates, LLC, 2155 West Highway 89A, Suite 106, Sedona, Arizona 86336 (877-372-8800).
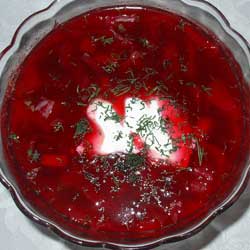
Bubbie’s Russian Borscht
This recipe serves 6 but can be doubled.
Ingredients:
8 cups gluten-free broth (I use Herb Ox brand, but other gluten-free brands are available)
1 pound slice of very meaty and hearty beef shank with bone in
1 large onion peeled and quartered
4 large fresh beets, chopped
4 carrots, peeled and chopped
1 large russet potato, peeled and cut into ½ inch cubes
2 cups cabbage, thinly sliced
¾ cup fresh chopped dill
3 tablespoons of gluten-free red wine vinegar
1 cup sour crème
Salt and pepper to taste
Directions:
1. Bring 4 cups of beef broth, the beef shank, and onion to a boil in a large pot. Reduce heat and cover. Simmer until the meat is very tender, like butter, which may take about 1½ hours.
2. Take meat out of broth and trim fat and bone from meat. Discard fat and bone. Chop meat.
3. Let meat and broth cool slightly at room temperature; then, put in pot. Cover and chill in refrigerator until cold, at least 4 hours and up to one day. The longer it chills this way, the better it tastes.
4. Spoon the fat from the top of the broth and discard.
5. Add remaining 4 cups of broth, beets, carrots, and potato; bring to a boil. Reduce heat, cover, and simmer until vegetables are quite tender. This may take about 30 minutes.
6. Stir in meat, cabbage, and ½ cup of dill. Cook until cabbage is tender, about 15 minutes. Season to taste with salt and pepper. Stir in vinegar.
7. Ladle soup into bowls and top with desired amount of sour crème and dill.
Note: This can be served hot the first time and then cold as leftover. This brings back some wonderful memories of my grandmother and the way she served this delicious soup.
*Tom Sawyer flour mixes are a close substitute to white flour that mix as well as white or wheat flour. You can purchase these products locally. For more information go to: http://www.glutenfreeflour.com/ or contact them at: Sawyer & Associates, LLC, 2155 West Highway 89A, Suite 106, Sedona, Arizona 86336 (877-372-8800).
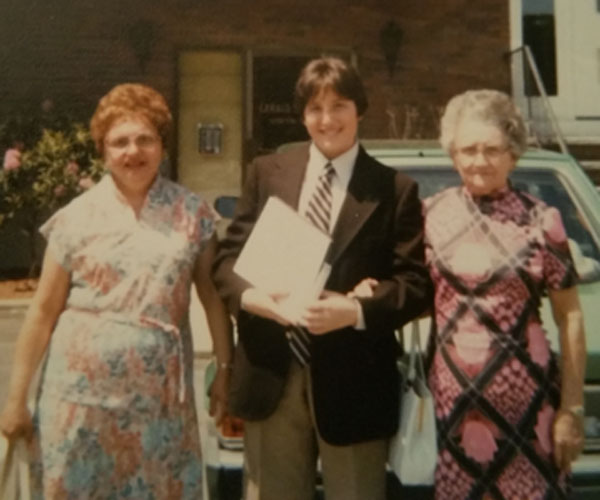
This recipe was made by my grandmother often, and even as kids we loved it. Like my other grandmother, we used to visit my mother’s mother whom we called (Bubbie) weekly. She was of Russian descent and immigrated to this country during the Russian revolution. She lost her parents and 8 sisters and brothers out of 11 during the war that caused her and one sister and one brother to flee to America.
She brought incredible culture, traditions, and stories with her, along with unique recipes from her mother (my great grandmother). I have such fond memories of Bubbie. She was a petite, pretty woman who was also very strong and had a lot of integrity. She always dressed so nicely, and she was so sweet. She loved her family and was very religiously Jewish. She was my first godly example. And so (like my other grandmother), she also had food cooking as we arrived for a visit each week. Everything she made was kosher, healthy, delicious, well balanced, and served in small portions. This was kind of opposite of my other grandmother who, even though she was a great cook, just didn’t know much about portions and healthy eating. That side of my family (my father’s side) ate for fun. Everything was also made from scratch. I was very blessed to have 2 grandmothers that were so loving, attentive, and caring. Wonderful role models who walked the walk and truly took time with us.
Both my grandmothers took a particular interest in me as I was recovering from a burst appendix in my childhood. Back then, because my illness was very extreme, no one realized I had Celiac disease. I struggled with chronic abdominal problems afterwards that was assumed, even by doctors, to stem from to the appendix episode. We believe my father’s mother had Celiac disease, and experts say it is hereditary. She was of European/Italian descent, and it is thought to run in Irish and Italian families. This grandmother, who cooked so much Italian food, was very sickly just as I have been. Anyway, it was in spending the time with both grandmothers that my culinary learning began.
To expand on the childhood illness I suffered: my appendix burst and then went misdiagnosed for way too long. The incident caused me to be out of school for almost 2 years and to be specially tutored at home while recovering. It was misdiagnosed for a virus. Long story short, I actually died for a few moments and was in a coma after that incident for quite a while. And The recovery was long and arduous. I lived with tubes in my stomach for quite a while until I could tolerate food again. They were also to drain the poison from all the peritonitis that had spread so far into my system. It was a very hard thing to go through at such a young age and then to spend the rest of my life with disabilities and struggling to keep up and feel well. One of my doctors later said, “You would have been diagnosed with the Celiac Disease much sooner, if it had not been for the appendix episode.” I can now understand that. So when I was later diagnosed with Celiac disease in my 30’s it took decades to feel better from all the gluten exposure!
I was very fortunate in my early years, though, that my grandparents and parents were determined to give me goals, to not only help me heal, but also to give me hope and a future as I was recovered! They encouraged me to keep doing what I could, to have fun, and to be as busy as I could be. I was encouraged to focus on what I could do, not on my limitations. My father also encouraged me with humor. In spite of the physical challenges, I have wonderful memories of my early years with my family. Cooking and sharing family meals with lots of relatives is what I enjoyed most. When I got well enough, my mother sent me to cooking classes at the local community center nearby where we lived. I remember my cooking teacher, Cynthia Bernstein, till this day! She and my mother attended the same school and class. Cynthia was a wonderful mentor and friend to me during that time in my life. I saw her at my mother’s funeral. I gave her the biggest hug, and we had a chance to reminisce. Talk about a woman of integrity!
You know, people have often asked me how I’ve done so well with all the health challenges. Well, read my story and see! Point blank, I always had a lot of support. I didn’t always understand it at the time. However, as I look back, it’s very obvious. I think it stems back to what I was taught: “that in order to have a friend, you must first be a friend.” Hey, it works!
So, I learned to make Borscht in my visits with Bubbie, and I want to share the recipe with you. This can be easily converted into gluten-free, as most of the ingredients are gluten-free anyway. You just have to be sure your beef broth and sour crème are from a gluten-free manufacturer. For more information on where to find items that are truly gluten-free refer to my gluten free mall link in this blog, there’s lots of good gluten free items there. They are reasonably priced too! If you try this recipe, drop me a line and let me know how it goes! Thanks so much for sharing this with me! Iris
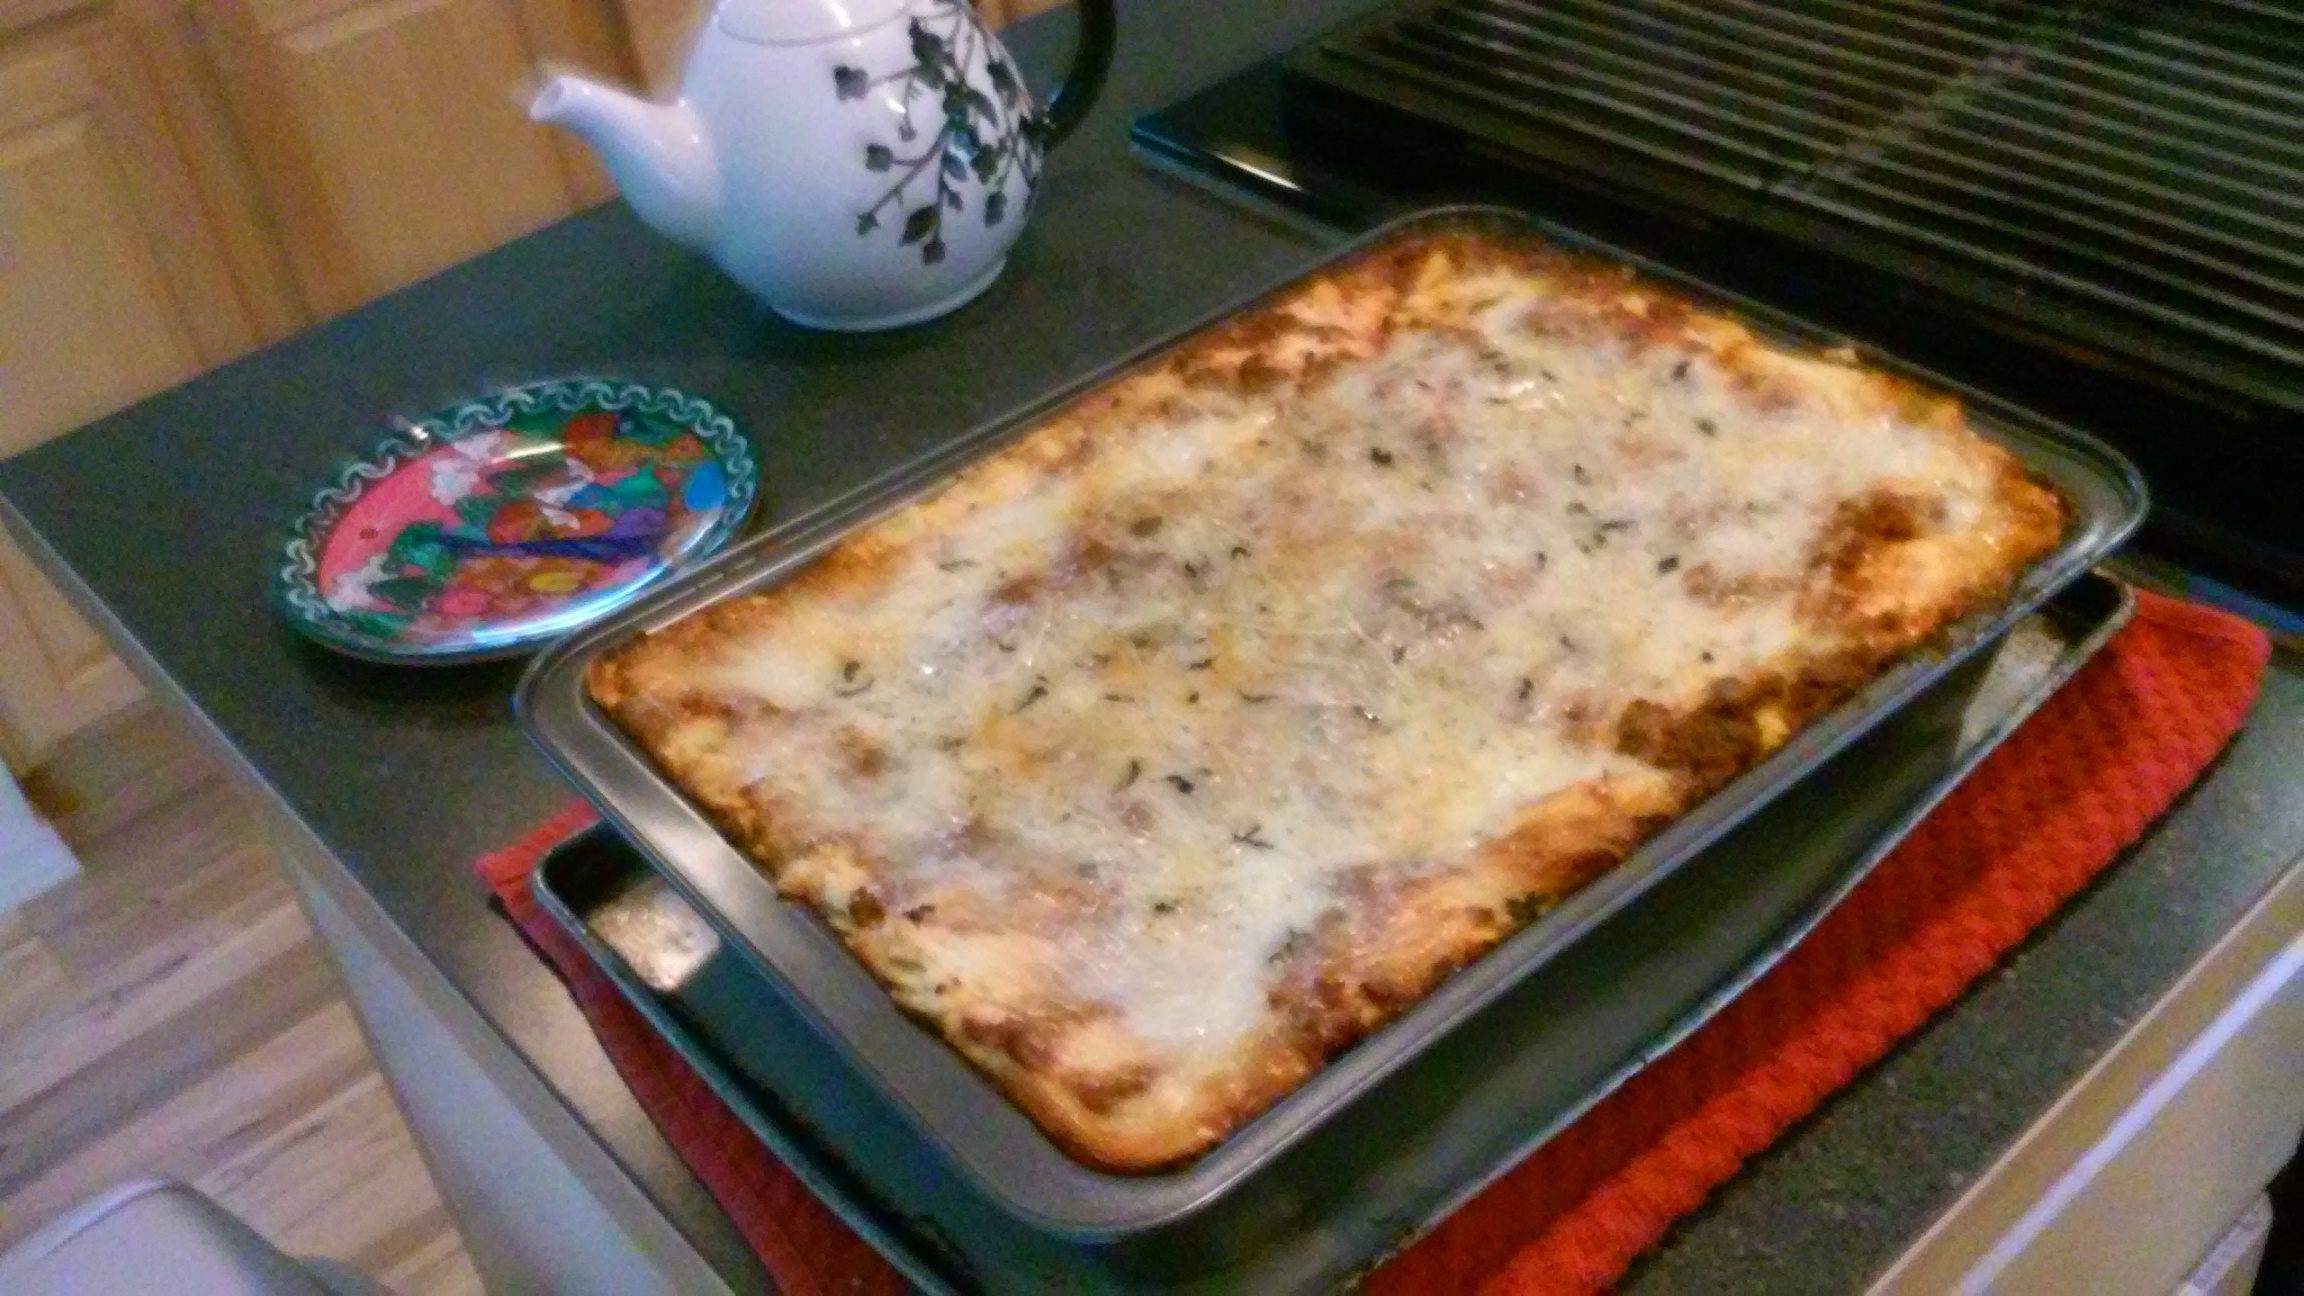
Grandma’s Italiano Lasagna with Béchamel Sauce
This was a video demonstration I did for a Cook Book contest. And I decided to publish it here on my blog!
Prep time: 60 minutes or less (not a quick prep but well worth it)
Serves 6 people
Cook time: 60 minutes @ 350 degrees. Then an additional 15 minutes to brown the top
Note: To save time on prep, I often don’t boil the noodles first. Instead I just layer them right out of the box, and when you’re layering is finished , just add 1 cup of water around the corners of the pan distributed evenly . And while cooking the lasagna, the noodles will have enough liquid to cook them as if you boiled them. Also if you use left over grilled or baked chicken from the day before, that is also a time saver! Complicated recipe, but as I said, well worth the time. Your Gluten free family or crowd will love it, and it goes a long way!
Ingredients:
5 tablespoons unsalted butter
½ cup gluten-free flour mix*
4 cups of whole milk (or almond milk)at room temperature
Rice or almond milk can be substituted if lactose intolerant. (I use Almond milk; it has a good flavor and texture.)
Pinch of packaged or grated, fresh nutmeg (fresh best captures the full essence and flavor)
1½ cups tomato sauce (see recipe below)
1 small can of tomato paste
Salt and white pepper
¼ cup extra virgin olive oil
1 pound ground turkey(optional – my grandmother would sometimes add cooked dark
chicken meat, cooked spare ribs, or cooked sausage to the ground turkey. But the meat mixture I recommend! It is great)
1½ pounds ricotta cheese or cottage cheese (if you can’t find a gluten free ricotta)
3 large eggs (raw or boiled for extra flavor and texture)
1 pound gluten-free lasagna sheets, cooked al dente/ or to save time you don’t have to boil them first. See above instructions!
2 packages (10 ounces each) frozen chopped spinach, thawed and squeezed dry
3 cups shredded mozzarella cheese
¼ cup freshly grated parmesan cheese
Directions:
1. Preheat oven to 350 degrees
2. Prepare the Béchamel Sauce (Besciamella Salsa, in Italian):
In a 2-quart pot, melt butter over medium heat. When completely melted, add flour. Stir until smooth using a wisk (about 2 minutes). Gradually add milk, whisking constantly to prevent lumps from forming. Simmer and whisk over medium heat until the sauce is thick, smooth, and creamy (about 10 minutes). The sauce should be thick enough to coat the back of wooden spoon. Remove from heat and add a 1/4 teasp00n of nutmeg, ( tomato sauce 1 can 14 oz. (optional). Traditionally the sauce is a white sauce, but sometimes I add a little tomato sauce just to spice it up a little. Anyway Stir until well combined. Add salt and pepper if needed. Set aside; cool completely.
Meanwhile, In a sauté pan, heat olive oil. When hot enough to be almost smoking, add the ground turkey and then sprinkle with salt and pepper. Brown the meat, breaking up any large lumps and until no longer pink. Remove from heat and drain excess fat. Set aside; cool completely.
3. In a medium sized bowl, thoroughly mix ricotta cheese and eggs. Lightly salt and pepper and set aside. If desired, mix some shredded mozzarella in the ricotta and egg mixture for cheesier flavor and zest.
4. In bottom of 13” x 9” baking dish arrange each of the following layers in this order:
• Spread 1/3 of Béchamel sauce on bottom of pan
• Lay pasta sheets side by side, covering sauce
• Evenly spread all of the ricotta mixture on pasta
• Spread all of the spinach on ricotta
• Add another layer of pasta sheets on the spinach
• Spread all the ground beef on top of pasta sheets
• Spread ½ of the mozzarella on top of ground beef
• Spread 1/3 of the Béchamel sauce over the mozzarella
• Add last layer of pasta sheets
• Add remaining Béchamel
Note: At this point you can spread a layer of pasta sauce or omit if you just want it white sauce only!
• Add remaining mozzarella
• Top with remaining parmesan cheese
5. Cut the remaining 2 tablespoons of butter into ¼-inch cubes and spread across top of the lasagna. Cover with foil. Then, line a large cookie sheet with aluminum foil and place lasagna dish on that. Place on the middle rack in oven and bake until top is bubbling, about 60 minutes covered, then an additional 15 – 30 minutes uncovered to make the top cheese cripsy. Remove from oven and let it set for about 15 minutes before serving!
Also Note: If you have trouble finding Gluten Free Ricotta, I substitute with same amounts of Gluten free cottage cheese! Spice it up with a little oregano, egg, garlic powder, and pepper and you won’t know the difference!
Simple Tomato Sauce Recipe:
Ingredients:
½ cup extra virgin olive oil
1 small onion, chopped
2 cloves of garlic, chopped
1 stalk of celery, chopped
1 carrot, chopped
Sea salt and freshly ground black pepper to taste
2 – 32 ounce cans crushed tomatoes
1 dried bay leaf
1 tablespoon unsalted butter, optional
Directions:
1. In a large pot or Dutch oven, heat oil over medium high heat. Add onion and garlic and sauté until soft and translucent, about 5 to 10 minutes. Add celery and carrots and season with salt and pepper. Sauté until all the vegetables are soft, about 5 to 10 minutes. Add tomatoes and bay leaves and simmer uncovered on low heat for one hour or until thick.
2. Remove bay leaves and add salt and pepper if needed. If sauce still tastes acidic, add unsalted butter (1 tablespoon at a time to round out the flavors).
3. Add ½ the tomato sauce into the bowl of a food processor. Process the tomato sauce until smooth. Continue adding remaining sauce.
Note: If not using all the sauce, allow it to cool completely and freeze for up to 6 months.
*Tom Sawyer flour mixes are a close substitute to white flour that mix as well as white or wheat flour. You can purchase these products locally. For more information go to: http://www.glutenfreeflour.com/ or contact them at: Sawyer & Associates, LLC, 2155 West Highway 89A, Suite 106, Sedona, Arizona 86336 (877-372-8800).
